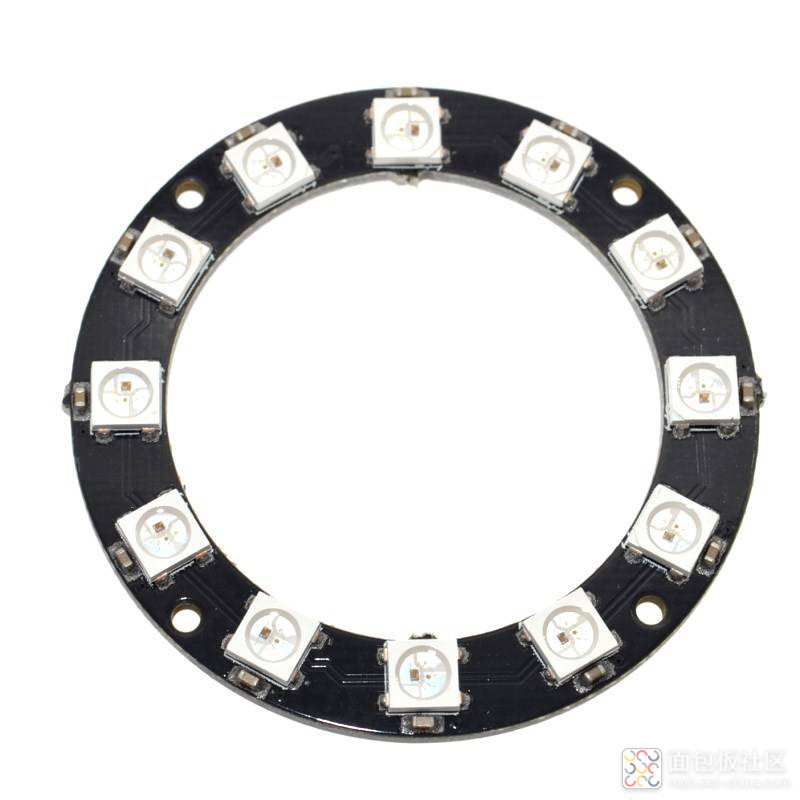
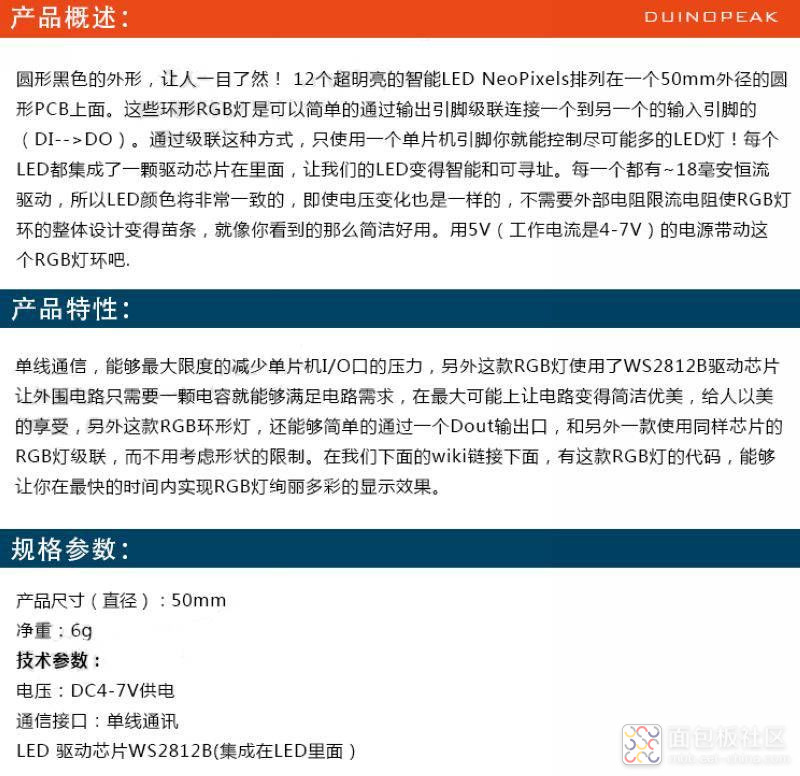
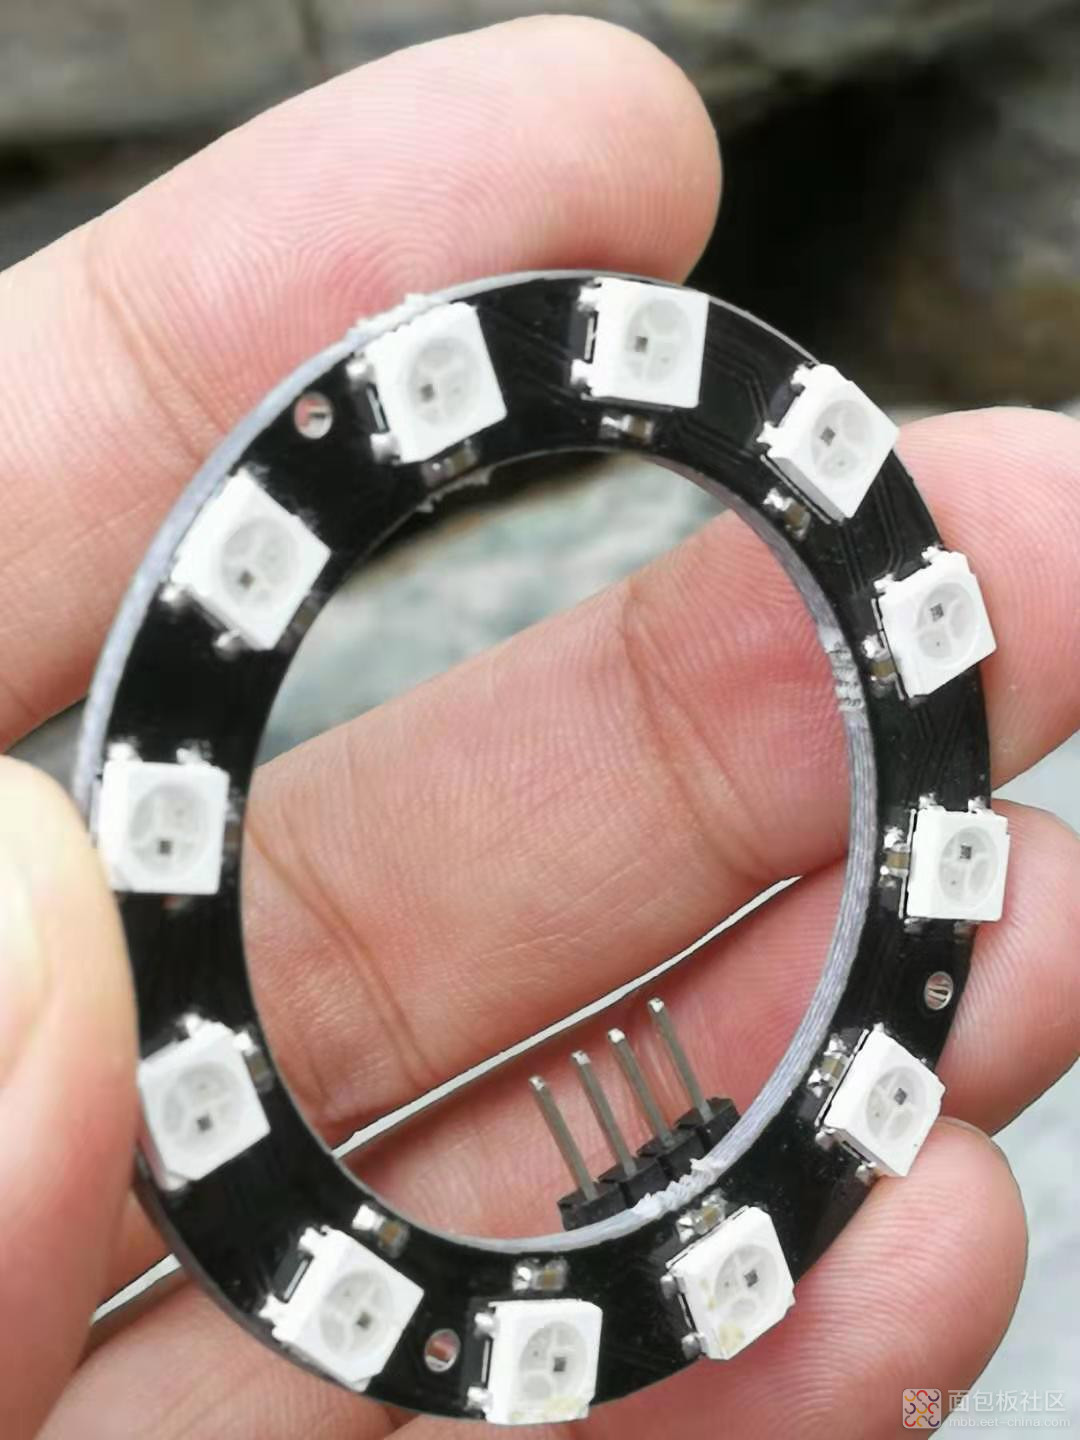
名称:12位WS2812智能全彩圆盘LED模块
整体尺寸:直径7cm
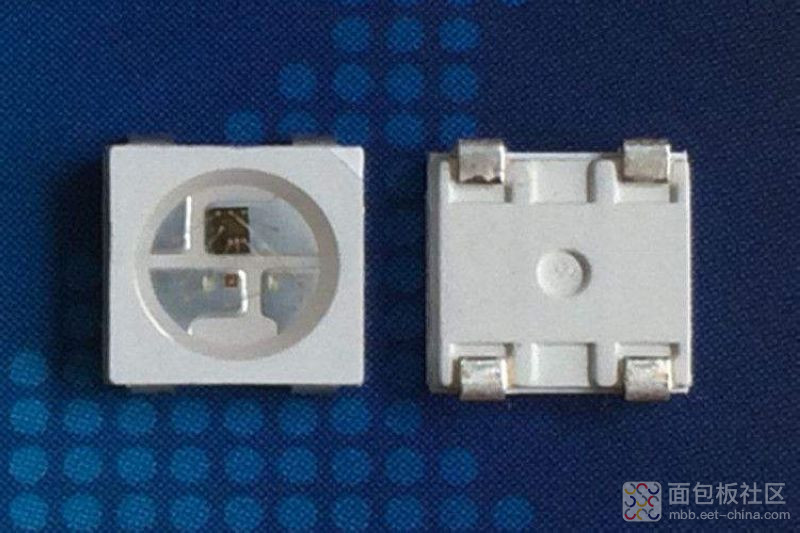
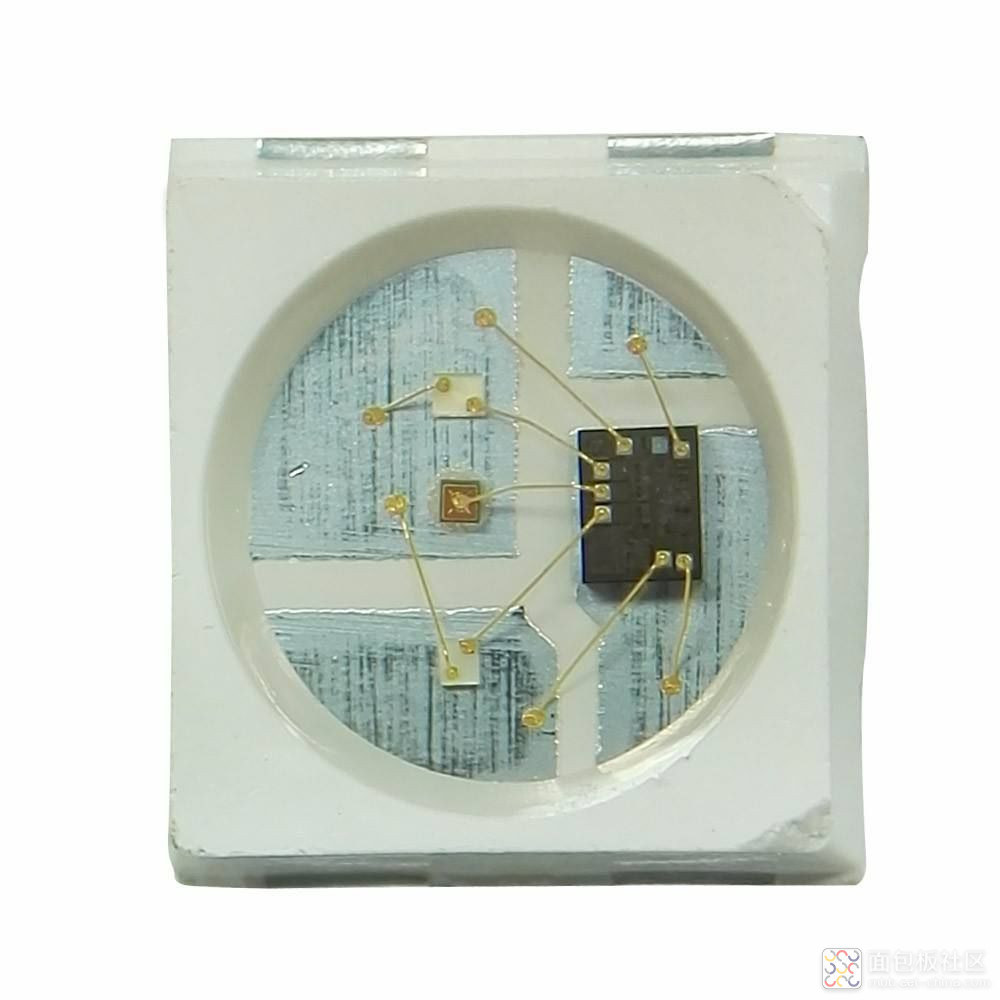
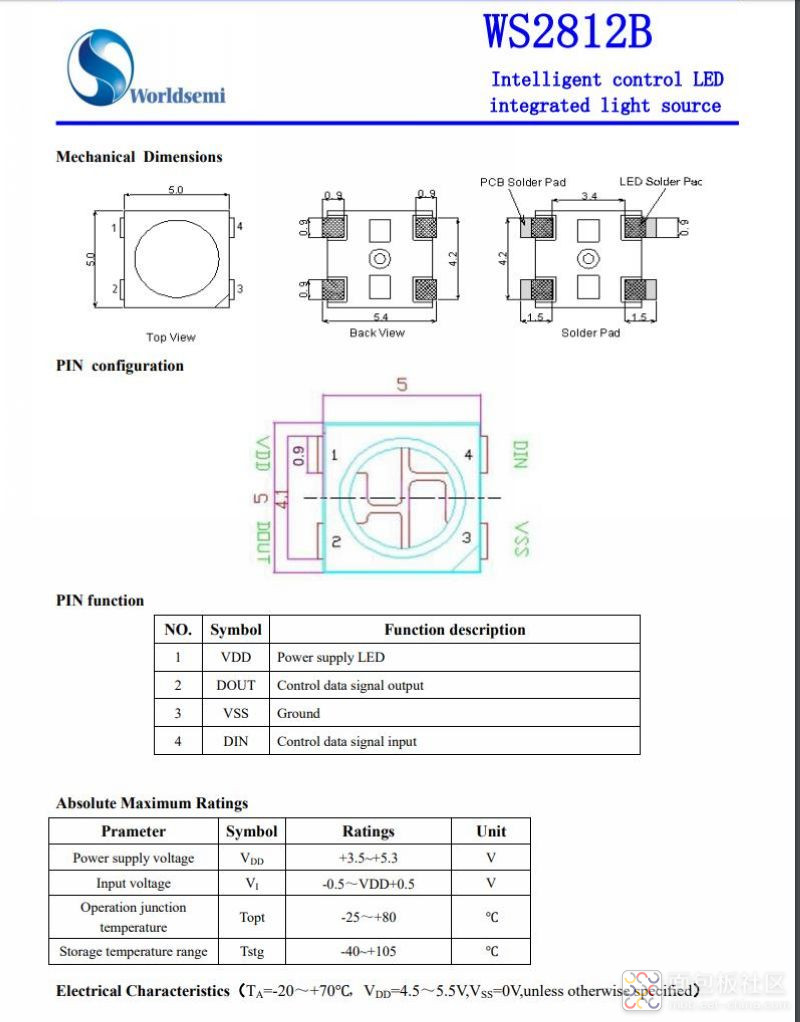
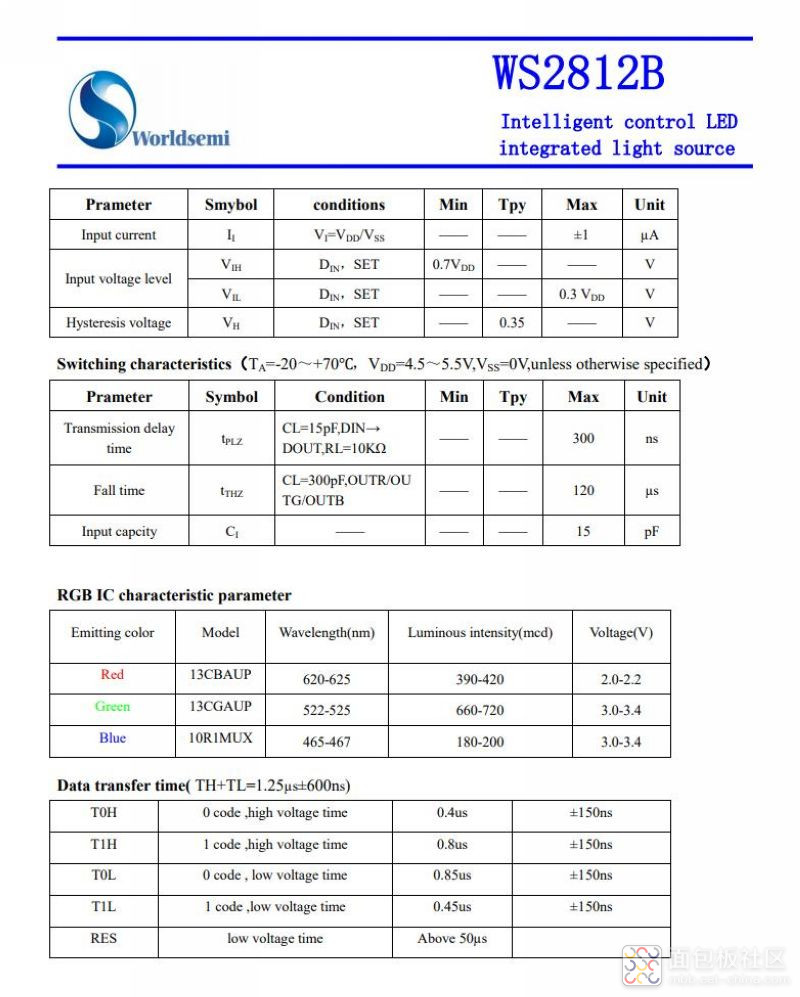
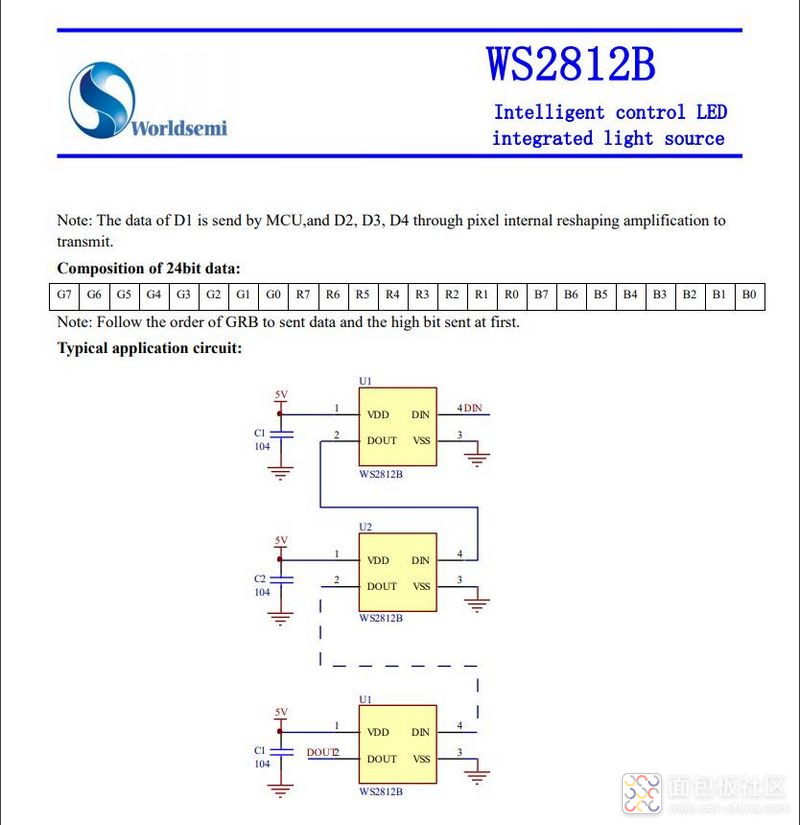
芯片:WS2812B(内置于LED)
LED:5050封装RGB全彩高亮
电压:5V
端口:数字
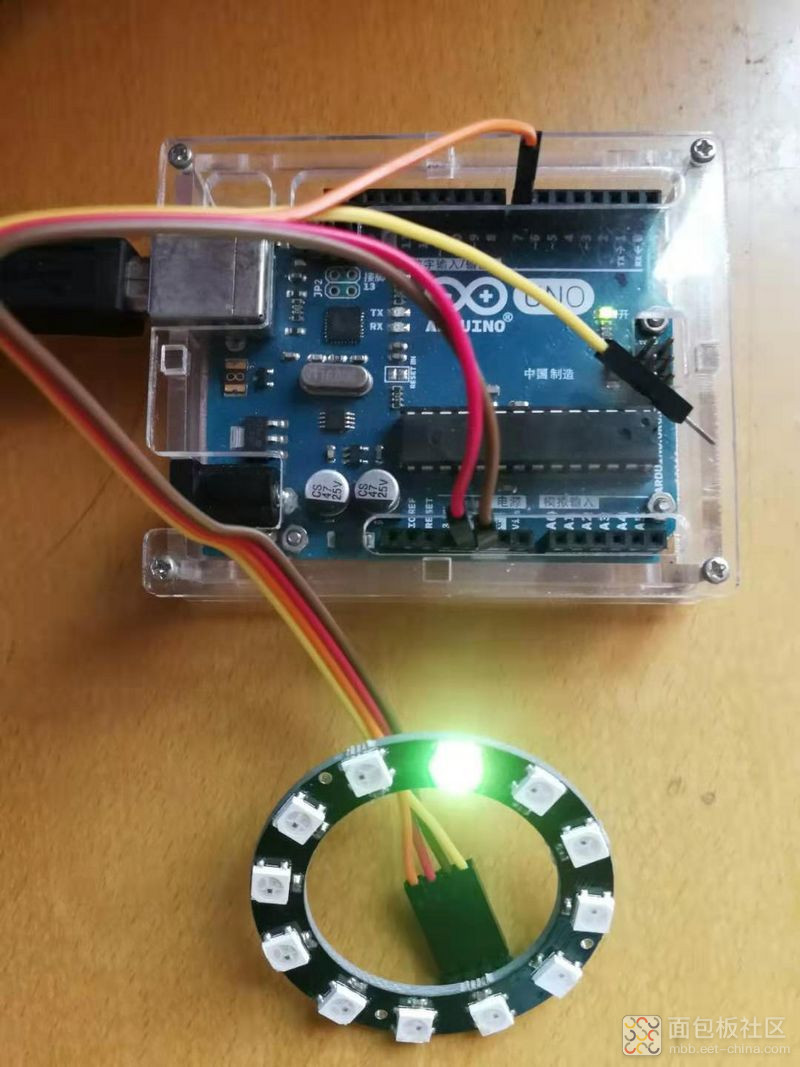
平台:单片机(Arduino 、51单片机等)
控制方式:内置控制芯片,只需一个IO口即可控制

(1)Arduino参考开源代码
/*
【Arduino】168种传感器模块系列实验(资料代码+仿真编程+图形编程)实验一百零一:12位 WS2812 5050 RGB LED 智能全彩RGB环开发板大环1、安装库:IDE-工具-管理库-搜索Adafruit_NeoPixel-安装2、项目:点亮环形LED模块,循环快闪绿色光3、接脚:VCC → 5VGND → GNDDI 接 D7*/#include <Adafruit_NeoPixel.h>#define PIN 7#define MAX_LED 12#define ADD true#define SUB falseint val = 0;boolean stat = ADD;Adafruit_NeoPixel strip = Adafruit_NeoPixel( MAX_LED, PIN, NEO_RGB + NEO_KHZ800 );void setup(){ strip.begin(); strip.show(); }void loop(){ uint8_t i,a=0; uint32_t color = strip.Color(255, 100, 0); while(a<17) { for(i=0;i<16;i++) { if(i==a) strip.setPixelColor(i, color); else strip.setPixelColor(i, 0); } strip.show(); delay(20); a++; }}复制代码实验场景图
/*
【Arduino】168种传感器模块系列实验(资料代码+仿真编程+图形编程)实验一百零一:12位 WS2812 5050 RGB LED 智能全彩RGB环开发板大环1、安装库:IDE-工具-管理库-搜索Adafruit_NeoPixel-安装2、项目:灯环显示彩色3、接脚:VCC → 5VGND → GNDDI 接 D7*/#include <Adafruit_NeoPixel.h>#ifdef __AVR__#include <avr/power.h>#endif#define PIN 7// Parameter 1 = number of pixels in strip// Parameter 2 = Arduino pin number (most are valid)// Parameter 3 = pixel type flags, add together as needed:// NEO_KHZ800 800 KHz bitstream (most NeoPixel products w/WS2812 LEDs)// NEO_KHZ400 400 KHz (classic 'v1' (not v2) FLORA pixels, WS2811 drivers)// NEO_GRB Pixels are wired for GRB bitstream (most NeoPixel products)// NEO_RGB Pixels are wired for RGB bitstream (v1 FLORA pixels, not v2)// NEO_RGBW Pixels are wired for RGBW bitstream (NeoPixel RGBW products)Adafruit_NeoPixel strip = Adafruit_NeoPixel(64, PIN, NEO_GRB + NEO_KHZ800);// IMPORTANT: To reduce NeoPixel burnout risk, add 1000 uF capacitor across// pixel power leads, add 300 - 500 Ohm resistor on first pixel's data input// and minimize distance between Arduino and first pixel. Avoid connecting// on a live circuit...if you must, connect GND first.void setup() { // This is for Trinket 5V 16MHz, you can remove these three lines if you are not using a Trinket #if defined (__AVR_ATtiny85__) if (F_CPU == 16000000) clock_prescale_set(clock_div_1); #endif // End of trinket special code strip.begin(); strip.show(); // Initialize all pixels to 'off'}void loop() { // Some example procedures showing how to display to the pixels: //colorWipe(strip.Color(255, 0, 0), 50); // Red// colorWipe(strip.Color(0, 255, 0), 50); // Green //colorWipe(strip.Color(0, 0, 255), 50); // Blue//colorWipe(strip.Color(0, 0, 0, 255), 50); // White RGBW // Send a theater pixel chase in...// theaterChase(strip.Color(127, 127, 127), 50); // White //theaterChase(strip.Color(127, 0, 0), 50); // Red //theaterChase(strip.Color(0, 0, 127), 50); // Blue rainbow(20); //rainbowCycle(20); //theaterChaseRainbow(50);}// Fill the dots one after the other with a colorvoid colorWipe(uint32_t c, uint8_t wait) { for(uint16_t i=0; i<strip.numPixels(); i++) { strip.setPixelColor(i, c); strip.show(); delay(wait); }}void rainbow(uint8_t wait) { uint16_t i, j; for(j=0; j<256; j++) { for(i=0; i<strip.numPixels(); i++) { strip.setPixelColor(i, Wheel((i+j) & 255)); } strip.show(); delay(wait); }}// Slightly different, this makes the rainbow equally distributed throughoutvoid rainbowCycle(uint8_t wait) { uint16_t i, j; for(j=0; j<256*5; j++) { // 5 cycles of all colors on wheel for(i=0; i< strip.numPixels(); i++) { strip.setPixelColor(i, Wheel(((i * 256 / strip.numPixels()) + j) & 255)); } strip.show(); delay(wait); }}//Theatre-style crawling lights.void theaterChase(uint32_t c, uint8_t wait) { for (int j=0; j<10; j++) { //do 10 cycles of chasing for (int q=0; q < 3; q++) { for (uint16_t i=0; i < strip.numPixels(); i=i+3) { strip.setPixelColor(i+q, c); //turn every third pixel on } strip.show(); delay(wait); for (uint16_t i=0; i < strip.numPixels(); i=i+3) { strip.setPixelColor(i+q, 0); //turn every third pixel off } } }}//Theatre-style crawling lights with rainbow effectvoid theaterChaseRainbow(uint8_t wait) { for (int j=0; j < 256; j++) { // cycle all 256 colors in the wheel for (int q=0; q < 3; q++) { for (uint16_t i=0; i < strip.numPixels(); i=i+3) { strip.setPixelColor(i+q, Wheel( (i+j) % 255)); //turn every third pixel on } strip.show(); delay(wait); for (uint16_t i=0; i < strip.numPixels(); i=i+3) { strip.setPixelColor(i+q, 0); //turn every third pixel off } } }}// Input a value 0 to 255 to get a color value.// The colours are a transition r - g - b - back to r.uint32_t Wheel(byte WheelPos) { WheelPos = 255 - WheelPos; if(WheelPos < 85) { return strip.Color(255 - WheelPos * 3, 0, WheelPos * 3); } if(WheelPos < 170) { WheelPos -= 85; return strip.Color(0, WheelPos * 3, 255 - WheelPos * 3); } WheelPos -= 170; return strip.Color(WheelPos * 3, 255 - WheelPos * 3, 0);} 复制代码
实验项目三
/*
【Arduino】168种传感器模块系列实验(资料代码+仿真编程+图形编程)实验一百零一:12位 WS2812 5050 RGB LED 智能全彩RGB环开发板大环1、安装库:IDE-工具-管理库-搜索Adafruit_NeoPixel-安装2、项目:逐个点亮环形彩色LED3、接脚:VCC → 5VGND → GNDDI 接 D7*/#include <FastLED.h>#define LED_PIN 7#define NUM_LEDS 12CRGB leds[NUM_LEDS];void setup() { FastLED.addLeds<WS2812, LED_PIN, GRB>(leds, NUM_LEDS);}void loop() { leds[0] = CRGB(255, 0, 0); FastLED.show(); delay(500); leds[1] = CRGB(0, 255, 0); FastLED.show(); delay(500); leds[2] = CRGB(0, 0, 255); FastLED.show(); delay(500); leds[3] = CRGB(150, 0, 255); FastLED.show(); delay(500); leds[4] = CRGB(255, 200, 20); FastLED.show(); delay(500); leds[5] = CRGB(85, 60, 180); FastLED.show(); delay(500); leds[6] = CRGB(150, 255, 20); FastLED.show(); delay(500); leds[7] = CRGB(0, 50, 255); FastLED.show(); delay(500); leds[8] = CRGB(255, 255, 0); FastLED.show(); delay(500); leds[9] = CRGB(20, 25, 255); FastLED.show(); delay(500); leds[10] = CRGB(255, 0, 20); FastLED.show(); delay(500); leds[11] = CRGB(50, 0, 55); FastLED.show(); delay(500);}复制代码实验项目四
/*
【Arduino】168种传感器模块系列实验(资料代码+仿真编程+图形编程)实验一百零一:12位 WS2812 5050 RGB LED 智能全彩RGB环开发板大环1、安装库:IDE-工具-管理库-搜索FastLED-安装2、项目:红蓝色快扫——这里第一个“for”循环点亮所有12个蓝色LED,从第一个LED到最后一个LED,延迟40毫秒。 下一个“for”循环再次点亮所有12个LED,但这次是红色,反之,从最后一个LED到第一个LED。3、接脚:VCC → 5VGND → GNDDI 接 D7*/#include <FastLED.h>#define LED_PIN 7#define NUM_LEDS 12CRGB leds[NUM_LEDS];void setup() { FastLED.addLeds<WS2812, LED_PIN, GRB>(leds, NUM_LEDS);}void loop() { for (int i = 0; i <= 11; i++) { leds = CRGB ( 0, 0, 255); FastLED.show(); delay(60); } for (int i = 11; i >= 0; i--) { leds = CRGB ( 255, 0, 0); FastLED.show(); delay(40); }}复制代码
实验项目五
/*
【Arduino】168种传感器模块系列实验(资料代码+仿真编程+图形编程)实验一百零一:12位 WS2812 5050 RGB LED 智能全彩RGB环开发板大环1、安装库:IDE-工具-管理库-搜索FastLED-安装2、项目:逐个点亮不同序列的LED(可设置为任何颜色)3、接脚:VCC → 5VGND → GNDDI 接 D7*/#include <FastLED.h>#define LED_PIN 7#define NUM_LEDS 12CRGB leds[NUM_LEDS];void setup() { FastLED.addLeds<WS2812, LED_PIN, GRB>(leds, NUM_LEDS);}void loop() { leds[0] = CRGB(255, 0, 0); FastLED.show(); delay(500); leds[1] = CRGB(0, 255, 0); FastLED.show(); delay(500); leds[2] = CRGB(0, 0, 255); FastLED.show(); delay(500); leds[5] = CRGB(150, 0, 255); FastLED.show(); delay(500); leds[9] = CRGB(255, 200, 20); FastLED.show(); delay(500); leds[3] = CRGB(85, 60, 180); FastLED.show(); delay(500); leds[7] = CRGB(50, 255, 20); FastLED.show(); delay(500);}复制代码
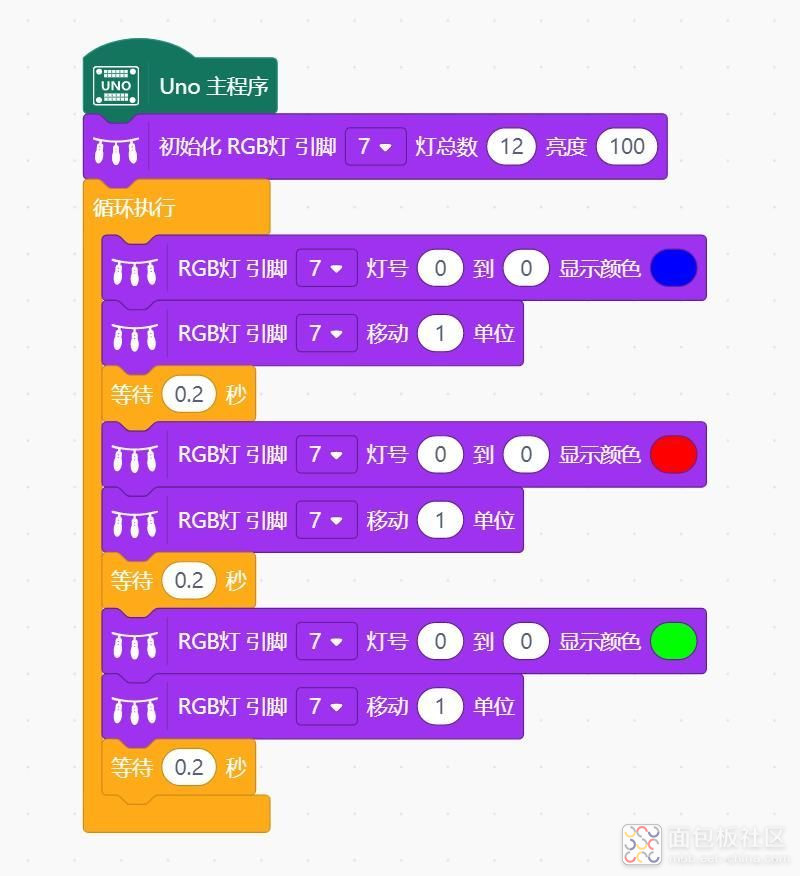
实验开源图形编程(Mind+、编玩边学)
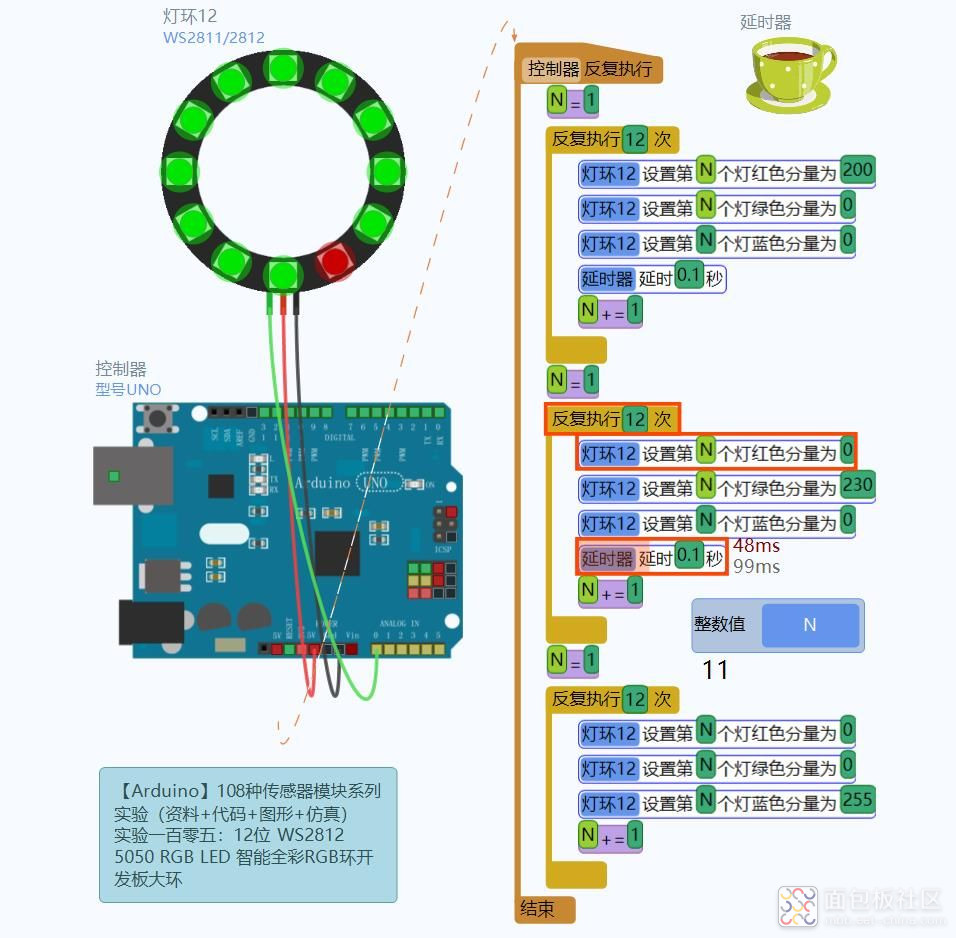
实验开源仿真编程(Linkboy V4.63)


 /1
/1 


文章评论(0条评论)
登录后参与讨论