首先声明 这是COPY别人。我认为写的不错,对入门级别的人来说是难得的,一步一步的写的很细。虽然跟着步骤编译好后,发现我也看不懂程序。
In this step, the full firmware is compiled from source. Thus you can experiment with customizing the TCPIP library, eg. stripping unneeded features such as SNMP, SMTP, upload handling, etc. For this step, we will need the Microchip Application Libraries.
Make sure you have MPLABX and C32 correctly installed and the starter kit is connected to your computer. These steps are detailed in
part I of this article.
Download the Microchip Application Libraries from
http://microchip.com/mal - choose Beta Linux, the actual version (v2011-10-18 as of writing). This library can be installed as a normal user, no need to get root.
$ chmod +x microchip-application-libraries-v2011-10-18-beta-linux-installer-v2.run
$ ./microchip-application-libraries-v2011-10-18-beta-linux-installer-v2.run
I choose installation directory ~/MPLABXProjects/MAL
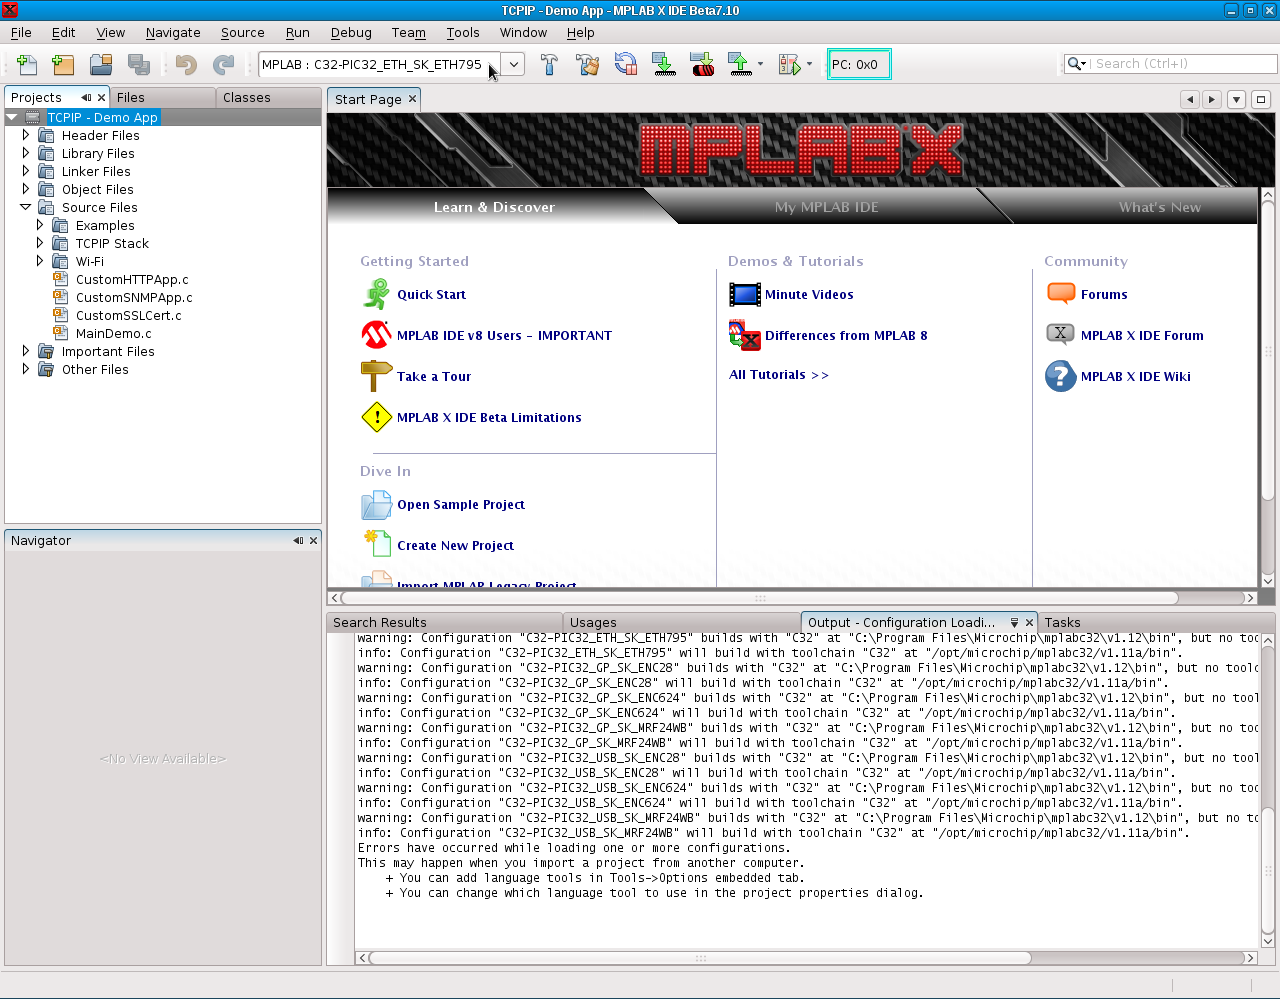
Start MPLABX, then choose File/Open project. Browse to ~/MPLABXProjects/MAL/TCPIP/Demo App and open the MPLAB.X project directory. Don't care about the "Configuration loading error" messages.
select the "MPLAB: C32-PIC32_ETH_SK_ETH795" configuration as seen on the screenshot.

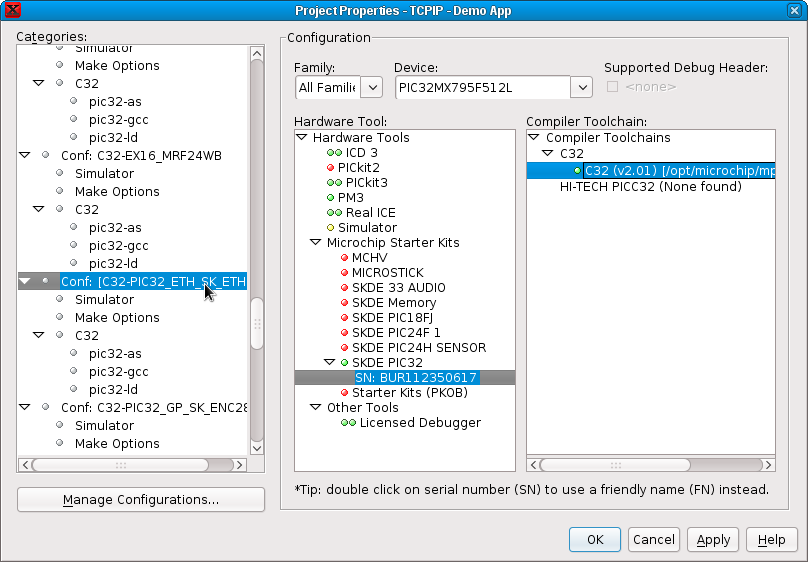
Edit the project properties by right clicking on the project "TCPIP - Demo App" and selecting "Properties". Select the Conf: C32-PIC32_ETH_SK_ETH795 item from the categories, and modify the Hardware tool to SKDE PIC32 and the Compiler toolchain to C32 (see picture)

Select the "Build the Project" button. If you see "BUILD SUCCESSFUL" at the end of the messages, you can press the button "Make and Program Device". This will upload the program to the board.
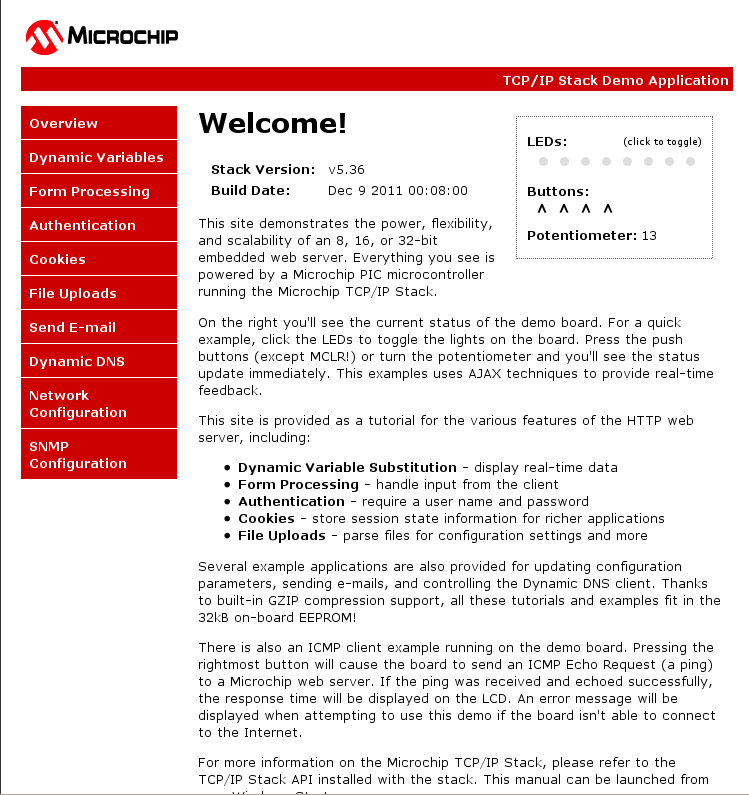
Now open the URL of the board. If everything is fine, you will see that the stack version is now v5.36 and the build date is changed to the actual date.


 /5
/5 
文章评论(0条评论)
登录后参与讨论