


Well, I have to admit that I have a great big Cheshire Cat-type grin plastered on my face at the moment, because the prototype for my Vetinari Clock project is now well underway.

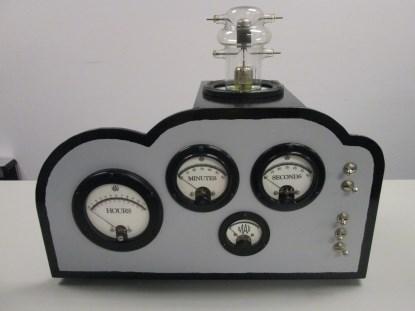
Just to tease you, let's start with a small photo showing the current state of play, and then I'll walk you through the steps that have brought us to our present position. We'll finish with more photos and accompanying links to full-size renderings of the little beauty.
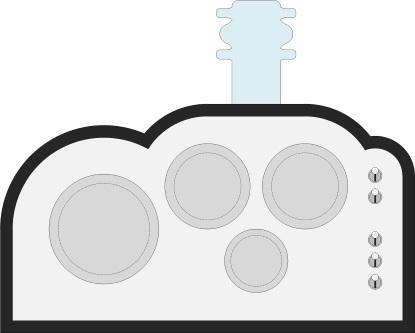
From the get-go, I knew that I was going to have a large "Hours" meter, two medium-sized "Minutes" and "Seconds" meters, and a small "Tick-Tock" metronome-like meter. One big aspect to all of this was deciding on the layout for the front panel. My graphic artist chum, Denis Crowder, suggested a symmetrical arrangement with the "Hours" meter on the top, the "Minutes" and "Seconds" meters side-by-side in the middle, and the "Tick-Tock" meter in the center at the bottom, with the switches mounted either side of the "Tick-Tock" meter. However, I decide that I preferred the asymmetrical presentation shown below (click here to see the column containing the deliberations that led to this layout).
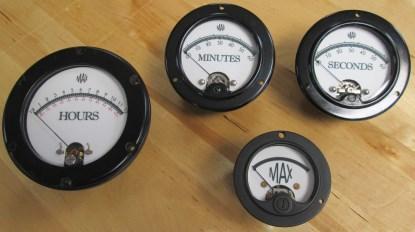
Another big consideration involved creating the new faceplates from the meters. As I described in this blog, graphics guru Denis created the artworks, master craftsman John Strupat machined and printed the faceplates, and analogue meter expert Jason Dueck refurbished the meters and inserted the new faceplates.
The first step with regard to creating the prototype was to mark the front panel out on a piece of 1/4" thick MDF (medium-density fibreboard).
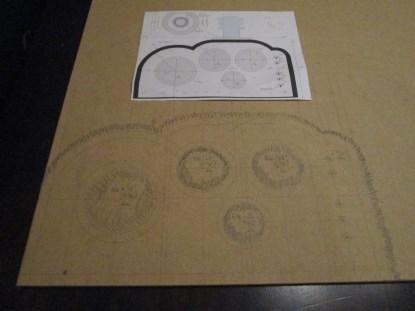
Now, I could have cut this front panel out myself with my trusty jigsaw, but I knew that the end result would not be as tasty as I wanted it to be. Also, there's no point in knowing a master carpenter if you don’t use him, so I asked my chum Bob to take a crack at it. Since Bob has a workshop full of tools -- not to mention decades of expertise -- it didn’t take him long to whip something into shape.
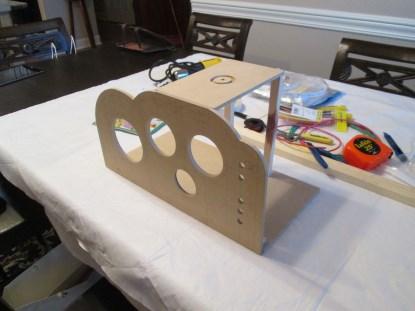
In the fullness of time, the real clock will be fully enclosed in a cabinet. For the purposes of this prototype, however, we've left everything open to make it easier for me to wire everything up and perform my experiments. The only part of the surrounding cabinet represented here is the small panel on the top, which will be used to hold the vacuum tube.
In fact, this provides a brilliant illustration of the value of creating a prototype. I had originally thought of making the clock 8" deep (from front to back). But as soon as I saw this top panel in the context of this prototype, I realized that 8" would be too much. I'm now thinking 6" deep, which means the vacuum tube will be 1" closer to the front in the full-up version.
One problem with MDF is that it soaks paint up like a sponge, so the next task was to prepare the prototype with a combined sealer and primer.
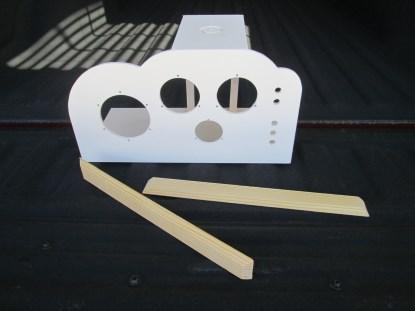
Originally, I'd considered creating a base upon which the clock would sit. My first thoughts revolved around a hand-carved piece with curved legs, but this wouldn’t have complemented the clock's Art Deco-esque style. Bob suggested creating legs using small, unobtrusive, inverted and truncated 4-sided pyramid shapes. I was starting to lean in this direction when we hit on the idea of not having any legs visible, but instead simply raising the base 3/8" in the air so the clock appears to be floating above the table.
This explains the two strips of wood shown in the previous image. In the image below, we see these strips glued and clamped to the base of the cabinet.
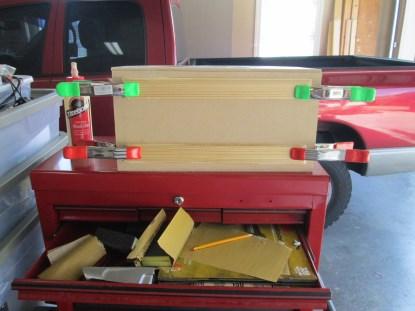
Since it wasn't possible to clamp the middles of the strips -- at least, not with the tools available to me in my garage -- my solution was to place the assembly on two books that I'm currently reading (biographies of Mick Jagger and Bernard Shaw, if you must know) and weigh everything down with a brick. When I come to think about it, it's amazing how often bricks make an appearance when I'm constructing my hobby projects.
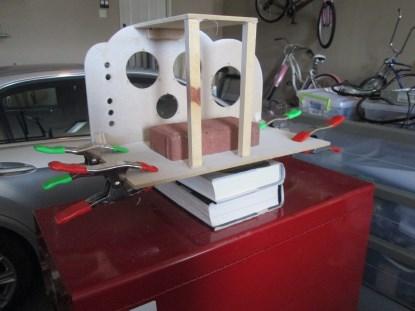
I also applied sealer/primer to the base of the prototype, using masking tape to protect the bottoms of the two wooden strips, thereby leaving them clear for felt to be attached later.
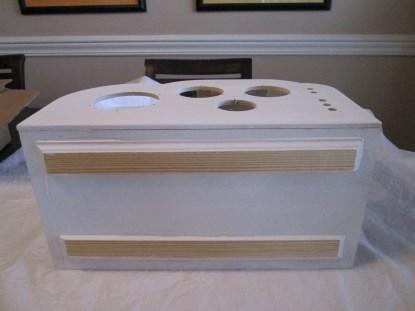
As you may recall, the front panel of the final clock is going to feature an amazing wood veneer with an aluminum look-and-feel. Meanwhile, the surrounding cabinet will be 0.5" thick and made of ebony (or, more likely, ebonized pear wood because that's much cheaper, or possibly even regular wood with an ebony veneer).
Of course we're not going to waste the aluminum look-and-feel veneer on a humble prototype, so I simply painted the inside area of the front panel with a blue-tinged-gray latex paint.
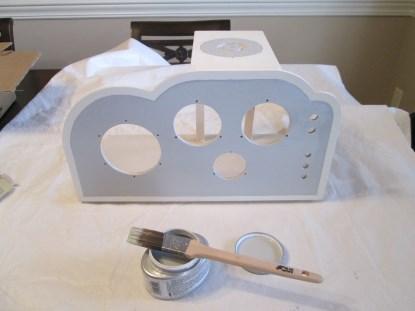
Observe the circle painted in the middle of the top panel. The vacuum tube is to be mounted in the center of this circle. Since I have a spare non-functioning 4.5" meter in my collection (similar to the "Hours" meter on the front panel), I've decided to mount its bezel on the top panel with the vacuum tube in the middle. You'll see what I mean in a moment.
I then painted the 1/2" boarders around the front panel with black gloss paint to represent the surrounding cabinet (you can just see these boarders in the photo below). In the final clock, the ebony-looking cabinet will be solid wood that protrudes 1/4" in front of the aluminum-colored front panel.
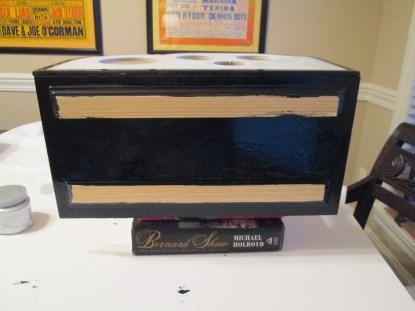
Also, I painted the bottom black. Why bother painting the bottom of a prototype when no one is going to look? Well, I could waffle on about preventing reflections so as to increase the illusion of floating and suchlike, but the real reason is that I'm well acquainted with my little foibles -- if I left it as is, I would know it wasn't painted, and this knowledge would constantly niggle away at me.
When the paint was dry, I attached two strips of felt to the base and then added the meters and the vacuum tube. Below are a few images to show you how everything is looking thus far.
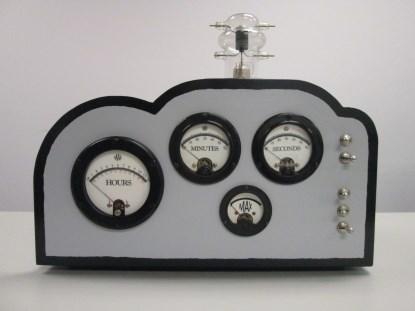
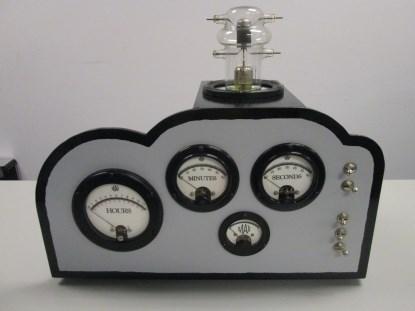
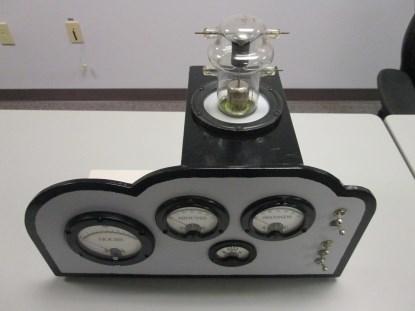
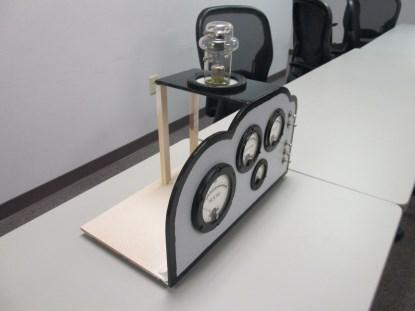
Now you can see how the clock appears to float above the surface of the table. This effect is a little more noticeable with the real thing, but it's also subtle enough that you don’t perceive it immediately. It's only after someone has been looking at the clock for a few seconds -- making high-pitched squeals of delight about the meters (and that's just the men) -- that they realize the clock doesn’t appear to be resting on anything and they excitedly exclaim "Just a moment, what's happening here?"
Also, you can now see what I mean about having the spare meter bezel mounted on the top of the cabinet framing the vacuum tube. Under the tube (which isn’t permanently attached to the prototype) is a circular slot into which I'll be inserting a 16-element NeoPixel Ring from Adafruit. In fact, this is one of the things I'll be doing this coming weekend -- in my next Vetinari Clock column I'll be showing a video of what this looks like when the vacuum tube is illuminated from below.
When I first painted the gray on the front panel, I was rather pleased with the sharpness of my edges. Sad to relate, however, when I painted the black borders with the gloss oil paint, things got a little wobblier. I've been fighting with myself over this. On the one hand I desperately want to re-paint everything; on the other hand, I know I could spend years trying to make things perfect. The bottom line is that, at the end of the day, this is only the prototype, so I've decided to grit my teeth, love what I've got, and move on with my life.
One last point (at least, for today), is related to the five switches. Did you spot the fact that the switch movements are orientated horizontally instead of vertically? Do you know, I never thought to check the switches when I created my original layout? Curse me for a fool! It was only when I was mounting the switches on the prototype that I realized they were too large to be presented vertically. "Well, take me outside and spank me now," I thought to myself (or words to that effect). Fortunately, I'm growing to like this orientation, which is lucky, because I'm short of other options (LOL).
So, what do you think? How do you like this little beauty so far?
 /4
/4 
文章评论(0条评论)
登录后参与讨论