


As you may remember, a month or so ago I decided to create an infinity mirror. Of course, the infinity mirror concept isn't new, but I've never actually made one myself. It also gives me a chance to play with a 1-metre length of NeoPixel Strip I acquired from Adafruit.com.
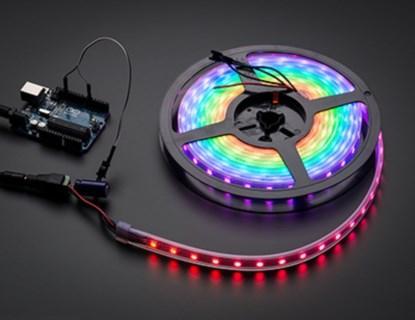
NeoPixel strip from Adafruit (60 tri-colour LEDs per metre).
This stuff is pretty amazing. There are just three wires running down the length of the strip: power (+5 V), ground (0 V), and a signal line. Using this signal line (and therefore only one digital pin on your Arduino), you can individually control the colour and brightness of each pixel. You can also download a corresponding Arduino library and examples from the Adafruit website, which makes everything just about as easy as it could be.
These NeoPixels are amazingly bright, to the extent that you can't really look at them head-on when they are at full intensity. I'm planning on using them for all sorts of projects, of which my infinity mirror is just one.
The thing about infinity mirrors is that you can find all sorts of images and descriptions on the web, but most of them are rather vague when it comes to the nitty-gritty details. For example, they may tell you to use a full mirror on the back and a half (one-way) mirror on the front, but they don't even hint as to the optimal gap between the two mirrors. Similarly, you may find a how-to article saying that you can form your one-way mirror using a piece of regular glass covered with a sheet of the film they use to tint car windows, but they don't say what type of film to use (there are lots of different shades, including mirrored ones).
Fortunately, "I R an Engineer" and I'm quite happy to experiment for myself. My first step was to determine the optimal gap between the two mirrors. I started by creating a crude prototype frame using four strips of wood with a 0.5" x 0.5" cross-section. I spray-painted these gloss black and placed them on top of the full mirror. I then used a couple of thin strips of painter's masking tape to temporarily attach one end of my NeoPixel strip to one of these pieces of wood, after which I laid the half mirror on top.
Test frame formed from a single 0.5" row.
In this experiment I was only lighting 16 or so NeoPixels at the end of the strip. You can see the unlit pixels on the rest of the strip as it exits my mirror from the upper right-hand corner. The far end of the strip (not visible in this image) is connected to an Arduino Uno. Eventually, I will end up wrapping the entire strip around the inside of the frame, but that's still in the future.
My next experiment was to leave the original four 0.5" strips and NeoPixels where they were, but to add a second 0.5" strip on top of the first. The result was for the reflections to come in pairs as shown below:
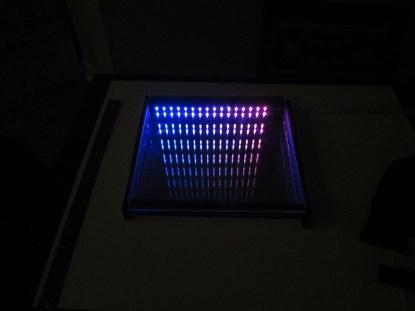
Test frame formed from two 0.5" rows with the NeoPixel strip attached to the bottom row.
Next, I swapped things over so that I started with a 0.5" strip without LEDs on the bottom and then added the strip with the NeoPixels on the top. This time we see a single row of lights at the top, followed by pairs of rows fading off into infinity as shown below:
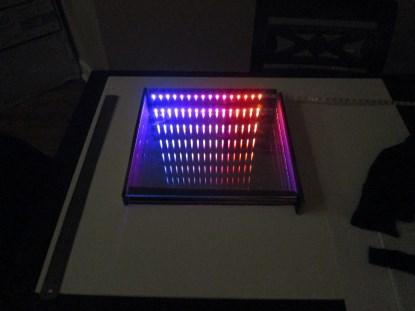
Test frame formed from two 0.5" rows with the NeoPixel strip attached to the top row.
Finally, I used three rows of 0.5" wooden strips, with blank rows at the bottom and top and the NeoPixel row in the middle. The result—as compared to the first test using only a single wooden strip—is to have a wider gap between the reflections and for the reflections to appear to go much deeper (further) as shown below:
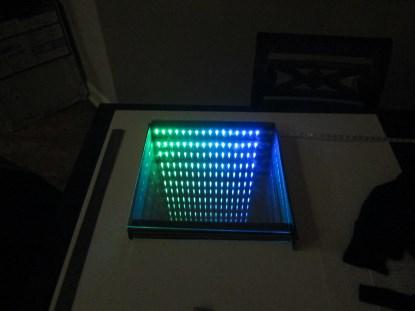
Test frame formed from three 0.5" rows with the NeoPixel strip attached to the middle row.
As we can see by comparing the above images, the advantages of having only a 0.5" gap between the back and front mirrors is that the resulting infinity mirror is really thin and it gives the impression you have many rows of LEDs mounted in close proximity to each other. The disadvantage is that the reflections fade away quite quickly. By comparison, the advantage of having a 1.5" gap between mirrors is that the reflections appear to continue longer (and deeper). The disadvantages are that the infinity mirror is thicker (chunkier) and the rows of reflections are spaced further apart.
In the end I went for a compromise and decided to use a 1.25" gap between the mirrors. My chum Bob, who lives in the office next to mine, has access to all sorts of saws and tools in a warehouse just around the corner from this building. He just popped out and whipped up the pieces for the real frame as shown below:
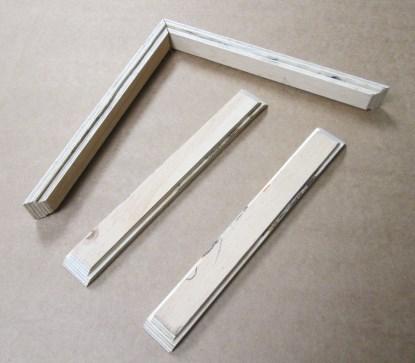
The pieces for the real frame, which provides a 1.25" gap between the full and half mirrors.
Sometime over the coming holiday weekend I will assemble the frame and mount the NeoPixel strip all around the inside. My next step will be to experiment with different types of automotive window-tinting film (my original experiments as shown above were conducted using a real one-way mirror). I shall, of course, report back as to the results of my experiments in a future blog. In the meantime, have you ever played with this infinity mirror concept yourself?
 /4
/4 
文章评论(0条评论)
登录后参与讨论