tag 标签: bus

相关博文
  • 热度 3
    2019-8-14 12:20
    7231 次阅读|
    0 个评论
    如何理解Xilinx的BMD?
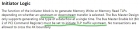
    BM是Bus Master的缩写,其中D是DMA。xapp1052讲使用PCIe的系统中通常有两种硬件实现的DMA,一种是系统DMA(System DMA),另外一种是总线主机DMA。 系统DMA通常是位于总线中心位置,且为总线中所有设备所共享,当前这种实现方式已经不多见了。如今在基于PCIe的系统中最常见的还是BMD,BMD由位于Endpoint的设备实现,之所以称为总线主机(Bus Masters),是因为数据写入系统内存或从系统内存读回都是由它们 发起( 这里说“发起”应该不准确,实际上发起方还是Host,因为需要host写DMA控制寄存器并“Start”DMA,然后Endpoint才能开始启动DMA操作 ) 的。 在实际设计的时候,记得将Endpoint的Bus Master Enable位设置为‘1’,该使能位位于PCI命令寄存器中(比特2),而PCI命令寄存器则位于PCI配置空间的04~05h。下图是PCI命令寄存器各段详细定义。这里重点说下Bus Master,该比特设置为1,表示本设备被设置为总线主机。 下图展示了PCI命令寄存器位于PCI配置空间的具体位置: 所以,xapp1052通篇都是基于将Endpoint作为总线主机来描述的。而当我们查看参考设计的时候,由于是DS端口模型,即downstream 端口模型,此时应该是没有设置Endpoint为总线主机,所有TLP都是由模拟的RP下发。 xapp1052参考设计的仿真似乎根本不支持BMD,在其测试文件ursapp_tx里对应PCI命令寄存器是这样配置的: // Program PCI Command Register TSK_TX_TYPE0_CONFIGURATION_WRITE(DEFAULT_TAG, 12'h04, 32'h00000003, 4'h1); DEFAULT_TAG = DEFAULT_TAG + 1; TSK_TX_CLK_EAT(100); 而实际参考其它人自行修改的测试文件,对应PCI命令寄存器的配置应该是这样的(如果是测试BMD就将PCI命令寄存器的bit-2置位,否则写0): // Program PCI Command Register if(testname == "bmd") TSK_TX_TYPE0_CONFIGURATION_WRITE(DEFAULT_TAG, 12'h04, 32'h00000007, 4'h1); else TSK_TX_TYPE0_CONFIGURATION_WRITE(DEFAULT_TAG, 12'h04, 32'h00000003, 4'h1); DEFAULT_TAG = DEFAULT_TAG + 1; TSK_TX_CLK_EAT(100); 下面是一段Xilinx工程师对xapp1052参考设计的说明: The flow for this application is: 1) Driver sends down 1DW MRD and MWR requests to the EP to program backend descriptor registers. The last MWR starts the DMA transfer by writing to the control register. 2) The TX engine sends out MRD and/or MWR requests to the root. 3) After the requested data is transfered, the EP interrupts the driver. 4) The driver comes down and verifies the transfer is complete by reading the backend descriptor registers and it also gets the performance information from the EP. 附加一个下载Windriver的链接:https://www.jungo.com/st/contact-form-2/?product=WinDriver
  • 热度 17
    2015-12-14 17:19
    1056 次阅读|
    1 个评论
    本文转自机器人天空 如何制作你的第一个机器人?如果你在寻找一个更加便宜和快速的工程,以下这个你可能会感兴趣。如果你以前从来没有制作过任何东西,下面这个视频也许会激发你的潜力,因为它是如此容易。 怎样用不到200美元的钱就可以制作出一个超酷的机器人 这样确实很酷,因为: 1. 这些电子设备用的都是真正的部件。 (他不是那种需要你花很多时间的思考才能工作的自制小玩具, 也不是随便搭配就能做成的转杯) 2. 这些基础的很容易做出来,你将在1小时之内拥有一个机器人! 3. 你可以从这开始慢慢发展, 4. 这确实很便宜。 5. 这是很认真的一件事,但也很有趣。不管怎么说这都是机器人初学者最酷的项目。 以下是你需要购买物品部件的清单: 1. 一个PICAXE-28X1单片机 这是机器人的“主脑”,他是非常方便且可编程的微控制器。 售价:10美元(可以参考其他价格)。 你可以从这里买到 2. 一个 PICAXE-28X1单片机的发动机包 在这个包里的28针工程主板就像游戏超级玛莉一样有趣,并且充满的特别而隐藏的特性,它使得你玩了还想玩。 售价:60美元 你可以从这里买到 3. 一个L293D芯片马达驱动器 光看名字就很清楚了,下面会有更多关于这个芯片的资料。 你可以从这里买到 4. 一个PICAXE单片机的伺服电机加强包 你可以使用任何的标准伺服电机,最好再有一个300欧姆的电阻器。 售价:30美元 你可以从这里买到: 5. 一个夏普GP2D120电感式电压调整传感器芯片 11.5英寸或者其他范围也可以。但是对于这个项目来说,不要买“数字版”的夏普传感器。 售价:20美元 你可以从这里买到: 6. 两个带有轮子的齿轮马达 其比率越高,机器人就越强壮,而越低,他就越快。对于这个项目来说,我建议比率应在120:1到210:1之间。 售价: 总计31美元 你可以从这里买到: 你还所需要这些东西: 双面胶,普通的胶带纸,简单的焊接装置,一把普通的小钳子或者剪刀和一把螺丝起子。 如果为了好玩,你也可以用这些: 发光二极管,灯光的闪动那样会是你的机器人看起来更酷; 一个很小的扬声器,机器人对声音的反应可以使你和他交流; 用SRF05超声波传感器代替夏普的红外传感器,或者用更多的。SRF05超声波传感器价格更贵一些但是更精确,其探测范围也更大,而且看起来更酷。 好吧,你已准备好了材料,你想开始动手做了,现在开始! 首先,把轮子装到你的齿轮马达上,接着为他装上轮胎. 使用双面胶是为机器人快速装上器件一个方法. 装入电池,这样你对它的重量和平衡会有一个很实际的认识。在其底部粘上双面胶会更好. 如果你觉得我的设计太简单的话,你也可以自行设计. 最重要的是我把电池,伺服电机和轮子都粘在了一起。轮子和伺服电机可以自由的旋转,它可以设法在轮子上保持平衡或者不是。 为了避免意外发生,应该取出电池。 现在是制作“大脑”了。 你应该有这样一块工程主板。 可以注意到他上面有一块芯片,把它取出来。这块芯片是复合晶体管驱动,它很方便的装在主板上,但是在这个项目中我们不需要它。所以:拿掉吧! 我们可以用平头螺丝起子很容易的把芯片从插口撬出来,但是一定要小心。 一块新的芯片,从未使用过是很难直接插入插口的,所以你需要把所有的引脚弄弯到一个适合的 角度,是他们能正好插入。最后,确保所有的引脚都在插口里。 如果你买的是从Picaxe单片机升级的伺服电机,那么你得用他的黄色芯片代替复合晶体管。 注意,那个黄色的芯片并不是可以填满主板上所有的插口。正如照片所示,只需要把八个脚插入正确的插口就可以了,他本身是一个电阻,所以也就不需要别的电阻了。 这个黄色的芯片实际上是在套装里的一个8*330欧姆的电阻。因此,如果你需要一个电阻器,你只需要插入0号槽,我们在使用一个伺服电机时将使用这个槽。 再将一块大的芯片,“主脑”,微控制器Picaxe 28单片机插入工程主板。 确保位置很重要,在每一个的末尾都有标记,包括主板。这必须组装在一起。 芯片将通过两个引脚从主板上获得动力。 剩下的26个引脚分布在主板的周围,你可以对他们进行编程。所以你可以通过上载到微控制器的程序发送输入输出电流来检测和控制事物。 现在插入L293D马达控制器。 这将要使用微控制器的4个输出信息并把他们转变成2个。听起来很笨?好吧。。。任何从微控制器的输出信息都只有“开”和“关”。所以如果仅仅是使用这些,那么机器人只能向前进或者停止,他不会倒走!这样遇到墙时显然很不合适! 这块主板制作的很精巧,2个信号输出口有独自的的位置--在马达控制器附近--分别被标以(A)和(B)。后面将有更多关于他的信息。 你在主板的后面可以找到一些奇怪的塑料。他们没有什么用处,只是一些出厂时的残留物。在你需要那些被遮挡的插口时只需把他们揭下来就可以了。 取4根电线,把他们和4个“AB”两极焊接在一起。(或者其他的连接方法) 如果你有其他遇热会融化收缩的塑料或者胶带纸,那也是很好的办法。 两个“A”输出端链接马达,另两个“B”端口链接另一个。不管谁和谁,只要保证A接口连到了马达上,“B”接到了另两个点上。 现在让我们连接伺服电机。 如果你已经阅读了关于Picaxe单片机的文档,你就该知道要是你要增加私服电机,你就得使用两 个不同的电源。先不管这个,现在我们不在乎这个,这只是一个简单的机器人,而且据我的经验我这样方法他也能很好的工作。 如果想使用标准的伺服电机那就为他的“0”输出口焊接一个针。 如果你的线是(黑,红,白),或者(黑,红,黄),那么黑线应该连在最边上。我的是(棕色,红色,橙色)的,所以棕色线在最边缘。 指示一般是红线,标记为V,或者是这些里面的一种(“V”“V+”“+”“1”)。这时电流的来源。 黑线(我是棕色线)是G(或者“G”“0”“-”)。这就是地线,电流的流向。 最后一根就是信号线。 其他设备可能只需要地线和信号线,有些对于输入输出的正极,地线都需要。每一件事物都有不同的叫法,所以一开始可能会疑惑,但是之后你将会习惯。因为他真的很简单. 现在连接他的头--夏普的电感式电压调整感应器。 有很多种方法可以完成他,一下是一些提示: 红线应接到V1,或者接到类似有“V”这样的标记处。 无论在哪,黑线都是接地线的。 白线连接模拟输入口1。 如果已经阅读过该工程主板的相关文档,那么你应该知道怎样连接和使用附带的缎带。 在这张照片上可以看到,我是从旧的烧坏的伺服电机上把电线剪下来,焊接上针,就像连接伺服电机一样把他连上去。 无论你是用缎带或者我的方法连接夏普的电感式电压调整器,你都应该将剩下的3根模拟输入信号线连到V端。我跳过了一些步骤,你可以发现剩下的3根线的连接很便捷。 在这里方便不使用的信号输入很重要的原因是他们是左浮动的。这就意味着,在你试图读入信号时,如果没有连接好,那么你将会得到很多各式的数据。   接下来是很有趣的工作。(或者说让他具有生命) 无论如何都要把电池正极的红线和工程主板上的红线(V)连在一起,还有黑线(-)和地线。具体怎么做取决于你的设备工具。如果电池和主板都有别针,那么你应该确保从电池的正极出发到主板的“地线”。虽然并不是经常,但有时候别针会相反,所以只要保证把相配的别针组一起。 还有就是不要供给主板超过6伏的电压。 一个小提示:在这里我们只用一个电池工作。除了V1和V2,你以后可能会要用同样的地线。那样的话你的别针可以只用一个电源,马达等其他的部件用别的电压。 在你自己的电脑上装一个Picaxe单片机编程的编辑器,按照手册把插口/USB接口/串口都连接起来,把电池装进还未装头的机器人,往机器人插入插口杆。。。进入编辑器,写程序: servo 0, 150 按下F5,等待程序的转换,接着你的伺服电机会有点拉动(或者旋转,这取决于他的初始状态)。 如果在这里出错,联系我,或者翻阅手册检查端口,直到没有错误警告并可以工作。 作为测试,试着写下: servo 0, 200 按下F5,伺服电机会旋转一个角度后停下来。为了回来,写: servo 0, 150 按下F5,现在,机器人的头正向朝前了。 粘上头--夏普的电感式电压调整感应器。 你好世界,我是一个机器人,准备好接受你的命令去探索世界!^_^ 你已经做好基础的工作了。 这个设计也许还周到,你也可以使用其他部件等。 下面是一些小提示,作为你开始对机器人编程的参考。复制-粘贴以下代码,连好机器人后按下F5 +++ main: readadc 1, b1 ' takes the voltage returned to analogue pin 1, and puts it into  variable b1  debug ' this draws out all variables to the editor. Set it to “Byte” if it is on “ Word” goto main +++ 现在,把你的手伸到机器人头的前面,注意变量b1的变化。你可以用你已有的只是快速的判断出 将会发生什么。 现在我建议你将机器人放在火柴盒上,这样轮子就可以开始转动。 在你的编辑器内输入(或者复制-粘贴)以下代码,连好机器人后按下F5 +++ high 4 low 5 +++ 其中一个轮子会转向一个方向,是不是向前转呢?那么,这就是轮子前进的指令。 如果要让轮子向后转,你可以试试: +++ low 4 high 5 +++ 要转动另一个轮子: high 6 low 7 (或者其他向反方向转动的方法) 伺服电机你已经试过了。 自始至终,转到一边是: servo 0, 75 转到另一边是: servo 0, 225 转到中间: servo 0, 150 这里有一个小程序,它将使机器人转圈,在障碍物前停下来,巡视四周确定最好的路,转弯和大 胆的向前进。 +++ Symbol dangerlevel = 70 ' how far away should thing be, before we react? symbol turn = 300 ' this sets how much should be turned symbol servo_turn = 700 ' This sets for how long time we should wait for the servo to  turn (depending on it′s speed) before we measure distance main: ' the main loop readadc 1, b1 ' read how much distance ahead if b1 dangerlevel then gosub nodanger ' if nothing ahead, drive forward else  gosub whichway ' if obstacle ahead then decide which way is better end if goto main ' this ends the loop, the rest are only sub-routines   nodanger:' this should be your combination to make the robot drive forward, these you  most likely need to adjust to fit the way you have wired your robots motors high 5 : high 6 : low 4 : low 7 return   whichway: gosub totalhalt ' first stop! 'Look one way: gosub lturn ' look to one side pause servo_turn ' wait for the servo to be finished turning gosub totalhalt readadc 1, b1 'Look the other way: gosub rturn ' look to another side pause servo_turn ' wait for the servo to be finished turning gosub totalhalt readadc 1, b2 ' Decide which is the better way: if b1b2 then gosub body_lturn else gosub body_rturn end if return body_lturn: high 6 : low 5 : low 7 : high 4 ' this should be your combination that turns the  robot one way pause turn : gosub totalhalt return body_rturn: high 5 : low 6 : low 4 : high 7 ' this should be your combination that turns the  robot the other way pause turn : gosub totalhalt return rturn: servo 0, 100 ' look to one side return lturn: servo 0, 200 ' look to the other side return totalhalt: low 4 : low 5 : low 6 : low 7 ' low on all 4 halts the robot! Servo 0,150 ' face forward wait 1 ' freeze all for one second return +++ 优秀的程序可以使机器人向前进,转头,下决策,做较小的调整适应,转向“有趣的洞”,比如 大门口,在前进时还可以一齐工作。当他的转头时还旋转,那看起来真的非常的酷。   声音: 你可以为别针1和地线装一个扬声器,写下代码: Sound 1, (100, 5) 或者在上例中添加: Sound 1, (b1,5) 有趣的声音取决于前方物体的距离。 你也可以在别针2和地线安装灯或发光二极管,写下: High 2 -开灯, Low 2 -关灯。 在另一个伺服电机上装一直激光笔如何?以后你可以转动激光笔,打开或者关闭它,用它指向某个地方等等。  
  • 热度 21
    2014-12-25 21:45
    1608 次阅读|
    0 个评论
    TBD
  • 热度 19
    2013-6-21 18:52
    1754 次阅读|
    0 个评论
    Looking at the range of recent news, product introductions, design and technical articles, it is hard to believe there was once a time when there was no PCI Express or any of its Peripheral Component Interconnect progenitors. Shortly after the Intel x86 architecture exploded into the market place in the mid-1970s, all there was in the many homebrew personal computers and single board computers developed for industry was the S-100 bus, originally nothing more than the pins of the Intel 8080 run out onto the backplane to form the single system bus. But after about five years its dominance evaporated. In 1981 IBM bulldozed its way into the one computing market segment it did not dominate—personal computing—with the IBM PC AT and its Industry Standard Architecture (ISA), which also quickly became widely used in embedded single board computing. ISA's dominance as well was short lived. By 1987, Intel engineers developed the PCI bus to replace it. And now, remarkably, 25 years later, PCIe dominates virtually every segment of computing where a high performance interconnect bus is necessary. Part of its longevity is the flexibility of the original PCIe specification and the foresight of the engineers who developed it. But much is also owed to the companies that make up the PCI SIG, who have adapted and extended the standard into a wide range of applications. Indicative of the ubiquity and vitality of the PCIe bus across the embedded system infrastructure are some recent conference and technical journal papers I have come across. This is not to say that PCIe does not have its limitations and is not without serious competitors in many important segments of the market. In "Sub-microsecond interconnects: PCIe, RapidIO and other alternatives," Sam Fuller makes the important observation that much as there are different forms of processors that are optimised for differing applications, interconnects are also designed and optimised to solve different connectivity problems. " Typically an interconnect will solve the problems it was designed for very well and can be pressed into service to solve other problems, but it will be less efficient in these applications ," he writes. Technologies such as PCI Express and 10G Ethernet are certainly not going away any time soon, according to Fuller, but they also will not be the foundation for future tightly coupled computing systems. As the systems you are designing move to applications requiring faster and more reliable high speed interconnects, you will no doubt be considering a variety of high speed, low latency alternatives. I would like to hear from you about how you are addressing these issues.  
  • 热度 11
    2011-7-14 22:24
    1828 次阅读|
    0 个评论
    A notable study ( "Experimental Security Analysis of a Modern Automobile" ) by a cast of thousands indicates that at least some modern cars can be attacked with quite devastating results. Today's cars are basically some mechanical bits that support a huge array of electronics. The latter is composed of Electronic Control Units (ECUs) that are unsurprisingly all interconnected by one or more busses. What is amazing is how deeply these units interact. For instance, in some vehicles the doors are unlocked and seatbelts pre-tensioned just before a crash. Others use the radio to generate all of the clicks, beeps and groans that alert the driver to various conditions. Communications between ECUs is over CAN busses, with a low-speed bus to handle relatively unimportant functions (e.g., door locks) and a high speed bus for safety-critical functions like braking. Some ECUs require both busses, creating a bridge between them that can have unintentional vulnerabilities. In the paper the authors talk little about attack entry points; they refer vaguely to one wireless threat uncovered during their experiments, but mostly used the OBD-II under-dash connector to monitor inter-ECU communications and inject their own bits of nastiness. But they seem to have little doubt that networking capabilities like OnStar and the coming Interneting of the highways will provide plenty of entry points for the bad guys to exploit. Aftermarket add-ons that connect to the OBD-II or counterfeit ECUs could also create openings into the busses. One might think that CAN would provide some authentication, but the paper shows that those supported by the standard are often modified or disabled by the ECU designers. And, CAN is very subject to DoS attacks, which can so flood traffic that important messages never get through. One gets the feeling that they had a lot of fun running the experiments; for instance, they could pop the trunk, honk the horn, display messages on the dashboard (like a count-down to destruction accompanied by increasingly threatening noises over the radio), change all of the lighting, and continuously squirt windshield wiper fluid. More perilously, at speed it wasn't hard to lock a single front brake, or even disable braking entirely. An alarming quote: "we were able to release the brakes and actually prevent our driver from braking; no amount of pressure on the brake pedal was able to activate the brakes." I found two takeaway messages from the paper. First, security needs to be Job One for automotive engineers. And second, all of us in the embedded world should start thinking very hard about our products. Are they compromisable? Does it matter? For many the answer to the latter is "no," but I think one should be wary of a glib "no."
相关资源
  • 所需E币: 1
    时间: 2022-9-25 22:00
    大小: 181.37KB
    上传者: czd886
    单总线(1-WireBus)技术及其应用
  • 所需E币: 3
    时间: 2022-5-28 18:05
    大小: 1.9MB
    上传者: xyzzyxaaa
    0canbus系统工作过程1.DOC
  • 所需E币: 1
    时间: 2022-5-2 16:59
    大小: 155.15KB
    上传者: ZHUANG
    基于CANBus的汽车发动机智能电子控制器研究
  • 所需E币: 5
    时间: 2022-4-18 08:30
    大小: 29.68MB
    上传者: lsy123
    包含了AMBASPICANUARTI2C RapidIO serialBUS资料的压缩包
  • 所需E币: 0
    时间: 2021-3-22 17:55
    大小: 212.22KB
    上传者: Goodluck2020
    STM_FLASHM25P64SPIBusInterface.zip
  • 所需E币: 0
    时间: 2020-12-4 23:42
    大小: 2.35MB
    上传者: kaidi2003
  • 所需E币: 0
    时间: 2020-9-19 21:08
    大小: 210.58KB
    上传者: bwj312
    STM_FLASHM25P64SPIBusInterfac
  • 所需E币: 5
    时间: 2020-6-25 16:22
    大小: 109.69KB
    上传者: kaidi2003
    AND9081-D_ONSEMI_NCV7381FlexRayBusDriverApplicationNote.PDF
  • 所需E币: 5
    时间: 2019-12-26 00:46
    大小: 3.41MB
    上传者: givh79_163.com
    PCI2.2规范……
  • 所需E币: 3
    时间: 2019-12-26 00:46
    大小: 2.34MB
    上传者: 238112554_qq
    PCI2.3规范PCILocalBusSpecificationRevision2.3……
  • 所需E币: 3
    时间: 2019-12-25 23:17
    大小: 90.49KB
    上传者: 2iot
    ThisdocumentprovidesasummaryofthedifferencesbetweentheTMS320VC5509andTMS320VC5509A.Alleffortshavebeenmadetoprovideacomprehensivelistofthedifferencesbetweenthetwodevices,thiswillbeupdatedifadditionalchangesareidentified.……
  • 所需E币: 5
    时间: 2019-12-25 21:14
    大小: 11.5KB
    上传者: givh79_163.com
    单片机常用术语……
  • 所需E币: 4
    时间: 2019-12-27 20:46
    大小: 126.17KB
    上传者: rdg1993
    为提高系统在大量数据处理、数据存储和通信系统的稳定性,子系统中包含一些主动电路来监控系统中的一些参数,如温度、风扇速度和系统电压等。独立的子监控系统一般通过2线串行总线如SMBUS、I2C与主机通信。随着监控功能复杂度和数量的增加,一些实际问题也开始显现。如数据总线上升时间特性无法满足,不间断系统无法适应新I/O卡及器件的地址一般为专用等。LTC4302-1/LTC4302-2可寻址2线总线缓冲器可解决所有这些问题。advertisementAddressableI2CBusBufferProvidesCapacitanceBuffering,LiveInsertionandNestedAddressingin2-WireBusSystemsDesignNote329JohnZieglerIntroductionLiveInsertionandRemovalandInanefforttoimprovethereliabilityoflargedataprocess-CapacitanceBufferingApplicationing,datastorageandcommunicationssystems,theirTheLTC4302solvesbusconnect/disconnectproblemssubsystemsincludeagrowingnumberofactivecircuitsbycreatinganactivebridgebetweentwophysicallysepa-tomonitorparameterssuchastemperature,fanspeedrate2-wirebusses.TheLTC4302’stwo“input”pin……
  • 所需E币: 5
    时间: 2019-12-27 20:53
    大小: 164.28KB
    上传者: 978461154_qq
    采用LTC1646,可使CompactPCI板具有热插拔功能,系统不会在板插入或拔出时受到影响。advertisementLTC1646:PowerSupplyIsolationControllerSimplifiesHotSwappingtheCompactPCIBusfor5V-/3.3V-OnlyApplicationsDesignNote253AndyGardnerAlthough±12VsuppliesareprovidedontheCompactPCITMpinsduringinsertionandextractionandreportsonthebackplanes,manyplug-inboardsonlyrequire5VandstateofthesupplyvoltagesviatheHEALTHY#signal.3.3V.TheLTC1646istheidealpowersupplyisolationLTC1646FeatureSummarycontrollerfortheseapplications.……
  • 所需E币: 5
    时间: 2019-12-28 21:03
    大小: 705.02KB
    上传者: 2iot
    97%高效BUS电源开发97%高效BUS电源开发艾默生:李卫东2006年9月内容目录业界BUS电源趋势艾默生BUS电源97%高效BUS电源中间母线定义12V中间母线Intermediate-Bus-Architecture,IBA开环电源模块(Transformer)需求最早由Cisco在数据通信产品中提出中间母线IBA优势1、性能:负载电压规格多电源与负载的距离近板上热分布均匀2、成本:IBA具有较好的竞争力随着IC供电电压下降和所需电流的增加,IBA的应用得到推广,相应的BC和POL得到迅速发展中间母线市场趋势12V是增速最快的输入电压12V的快速增长是基于IBA和计算机应用的驱动年均增长17.5%Source:DCDCConvertermodulesE8……
  • 所需E币: 3
    时间: 2019-12-25 17:43
    大小: 16.67KB
    上传者: quw431979_163.com
    BusTranslationDesignUsingFPGAs……
  • 所需E币: 3
    时间: 2019-12-25 17:16
    大小: 520.24KB
    上传者: 16245458_qq.com
       ThisuserguideprovidescomprehensiveinformationabouttheAltera?Excalibur?busfunctionalmodel.……
  • 所需E币: 4
    时间: 2019-12-25 17:02
    大小: 991.02KB
    上传者: 二不过三
       IntheExcalibur?familyofdevices,anARM922T?processor,memoryandperipheralsareembeddedonanFPGA.Fordesigners,thiscombinationofelementsprovidesaneasyandflexiblewayofintegratinghighly-complexembeddedmicroprocessordesignsintoacost-effectiveandfastertime-to-marketsystem-on-a-programmable-chip(SOPC)solution.……
  • 所需E币: 4
    时间: 2019-12-28 21:59
    大小: 577.05KB
    上传者: 2iot
       Withthedevelopmentoflow-voltageandhighlyintegratedelectronicsystemsforinformationandcommunicationsapplications,primarycomponentssuchasCPUs,memoriesandASICsareoperatingatlowervoltages.……
  • 所需E币: 5
    时间: 2019-12-28 23:45
    大小: 38KB
    上传者: givh79_163.com
    AninterfacecircuitusestheDallasSemiconductor1-Wireserialbustoprovideisolatedpowerandbidirectionalcommunicationsbetweenamaster(MCU)andasensingelement.……