

TQ2440开发板使用手册——4.4.1 Linux烧写实战(USB篇)
由于操作不熟悉使自己无法专心投入到软件设计中,所以用今天的而时间利用已有的天嵌资料将有关Linux下载的操作熟悉一下。
l Fedora10
l EABI_4.3.3_EmbedSky
Linux的启动需要烧写uboot、linux内核、开机logo、文件系统。
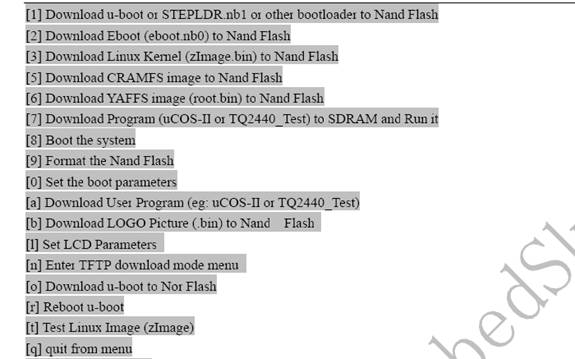
下载界面:

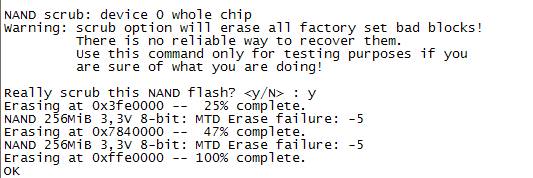
2.2.1 格式化Nand Flash

2.2.2 烧写uboot镜像
Enter your selection: 1
USB host is connected. Waiting a download.
Now, Downloading [ADDRESS:30000000h,TOTAL:219130]
RECEIVED FILE SIZE: 219130 (213KB/S, 1S)//这部分的功能从DNW中获得镜像数据并写入内存
NAND erase: device 0 offset 0x0, size 0x40000
Erasing at 0x20000 -- 100% complete.
OK//这部分的作用是擦除Nand Flash的对应空间,供uboot烧写镜像用提供了0x40000大小的空间
NAND write: device 0 offset 0x0, size 0x357f0
Writing data at 0x35000 -- 100% complete.
219120 bytes written: OK//uboot把内存中的镜像数据写入Flash中。
2.2.3 烧写Linux内核镜像
Enter your selection: 3
USB host is connected. Waiting a download.
Now, Downloading [ADDRESS:30000000h,TOTAL:2305446]
RECEIVED FILE SIZE: 2305446 (1125KB/S, 2S)
NAND erase: device 0 offset 0x200000, size 0x300000
Erasing at 0x4e0000 -- 100% complete.
OK
NAND write: device 0 offset 0x200000, size 0x232d9c
Writing data at 0x432800 -- 100% complete.
2305436 bytes written: OK
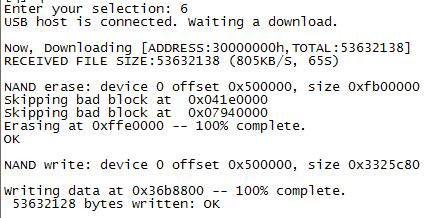
2.2.4 烧写文件系统镜像

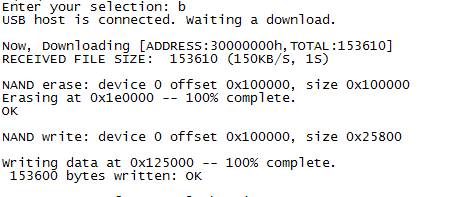
2.2.5 烧写开机logo镜像

当完成上述操作后(即烧写完uboot、内核、文件系统、logo镜像),拔掉USB下载电缆(防止PC蓝屏),然后使用命令8,即可启动Linux操作系统。
2.2.6 设置Linux启动方式
0->2->s
 /5
/5 
文章评论(0条评论)
登录后参与讨论