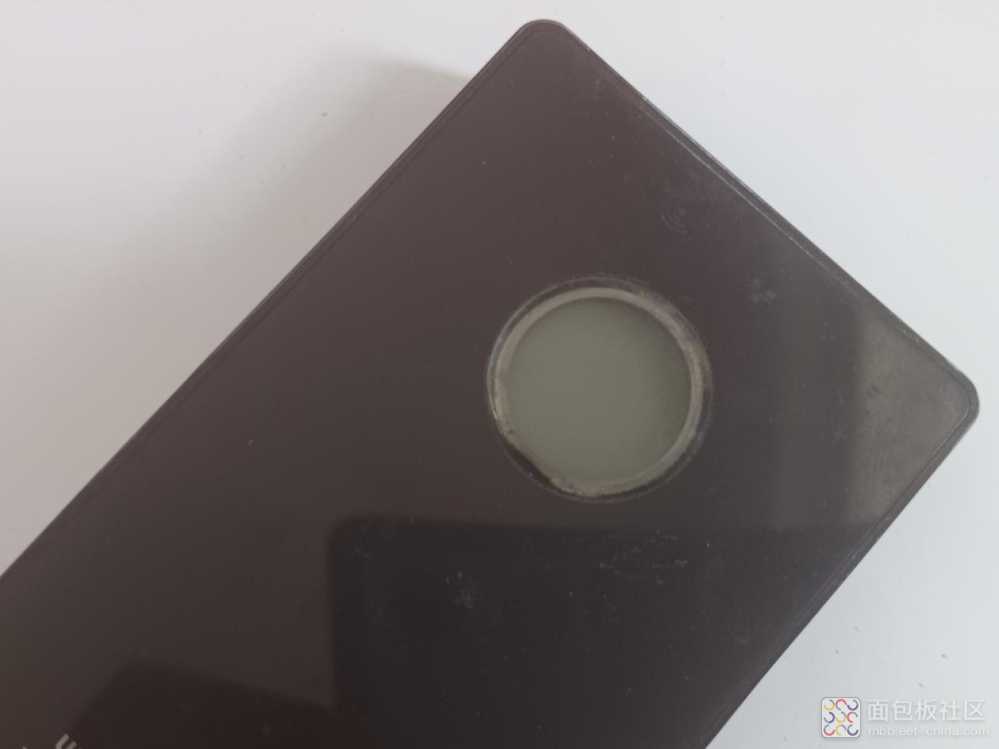
2025-2-22 14:44
204 次阅读|
0 个评论
在这个万物互联的时代,无线通信技术已经成为嵌入式系统中不可或缺的一部分。其中,Wi-Fi模块作为连接设备与网络的重要桥梁,其性能与兼容性显得尤为关键。Intel的AX210NGW Wi-Fi 6E模块作为一款高性能的无线网络适配器,不仅支持最新的Wi-Fi 6E标准和蓝牙5.3,还具备出色的传输速度和兼容性,为嵌入式系统的无线连接提供了强有力的支持。 AX210NGW Wi-Fi 6E模块 为了更好地满足客户对高性能嵌入式主控的应用需求,本文将详细介绍在飞凌嵌入式OK3576-C开发板上适配AX210NGW Wi-Fi 6E模块(以下简称模块)的方法,帮助开发者快速上手并充分发挥性能优势。 注:目前暂未对Wi-Fi模块的蓝牙功能进行适配,本文只讲解Wi-Fi功能的适配方式。 OK3576-C开发板接口图 首先,需要将Wi-Fi模块连接到飞凌嵌入式OK3576-C开发板上(Wi-Fi模块使用的是M.2 key A+E接口,但通过接口图看到OK3576-C开发板没有此接口,这时使用M.2转PCIe双频无线网卡转接卡进行转接就可以)。 进入内核目录开始配置: forlinx @ubuntu20 :~/ 3576 $ cd kernel- 6.1 / forlinx @ubuntu20 :~/ 3576 /kernel- 6.1 $ make menuconfig ARCH =arm64 按如下顺序进行选择: Location: - Device Drivers - Network device support (NETDEVICES ) - Wireless LAN (WLAN ) - Intel devices (WLAN_VENDOR_INTEL ) - Intel Wireless WiFi Next Gen AGN - Wireless-N/Advanced-N/Ultimate-N (iwlwifi) (IWLWIFI ) - Intel Wireless WiFi MVM Firmware support (IWLMVM ) 进行编译: forlinx @ubuntu20 :~/ 3576 /kernel- 6.1 $ export CROSS_COMPILE = /home/forlinx /3576/prebuilts /gcc/linux -x86/aarch64/gcc-arm- 10.3 - 2021.07 -x86_64-aarch64-none-linux-gnu/bin/aarch64-none-linux-gnu- forlinx @ubuntu20 :~/ 3576 /kernel- 6.1 $ export PATH = $PATH :/home/forlinx/ 3576 /prebuilts/gcc/linux-x86/aarch64/gcc-arm- 10.3 - 2021.07 -x86_64-aarch64-none-linux-gnu/bin/ forlinx @ubuntu20 :~/ 3576 /kernel- 6.1 $ make ARCH =arm64 rk3576-evb1-v10-linux.img 最后将编译好的模块自行拷贝到OK3576-C开发板中,我们这里是将模块拷贝到 /root目录中了。模块在内核源码中的路径: (1) drivers/net/wireless/intel/iwlwifi/iwlwifi.ko (2) drivers/net/wireless/intel/iwlwifi/mvm/iwlmvm.ko 除此之外,还需要将Wi-Fi固件和STA脚本拷贝到/root目录中备用。 root@rk3576-buildroot:/root# ls firmware.zip fltest_wifi.sh iwlmvm.ko iwlwifi.ko STA脚本可以参考以下内容,如自行创建脚本,记得要添加可执行权限。 #!/bin/sh cnt1=`ps aux | grep hostapd | grep -v grep | wc -l` if ; then killall hostapd /dev/null fi ifconfig uap0 down function usage () { echo "Usage: -i wifi -s ssid -p password" echo "eg: ./wifi.sh -i mlan0 -s bjforlinx -p 12345678 " echo "eg: ./wifi.sh -i mlan0 -s bjforlinx -p NONE " echo " -i : mlan0 or mlan1" echo " -s : wifi ssid" echo " -p : wifi password or NONE" } function parse_args () { while true ; do case " $1 " in -i ) wifi= $2 ; echo wifi $wifi ; shift 2 ;; -s ) ssid= $2 ; echo ssid $ssid ; shift 2 ;; -p ) pasw= $2 ; echo pasw $pasw ; shift 2 ;; -h ) usage; exit 1 ;; * ) break ;; esac done } if then usage; exit 1; fi parse_args $@ if then rm /etc/wpa_supplicant.conf fi echo \#PSK/TKIP /etc/wpa_supplicant.conf echo ctrl_interface=/var/run/wpa_supplicant /etc/wpa_supplicant.conf echo ctrl_interface_group=0 /etc/wpa_supplicant.conf echo update_config=1 /etc/wpa_supplicant.conf echo network={ /etc/wpa_supplicant.conf echo ssid=\" $ssid \" /etc/wpa_supplicant.conf echo scan_ssid=1 /etc/wpa_supplicant.conf if then echo key_mgmt=NONE /etc/wpa_supplicant.conf else echo psk=\" $pasw \" /etc/wpa_supplicant.conf echo key_mgmt=WPA-EAP WPA-PSK IEEE8021X NONE /etc/wpa_supplicant.conf # echo group=CCMP TKIP WEP104 WEP40 /etc/wpa_supplicant.conf fi echo } /etc/wpa_supplicant.conf ifconfig -a|grep mlan0 |grep -v grep /dev/null if then ifconfig mlan0 down /dev/null fi ifconfig -a|grep mlan1 |grep -v grep /dev/null if then ifconfig mlan1 down /dev/null fi ifconfig -a|grep eth0 |grep -v grep /dev/null if then ifconfig eth0 down /dev/null fi ifconfig -a|grep eth1 |grep -v grep /dev/null if then ifconfig eth1 down /dev/null fi ifconfig -a|grep usb0 |grep -v grep /dev/null if then ifconfig usb0 down /dev/null fi ps -fe|grep wpa_supplicant |grep -v grep /dev/null if then kill -9 $(pidof wpa_supplicant) fi sleep 1 ifconfig $wifi up /dev/null sleep 1 (wpa_supplicant -Dnl80211,wext -i $wifi -c/etc/wpa_supplicant.conf /dev/null) echo "waiting..." sleep 3 wpa_cli -i $wifi status |grep COMPLETED |grep -v grep /dev/null if then dhcpcd -i $wifi echo "Finshed!" else echo "try to connect again..." sleep 3 wpa_cli -i $wifi status |grep COMPLETED |grep -v grep /dev/null if then dhcpcd -i $wifi echo "nameserver 114.114.114.114" /etc/resolv.conf echo "Finshed!" else echo "************************************************" echo "connect faild,please check the passward and ssid" kill -9 $(pidof wpa_supplicant) exit 1 fi fi 接下来就需要将固件部署到板卡的/lib/firmware路径下: root@rk3576-buildroot:/root# unzip firmware.zip -d /lib/ root@rk3576-buildroot:/root# ls /lib/firmware/iwlwifi-ty-a0-gf-a0* /lib/firmware/iwlwifi-ty-a0-gf-a0-59.ucode /lib/firmware/iwlwifi-ty-a0-gf-a0-66.ucode /lib/firmware/iwlwifi-ty-a0-gf-a0-71.ucode /lib/firmware/iwlwifi-ty-a0-gf-a0-72.ucode /lib/firmware/iwlwifi-ty-a0-gf-a0-73.ucode /lib/firmware/iwlwifi-ty-a0-gf-a0-74.ucode /lib/firmware/iwlwifi-ty-a0-gf-a0-77.ucode /lib/firmware/iwlwifi-ty-a0-gf-a0-78.ucode /lib/firmware/iwlwifi-ty-a0-gf-a0-79.ucode /lib/firmware/iwlwifi-ty-a0-gf-a0-81.ucode /lib/firmware/iwlwifi-ty-a0-gf-a0-83.ucode /lib/firmware/iwlwifi-ty-a0-gf-a0-84.ucode /lib/firmware/iwlwifi-ty-a0-gf-a0-86.ucode /lib/firmware/iwlwifi-ty-a0-gf-a0-89.ucode /lib/firmware/iwlwifi-ty-a0-gf-a0.pnvm 接下来就可以加载模块了: root@rk3576-buildroot:/root# insmod iwlwifi.ko Intel(R) Wireless WiFi driver for Linux iwlwifi 0000:01:00.0: api flags index 2 larger than supported by driver iwlwifi 0000:01:00.0: TLV_FW_FSEQ_VERSION: FSEQ Version: 0.0 .2 .36 iwlwifi 0000:01:00.0: loaded firmware version 72. a764baac.0 ty-a0-gf-a0-72.ucode op_mode iwlmvm root@rk3576-buildroot:/root# insmod iwlmvm.ko iwlwifi 0000:01:00.0: Detected Intel(R) Wi-Fi 6 AX210 160MHz, REV=0x420 thermal thermal_zone6: power_allocator: sustainable_power will be estimated thermal thermal_zone6: failed to read out thermal zone (-61) iwlwifi 0000:01:00.0: loaded PNVM version 35148b80 iwlwifi 0000:01:00.0: Detected RF GF, rfid=0x10d000 iwlwifi 0000:01:00.0: base HW address: 4c:49:6c:f0:99:7a iwlwifi 0000:01:00.0 wlp1s0: renamed from wlan0 如有上述信息,说明模块已经加载成功,即可看到网卡节点信息: root @rk 3576 -buildroot :/root# ifconfig wlp1s0 wlp1s0 Link encap :Ethernet HWaddr 4 C : 49 : 6 C :F0: 99 : 7 A BROADCAST MULTICAST MTU : 1500 Metric : 1 RX packets : 0 errors : 0 dropped : 0 overruns : 0 frame : 0 TX packets : 0 errors : 0 dropped : 0 overruns : 0 carrier : 0 collisions : 0 txqueuelen : 1000 RX bytes : 0 ( 0.0 B) TX bytes : 0 ( 0.0 B) 下面开始测试STA模式: root@rk3576-buildroot:/root# ./fltest_wifi.sh -i wlp1s0 -s forlinx-wlan -p fl03123102650 ifconfig: SIOCGIFFLAGS: No such device wifi wlp1s0 ssid forlinx-wlan pasw fl03123102650 rk_gmac-dwmac 2a220000.ethernet eth0: FPE workqueue stop waiting... try to connect again... wlp1s0: authenticate with ee:b9:70:81:7d:88 wlp1s0: send auth to ee:b9:70:81:7d:88 (try 1 /3) wlp1s0: send auth to ee:b9:70:81:7d:88 (try 2 /3) wlp1s0: send auth to ee:b9:70:81:7d:88 (try 3 /3) wlp1s0: authenticated wlp1s0: associate with ee:b9:70:81:7d:88 (try 1 /3) wlp1s0: RX AssocResp from ee:b9:70:81:7d:88 (capab=0x1931 status=0 aid=42) wlp1s0: associated IPv6: ADDRCONF(NETDEV_CHANGE): wlp1s0: link becomes ready main: control_open: Connection refused dhcpcd-10.0.4 starting dev: loaded udev DUID 00 :01:00:01:c7:92:c8:aa:4c:49:6c:f0:99:7a wlp1s0: connected to Access Point: forlinx-wlan wlp1s0: IAID 6c:f0:99:7a wlp1s0: soliciting an IPv6 router wlp1s0: rebinding lease of 192.168 .81 .206 wlp1s0: NAK: from 192.168 .80 .1 wlp1s0: soliciting a DHCP lease wlp1s0: offered 192.168 .81 .206 from 192.168 .80 .1 wlp1s0: probing address 192.168 .81 .206 /23 wlp1s0: leased 192.168 .81 .206 for 28800 seconds wlp1s0: adding route to 192.168 .80 .0 /23 wlp1s0: adding default route via 192.168 .80 .1 forked to background, child pid 1185 dhcpcd_fork_cb: truncated read 0 (expected 4 ) Finshed! 测试ping到飞凌嵌入式官网,查看是否可以正常上网: root @rk 3576 -buildroot :/root# ifconfig wlp1s0 wlp1s0 Link encap :Ethernet HWaddr 4 C : 49 : 6 C :F0: 99 : 7 A inet addr : 192.168 . 81.206 Bcast : 192.168 . 81.255 Mask : 255.255 . 254.0 inet6 addr : fe80:: 4 e49: 6 cff :fef0: 997 a/ 64 Scope :Link UP BROADCAST RUNNING MULTICAST MTU : 1500 Metric : 1 RX packets : 1547 errors : 0 dropped : 93 overruns : 0 frame : 0 TX packets : 21 errors : 0 dropped : 0 overruns : 0 carrier : 0 collisions : 0 txqueuelen : 1000 RX bytes : 150462 ( 146.9 KiB) TX bytes : 3123 ( 3.0 KiB) root @rk 3576 -buildroot :/root# ping www.forlinx.com PING s- 526319 .gotocdn.com ( 211.149 . 226.120 ) 56 ( 84 ) bytes of data. 64 bytes from 211.149 . 226.120 ( 211.149 . 226.120 ): icmp_seq= 1 ttl= 54 time= 45.9 ms 64 bytes from 211.149 . 226.120 ( 211.149 . 226.120 ): icmp_seq= 2 ttl= 54 time= 40.1 ms 64 bytes from 211.149 . 226.120 ( 211.149 . 226.120 ): icmp_seq= 3 ttl= 54 time= 39.8 ms 64 bytes from 211.149 . 226.120 ( 211.149 . 226.120 ): icmp_seq= 4 ttl= 54 time= 40.8 ms 64 bytes from 211.149 . 226.120 ( 211.149 . 226.120 ): icmp_seq= 5 ttl= 54 time= 40.5 ms ^C --- s- 526319 .gotocdn.com ping statistics --- 5 packets transmitted, 5 received, 0% packet loss, time 4007ms rtt min/avg/max/mdev = 39.813 / 41.401 / 45.867 / 2.257 m 可以看到ping飞凌嵌入式官网是正常的,这样小编就把STA模式配置好了。 那么,AP模式如何开启?接下来,我们就介绍一下如何配置AP模式。 第一步还是需要编写AP模式脚本。小编 将脚本放在了/usr/bin/目录中,文件名称为fltest_hostapd.sh ,同样的也需要配置可执行权限。 #!/bin/sh cnt=`ps aux | grep wpa_supplicant | grep -v grep | wc -l` if ; then killall wpa_supplicant /dev/null fi cnt1=`ps aux | grep hostapd | grep -v grep | wc -l` if ; then killall hostapd /dev/null fi /etc/init.d/S80dnsmasq stop echo 1 /proc/sys/net/ipv4/ip_forward #iptables -t nat -A POSTROUTING -o eth0 -j MASQUERADE sleep 1 ifconfig wlp1s0 192.168.2.1 hostapd /etc/hostapd-2.4g.conf #hostapd /etc/hostapd-5g.conf /etc/init.d/S80dnsmasq start 以上就是fltest_hostapd.sh脚本的全部内容。在fltest_hostapd.sh脚本中,还用到了/etc/hostapd-2.4g.conf配置文件,以下是文件的配置内容: interface =wlp1s0 driver =nl80211 channel = 9 hw_mode =g auth_algs = 1 ieee80211n = 1 wpa = 1 ssid =OK3576_WIFI_2. 4 G_AP //AP模式wifi名称 wpa_passphrase = 12345678 //AP模式WiFi密码 wpa_key_mgmt =WPA-PSK wpa_pairwise =TKIP rsn_pairwise =CCMP 下面还需要配置下dnsmasq.conf服务: root@rk3576-buildroot:/root# vi /etc/dnsmasq.conf interface=wlp1s0 bind-interfaces except-interface=lo dhcp-range= 192.168.2.100 , 192.168.2.254 , 12h dhcp-option= 3,192.168.2 . 1 dhcp-option= 6,192.168.2 . 1 有的朋友可能就要问了,在其他系统上使用的是udhcpd服务,为什么在这里使用的DNSmasq服务?下面就简单介绍一下这两个服务的区别: (1)udhcpd 是来自 BusyBox 工具集的 DHCP 服务器程序。主要的功能是为本地网络设备分配动态IP地址、子网掩码、网关等信息。DHCP服务本身是不包含DNS转发或其他的网络服务。 (2)DNSmasq 是一个轻量级的 DNS 转发器和 DHCP 服务器软件。 ① 可以将DNS查询的请求转发到上游DNS服务器,并缓存这些查询结果,目的是为了提高网络应用的响应速度。 ② 做DHCP服务器时与第一条udhcpd服务功能相同,这里就不做重复介绍了。 此外,应用场景也不同,DNSmasq主要用于小型网络环境。易于配置和管理,如家庭网络、小型办公室和路由器中;而udhpcd服务适合用于嵌入式系统或者资源有限的环境中。 扩展知识介绍完毕,下面就开启AP模式: root @rk 3576 -buildroot :/root# fltest_hostapd.sh wlp1s0: deauthenticating from ee :b9: 70 : 81 : 7 d : 88 by local choice ( Reason : 3 =DEAUTH_LEAVING) killall : hostapd : no process killed Stopping dnsmasq : FAIL Starting dnsmasq : OK IPv6: ADDRCONF(NETDEV_CHANGE): wlp1s0: link becomes ready wlp1s0: interface state UNINITIALIZED-ENABLED wlp1s0: AP-ENABLED root @rk 3576 -buildroot :/root# ifconfig wlp1s0 wlp1s0 Link encap :Ethernet HWaddr 4 C : 49 : 6 C :F0: 99 : 7 A inet addr : 192.168 . 2.1 Bcast : 192.168 . 2.255 Mask : 255.255 . 255.0 UP BROADCAST RUNNING MULTICAST MTU : 1500 Metric : 1 RX packets : 50382 errors : 0 dropped : 2982 overruns : 0 frame : 0 TX packets : 261 errors : 0 dropped : 0 overruns : 0 carrier : 0 collisions : 0 txqueuelen : 1000 RX bytes : 4291281 ( 4.0 MiB) TX bytes : 27170 ( 26.5 KiB) 下面就是要使用手机连接飞凌嵌入式OK3576-C开发板的热点了。 root @rk3576 - buildroot: / root# ping 192.168 .2 .225 PING 192.168 .2 .225 ( 192.168 .2 .225 ) 56 ( 84 ) bytes of data. 64 bytes from 192.168 .2 .225 : icmp_seq = 1 ttl = 64 time = 142 ms 64 bytes from 192.168 .2 .225 : icmp_seq = 2 ttl = 64 time = 60.1 ms 64 bytes from 192.168 .2 .225 : icmp_seq = 3 ttl = 64 time = 88.2 ms 64 bytes from 192.168 .2 .225 : icmp_seq = 4 ttl = 64 time = 110 ms 64 bytes from 192.168 .2 .225 : icmp_seq = 5 ttl = 64 time = 69.9 ms ^ C --- 192.168.2.225 ping statistics --- 5 packets transmitted, 5 received, 0 % packet loss, time 4004 ms 到此,一个新的AX210NGW Wi-Fi 6E模块就已经适配完成了。小编在这里想告诉大家的是,PCIe Wi-Fi模块的适配思路都是一样的,如果有其他Wi-Fi模块,大家也可以参考此方法动手尝试。