
$ sudo vi /etc/netplan/00-installer-config.yaml
# This is the network config written by 'subiquity'
network:
renderer: networkd
ethernets:
ens33:
# dhcp4: true
addresses:
- 192.168.4.251/24
nameservers:
addresses: [4.2.2.2,8.8.8.8]
routes:
- to: default
via: 192.168.4.1
version: 2
$ sudo netplan apply
$ ip addr show ens33
$ ip route show
$ reboot
sudo apt-get install git wget flex bison gperf python3-pip python3-venv cmake ninja-build ccache libffi-dev libssl-dev dfu-util libusb-1.0-0 net-tools
$ mkdir esp32
$ cd esp32$ git clone https://gitee.com/EspressifSystems/esp-gitee-tools.git$ cd esp-gitee-tools
$ ./jihu-mirror.sh set$ cd ..
$ git clone --recursive https://github.com/espressif/esp-idf.git$ cd esp-idf
$ git checkout v5.3
$ git submodule update --init --recursive
如果提示失败或有错误试下这句:../esp-gitee-tools/submodule-update.sh$ pip config set global.index-url http://mirrors.aliyun.com/pypi/simple
$ pip config set global.trusted-host mirrors.aliyun.com$ ../esp-gitee-tools/install.sh
$ source export.sh
$ echo "source ~/esp32/esp-idf/export.sh" >> ~/.bashrc$ sudo usermod -aG dialout usrname usrname需要换成你的用户名
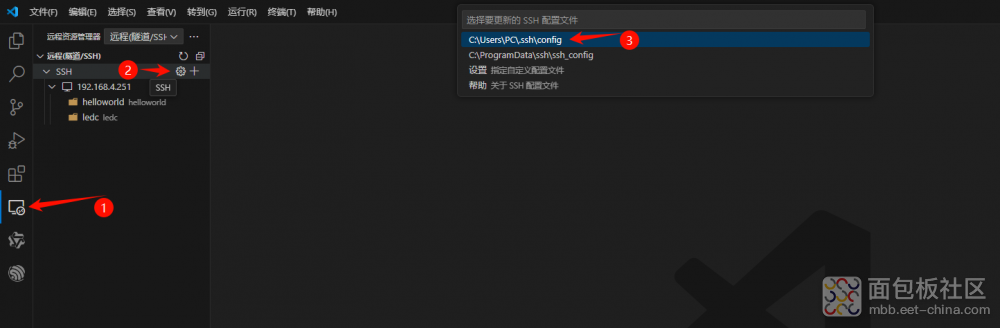
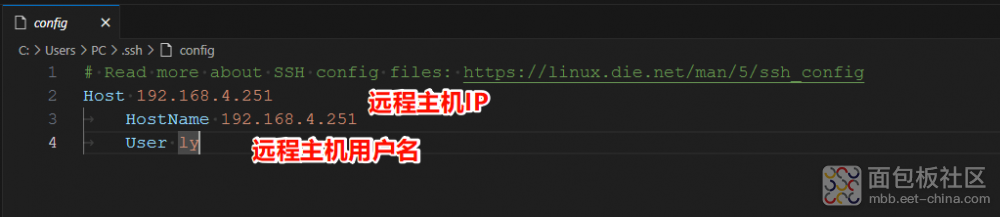
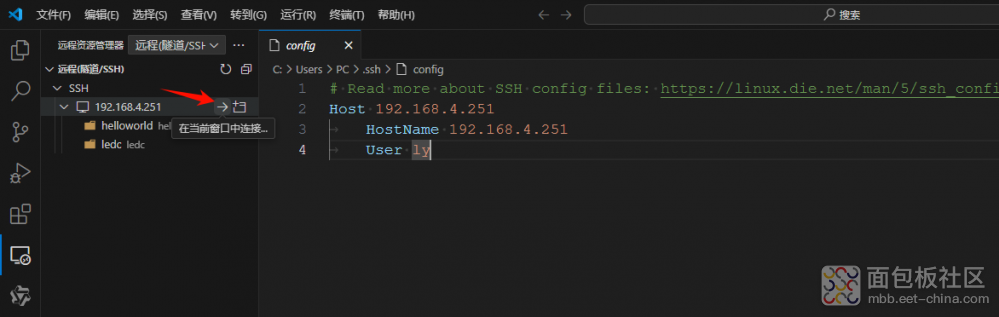
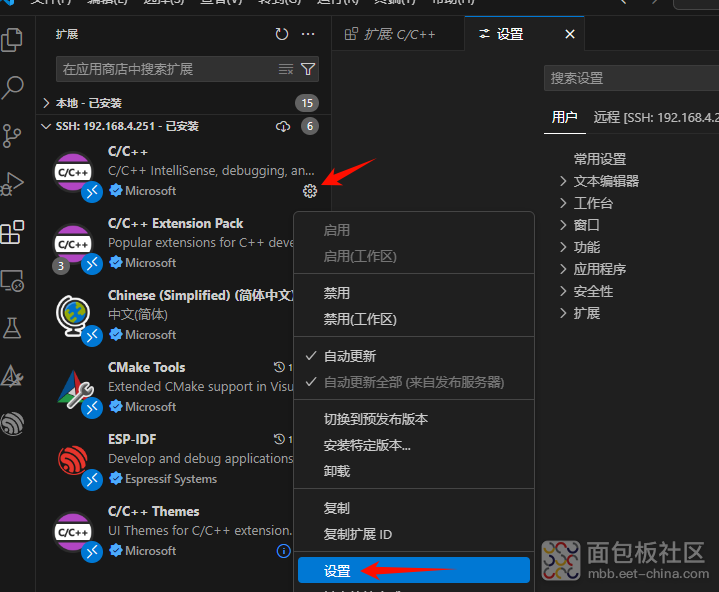
这样就可以建立远程连接了,代码就可以在vscode进行查看和更改,但是我们会发现每次都需要输入密码,我们通过如下方式解决
解决使用VsCode远程ssh连接虚拟机ubuntu需要重复输入密码

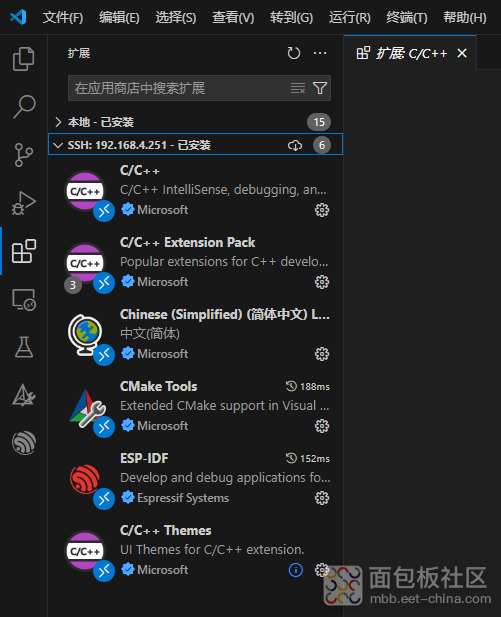
19. 按照上图依次安装如下插件

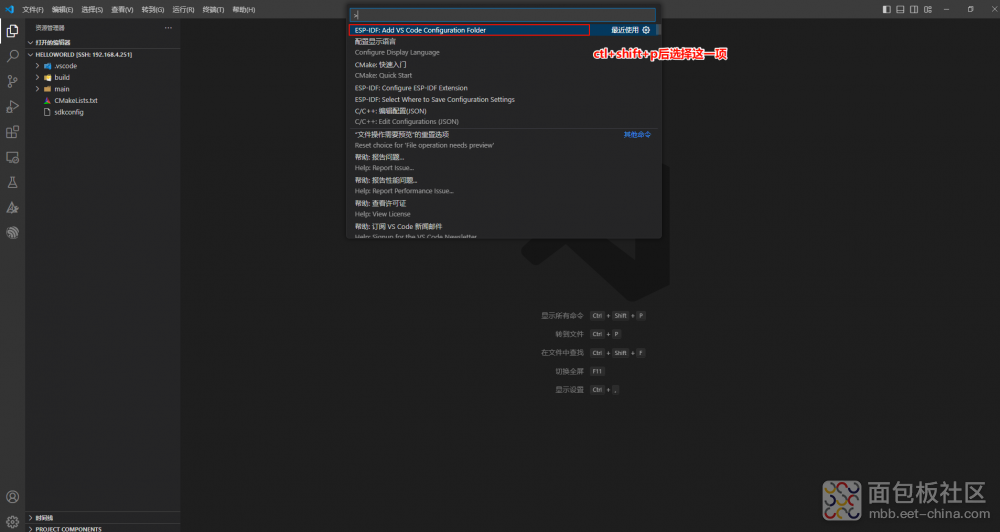
键盘同时按下ctl+shift+p,在弹出的对话框输入如下,这样我们就可以任意查看和跳转代码位置了。
![]()
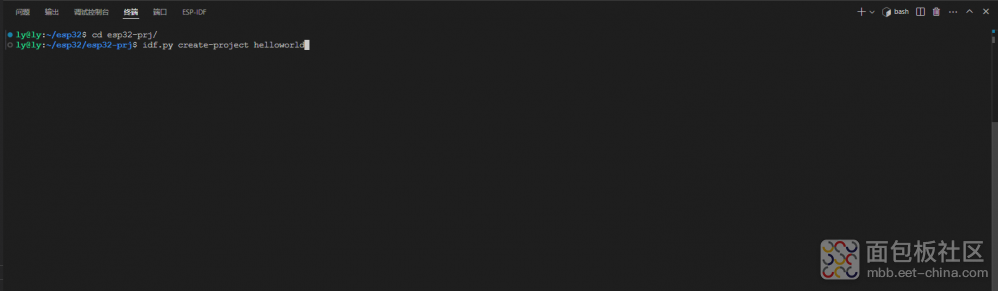
mkdir esp32-prj
cd esp32-prj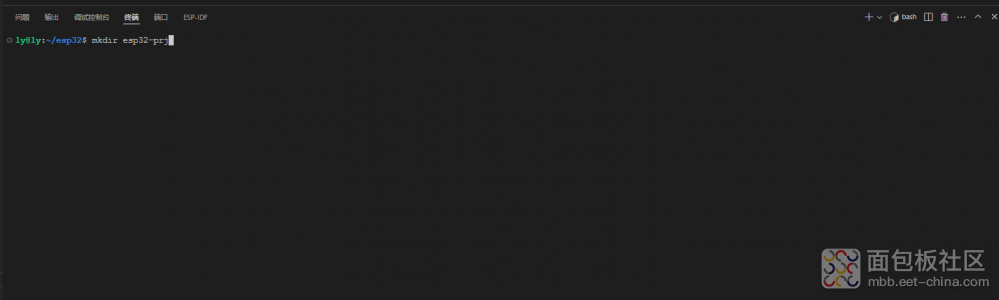
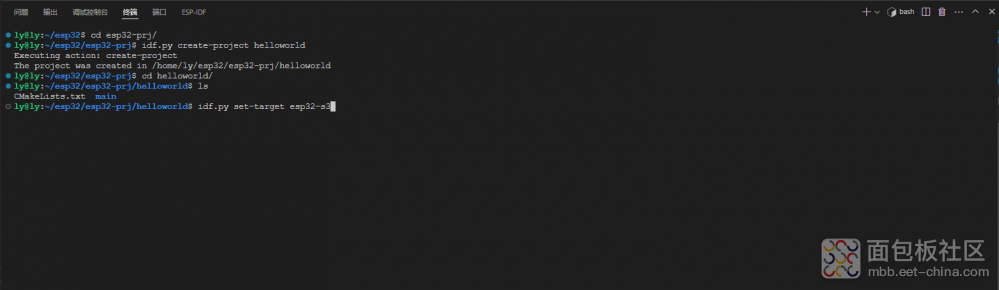
idf.py create-project helloworld
idf.py set-target esp32-s3
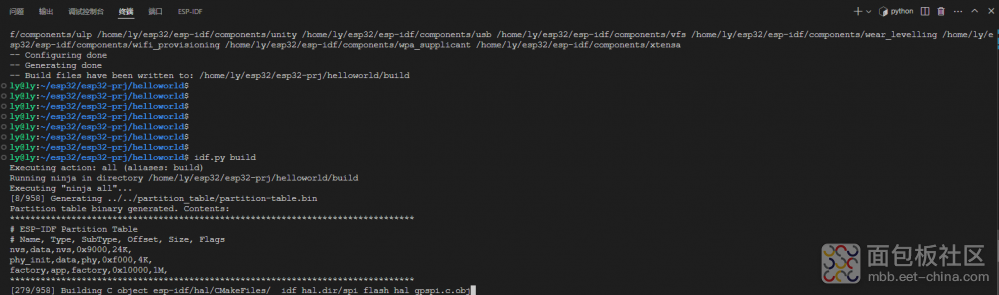
idf.py build

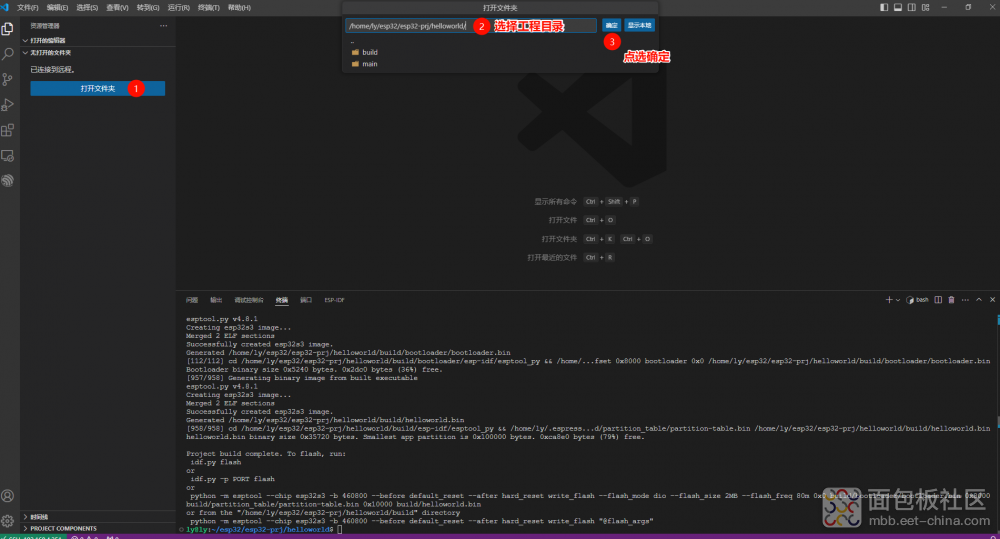

idf.py flash

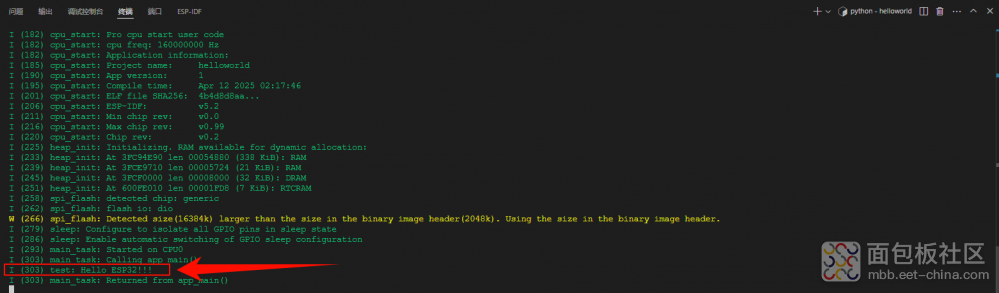
idf.py monitor
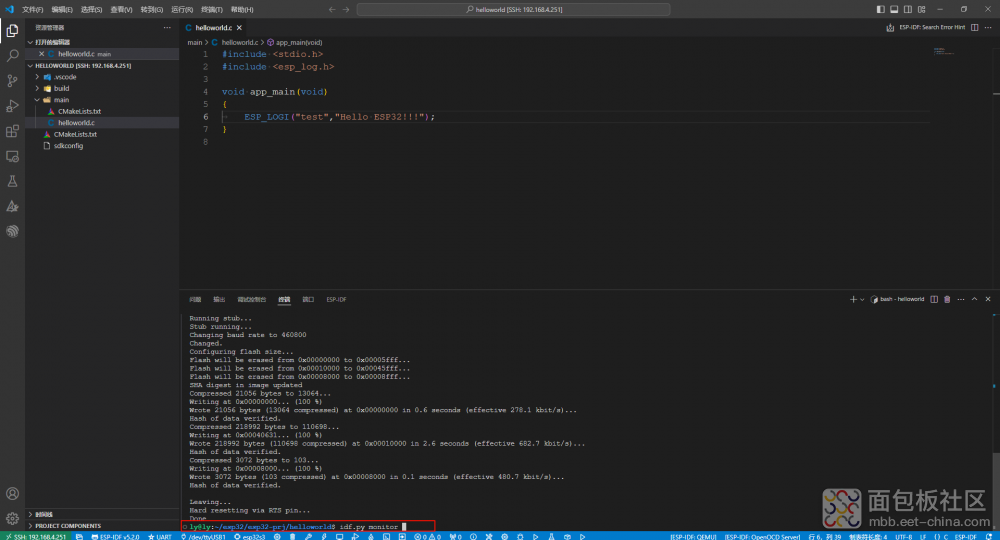
退出监控使用CTL+]组合键
idf.py flash monitor
作者: 二月半, 来源:面包板社区
链接: https://mbb.eet-china.com/blog/uid-me-1862109.html
版权声明:本文为博主原创,未经本人允许,禁止转载!


 /3
/3 


小手凉凉 2025-4-21 10:23
zhusx123 2025-4-20 17:00