各种类型的数据传输和存储就涉及到大小端的问题,首先要简单说下芯片的大小端问题,这里主要讨论Cortex-M内核。
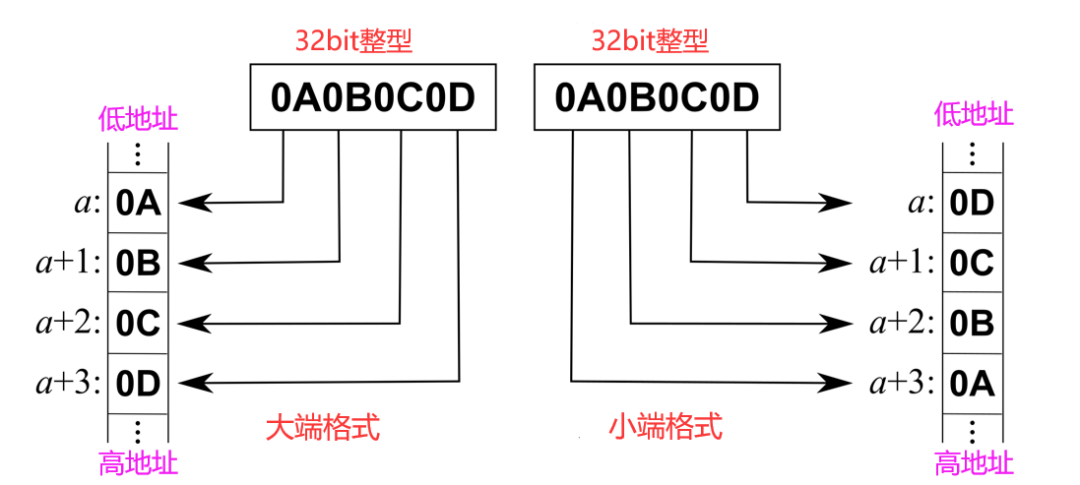
M内核支持大端或者小端,实际应用中大部分内核都是小端。以STM32为例,全部都是小端,而且是芯片设计之初就固化进去的,不可修改。
市面上其他厂家基本也都固化的小端格式。
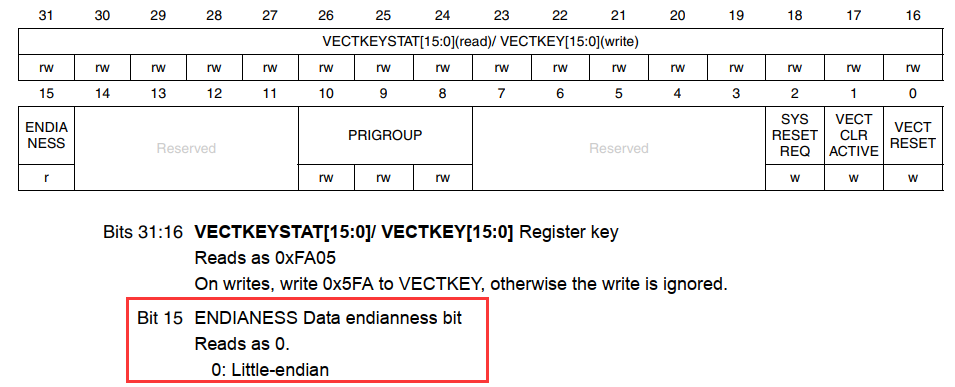
F1编程手册
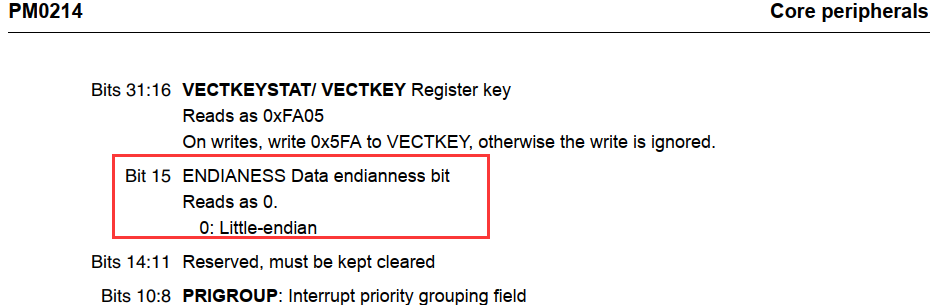
F3和F4编程手册
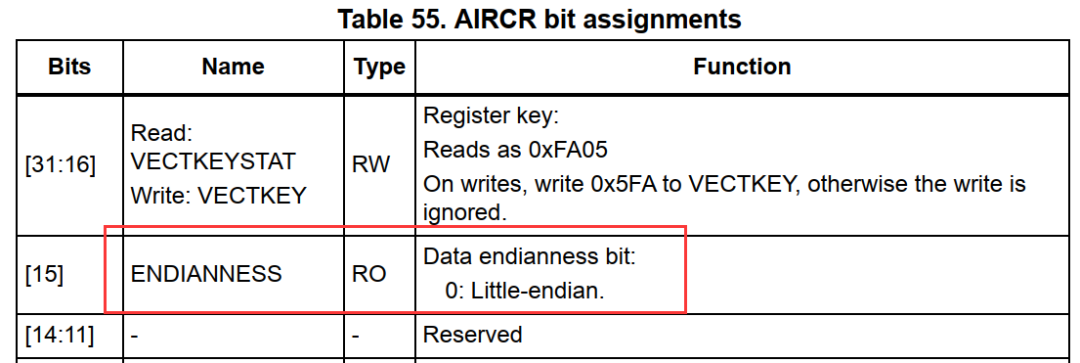
F7和H7编程手册
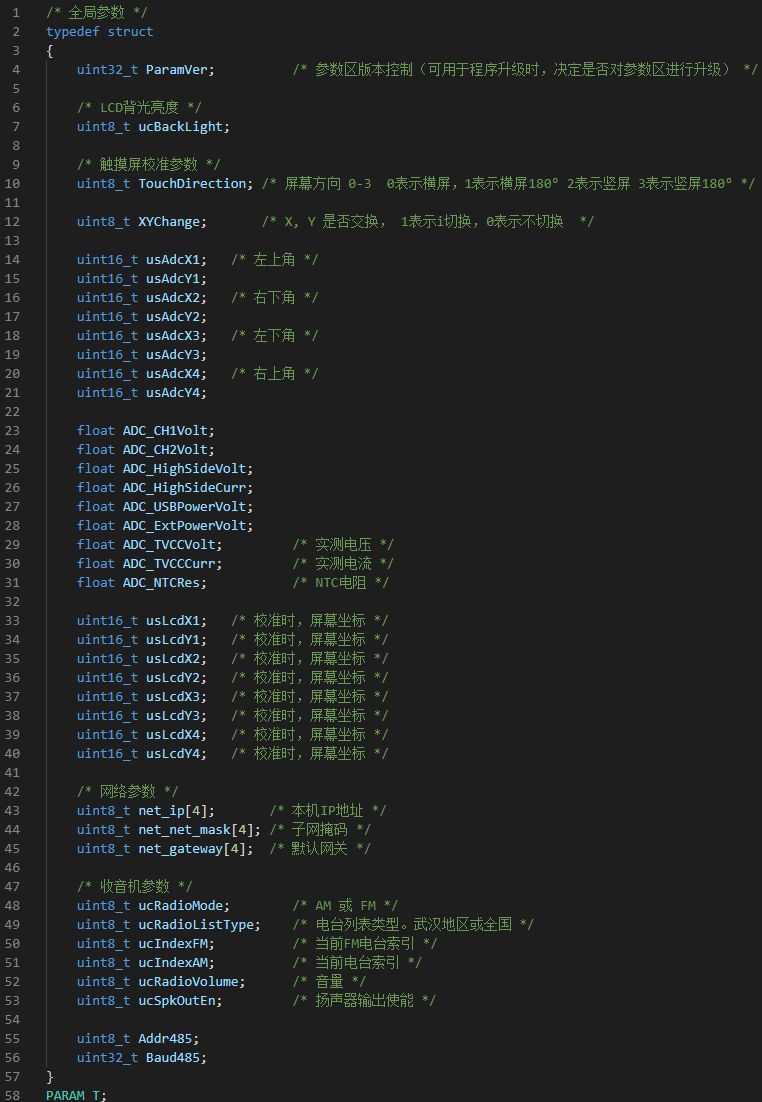
各种数据类型编程EEPROM,SPI Flash等存储器的简易方法,一般这些存储器都是字节编程,写入浮点等数据类型时不太方便。这里分享一个方法,定义一个结构体,将各种数据类型封装进去:
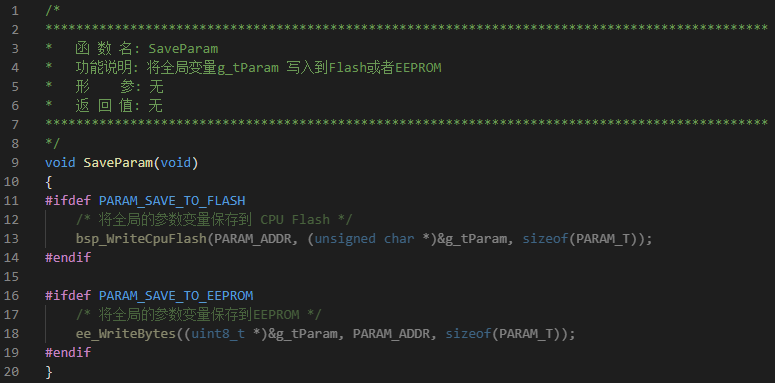
写入的时候采用下面方式:
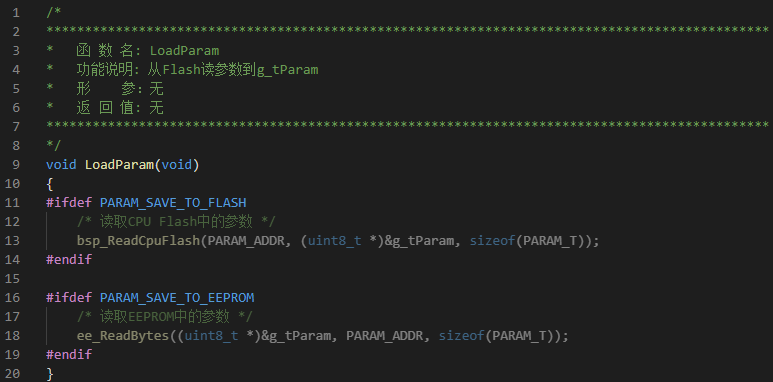
读取时可以采用下面方式:
各种数据类型的SPI,UART,I2C等传输问题。这里我们以串口通信为例,比如主机要发送如下格式数据给从机:
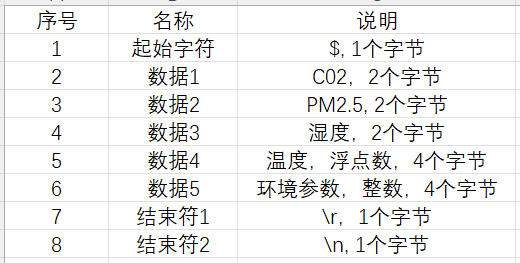
我们可以做一个如下结构体格式:
typedef struct { uint8_t ucStart; uint16_t usCO2; uint16_t usPM25; uint16_t usHumidity; float Temprature; uint32_t ulParam; uint8_t ucEnd1; uint8_t ucEnd2;
}
UART_T;

UART_T g_tUartParam;
主机发送的时候我们就可以采用如下方法:
comSendBuf(COM1, (uint8_t *)&g_tUartParam, sizeof(UART_T));
从机工程也定义一个同样的结构体变量,比如我们把接收到一帧数据存到缓冲uint8_t buf[50]里面了。
我们就可以定义一个结构体指针变量:
UART_T *pUartParam;
pUartParam = (UART_T *)buf;
那么我们就可以pUartParam->usCO2,pUartParam->Temprature等方式来访问,非常方便。
代码实现
结构体数据如下:
typedef struct { uint8_t ucStart; uint16_t usCO2; uint16_t usPM25; uint16_t usHumidity; float Temprature; uint32_t ulParam; uint8_t ucEnd1; uint8_t ucEnd2;
}
USART_T;

USART_T g_tUartParam; /* 串口1发送数据使用 */ USART_T *pUartParam; /* 串口2接数据使用 */ uint8_t buf[128]; /* 接收记录缓冲 */
数据收发处理:
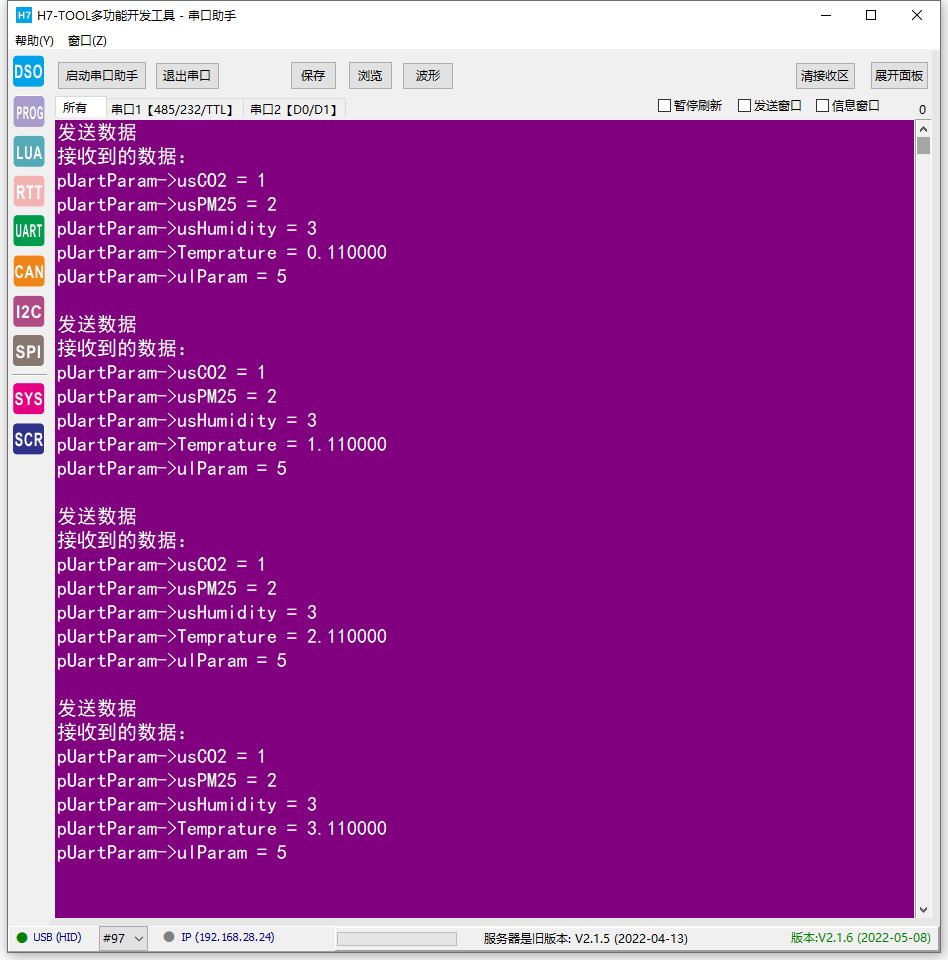
/*
*********************************************************************************************************
*        函 数 名: main
*        功能说明: c程序入口
*        形    参: 无
*        返 回 值: 错误代码(无需处理)
*********************************************************************************************************
*/ int main(void) { uint8_t ucKeyCode; uint8_t read; uint8_t ucStatus = 0; /* 状态机标志 */ uint8_t ucCount=0; float ftest = 0.11f;
        pUartParam = (USART_T *)buf;


        bsp_Init(); /* 硬件初始化 */ PrintfLogo(); /* 打印例程名称和版本等信息 */ PrintfHelp(); /* 打印操作提示 */ bsp_StartAutoTimer(0, 100); /* 启动1个100ms的自动重装的定时器 */ memset(buf, 0, 128); /* 进入主程序循环体 */ while (1)
        {
                bsp_Idle(); /* 这个函数在bsp.c文件。用户可以修改这个函数实现CPU休眠和喂狗 */ /* 判断定时器超时时间 */ if (bsp_CheckTimer(0))
                { /* 每隔100ms 进来一次 */ bsp_LedToggle(2);
                } /* 按键滤波和检测由后台systick中断服务程序实现,我们只需要调用bsp_GetKey读取键值即可。 */ ucKeyCode = bsp_GetKey(); /* 读取键值, 无键按下时返回 KEY_NONE = 0 */ if (ucKeyCode != KEY_NONE)
                { switch (ucKeyCode)
                        { case KEY_DOWN_K1: /* K1键按下,串口1发送数据给串口2 */ g_tUartParam.ucStart = '$';
                                        g_tUartParam.usCO2 = 1;
                                        g_tUartParam.usPM25 = 2;
                                        g_tUartParam.usHumidity = 3;
                                        g_tUartParam.Temprature = ftest++;
                                        g_tUartParam.ulParam = 5;
                                        g_tUartParam.ucEnd1 = '\r';
                                        g_tUartParam.ucEnd2 = '\n';
                                        comSendBuf(COM1, (uint8_t *)&g_tUartParam, sizeof(UART_T)); printf("发送数据完成\r\n"); break; default: /* 其它的键值不处理 */ break;
                        }
                } /* 串口2接收数据解析处理 */ if (comGetChar(COM2, &read))
                { switch (ucStatus)
                        { /* 状态0保证接收到0x01 */ case 0: if(read == '$')
                                        {
                                                ucStatus = 1;
                                                buf[ucCount++] = read;
                                        } break; case 1:
                                        buf[ucCount] = read; /* 接收够15个数据 */ if((buf[ucCount-1] == '\r')&&(buf[ucCount] == '\n'))
                                        { /* 打印接收到的数据值 */ printf("接收到的数据:\r\n"); printf("pUartParam->usCO2 = %d\r\n", pUartParam->usCO2); printf("pUartParam->usPM25 = %d\r\n", pUartParam->usPM25); printf("pUartParam->usHumidity = %d\r\n", pUartParam->usHumidity); printf("pUartParam->Temprature = %f\r\n", pUartParam->Temprature); printf("pUartParam->ulParam = %d\r\n", pUartParam->ulParam); printf("\r\n"); memset(buf, 0, 128);
                                                ucStatus = 0;
                                                ucCount=0;
                                        } else {
                                                ucCount++;
                                        } break; default: break;
                        }
                }
        }
}
测试效果
 0
0