


修改源码目录结构
先在./applications/sample/wifi-iot/app路径下新建一个目录(或一套目录结构),用于存放业务源码文件。
本例程:在app下新增业务chuankou,其中hello_world.c为业务代码,BUILD.gn为编译脚本,具体规划目录结构如下:
.
└── applications
└── sample
└── wifi-iot
└── app
│── chuankou
│ │── hello_world.c
│ └── BUILD.gn
└── BUILD.gn
.

业务代码。
新建./applications/sample/wifi-iot/app/chuankou下的hello_world.c文件,在hello_world.c中新建业务入口函数HelloWorld,并实现业务逻辑。并在代码最下方,使用HarmonyOS启动恢复模块接口SYS_RUN()启动业务。(SYS_RUN定义在ohos_init.h文件中)
- BUILD.gn为编译脚本
- hello_world.c为业务逻辑代码所在文件
#include <stdio.h>#include "ohos_init.h" #include "ohos_types.h" void led(void) { int i=0; for(i=0;i<4;i++)//输出四遍 { printf("[DEMO] zhangyang.\n"); } } SYS_RUN(led);
复制代码BUILD.gn(app/BUILD.gn)
static_library("bahuyang") { sources = [ "led.c" ] include_dirs = [ "//utils/native/lite/include" ] }
复制代码- “bahuyang”:是生成静态库名称,可随意更改
- “led.c”:代码文件
import("//build/lite/config/component/lite_component.gni")lite_component("app") { features = [ # "startup", "chuankou:bahuyang" ] }
复制代码- 将"startup"注释,运行我们自己的文件
- “chuankou”:工程目录
- bahuyang:静态库文件
我在以前的文章里,详细讲解了怎样编译。大家可以回头看看。
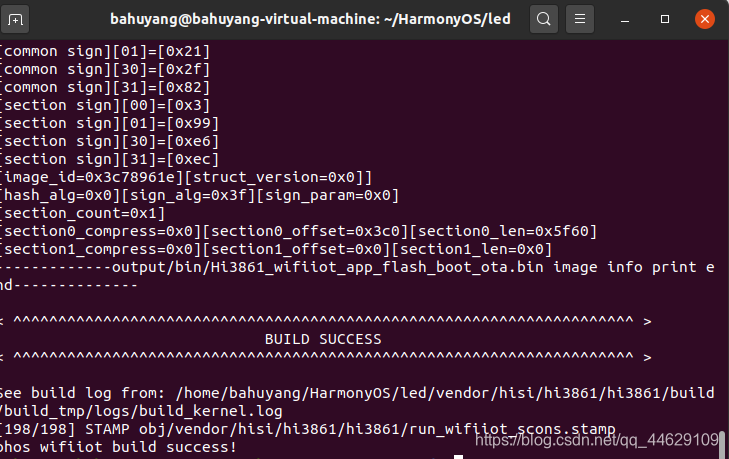
我们进入终端面板下,在对应工程目录下,输入python build.py wifiiot
进行编译,当出现编译成功时,就代表编译完成。
利用HiBurn工具进行烧录,我在以前的文章里,详细讲过。

选定文件后,点击connect,按下开发板复位按钮,进行烧录。
烧录完成后,再次按下复位按键。
选择波特率115200,连接相应串口,观看串口调试助手的结果。


 /5
/5 

