收到开发板之前就已经把coremark移植好了,想先测试下芯片性能。最近公司业务比较急,加班到很晚,收到开发板了也没空跑,现在先把移植的过程发出。
开发板资料:https://www.artinchip.com/knowledge/oxy_ex-1/topics/d133cbs-risc-v-kunlun-pi-v1-0-d13x.html
Luban-Lite SDK:https://gitee.com/artinchip/luban-lite.git
D133CBS RISC-V KunLun Pi
源码仓库:https://gitee.com/artinchip
主要特性:
开发板主控为 D133CBS (8M PSRAM),可 Pin to Pin 兼容 D133CCS(16M PSRAM)
片上 1MB SRAM,片上 8MB PSRAM(视主控型号决定)
NOR FLASH 16MB

VScode使用方法:https://www.artinchip.com/knowledge/oxy_ex-1/topics/vscode-luban-lite.html
Luban-Lite 还提供了其他快捷命令,包括:
- list - 列出当前所有方案配置
- menuconfig - 打开 menuconfig 配置界面
- info - 查看当前的方案配置
- scons --apply-def=xxx_defconfig // 加载应用上述列表其中一条工程配置
- scons apply-def=10 使用方案10
- scons --target=eclipse // 生成当前工程对应的 Eclipse 工程文件
- scons --target=eclipse_sdk // 生成当前工程对应的完整 Eclipse SDK 工程
生成工程后上传到gitee:https://gitee.com/hekun11/kunlunpi_d133cbs.git
下载安装最新版eclipse,导入工程
下载coremark源码,地址:https://github.com/eembc/coremark.git
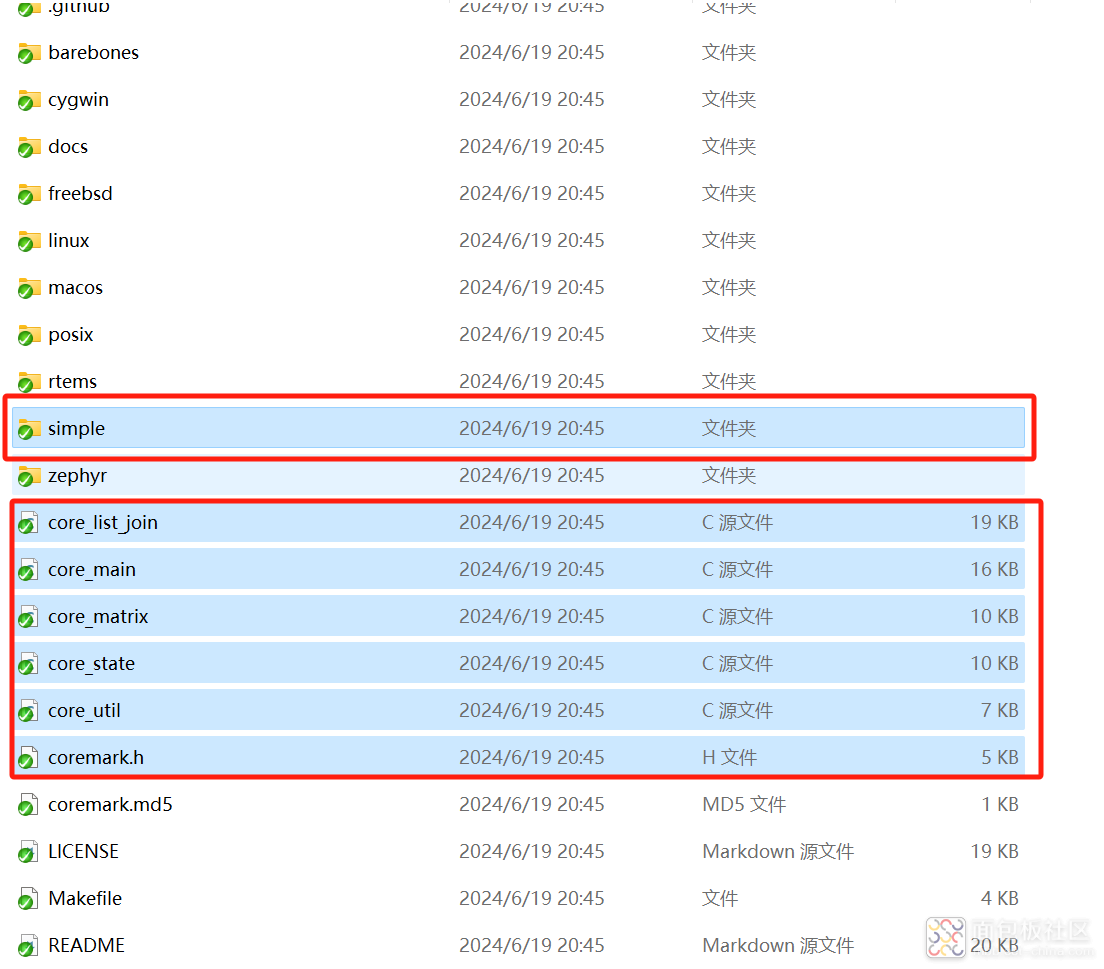
拷贝到application目录下
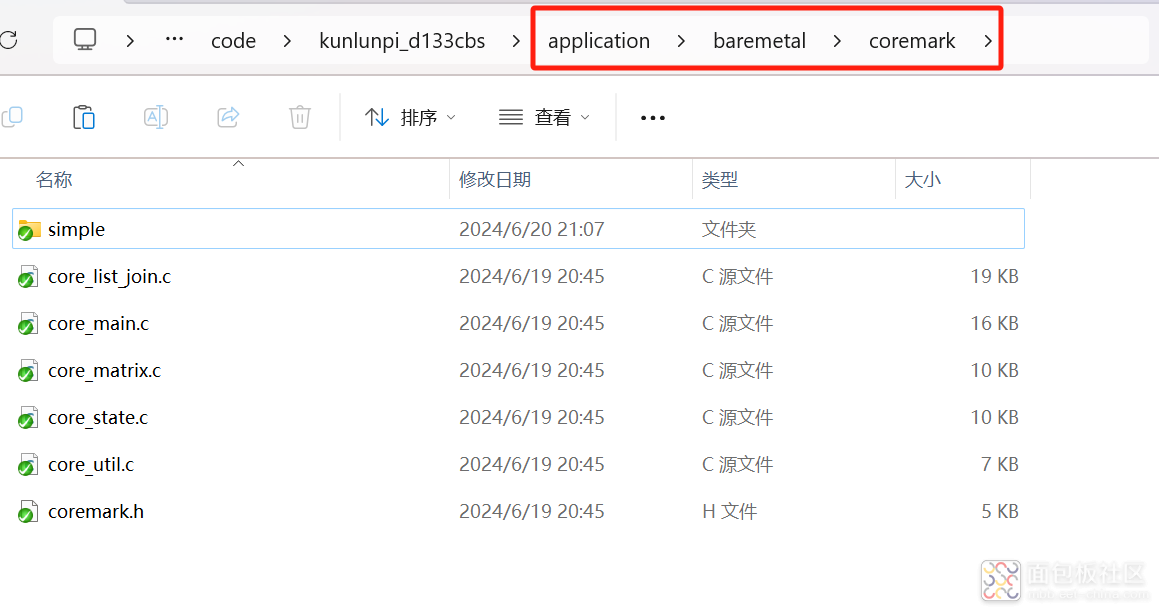
修改core_portme.c文件
core_portme.c文件中,需要修改的是计时的几个宏定义,具体如下:
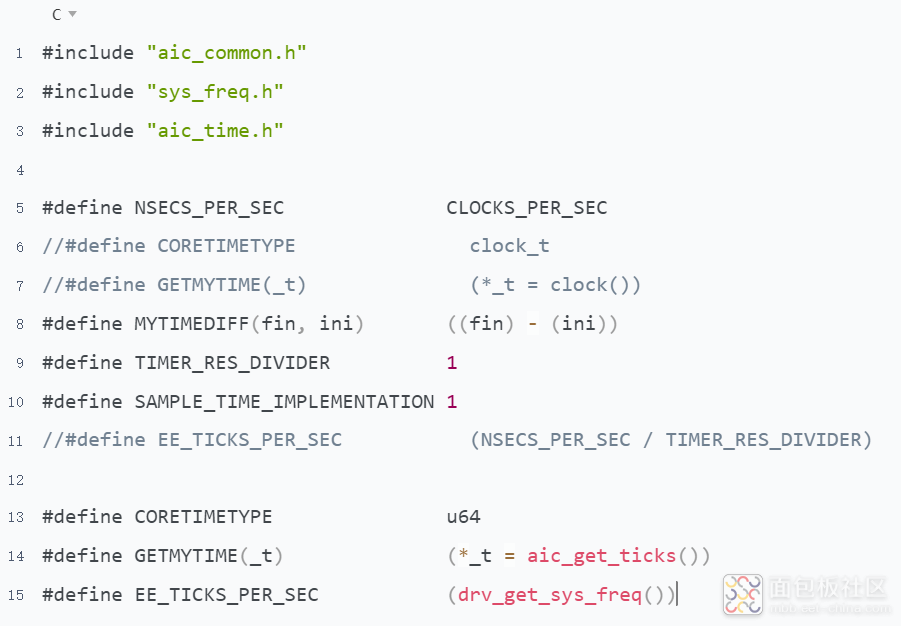
修改core_portme.h文件
core_portme.h文件中,需要新增几个宏定义:

core_main.c中,将main函数重命名为coremark_main:
coreamrk.h中,添加coremark_main声明的代码:
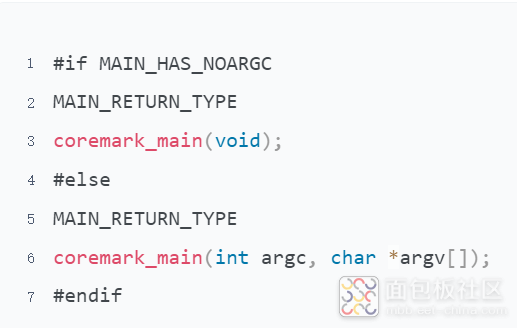
main函数中添加#include"coremark.h"并调用coremark_main
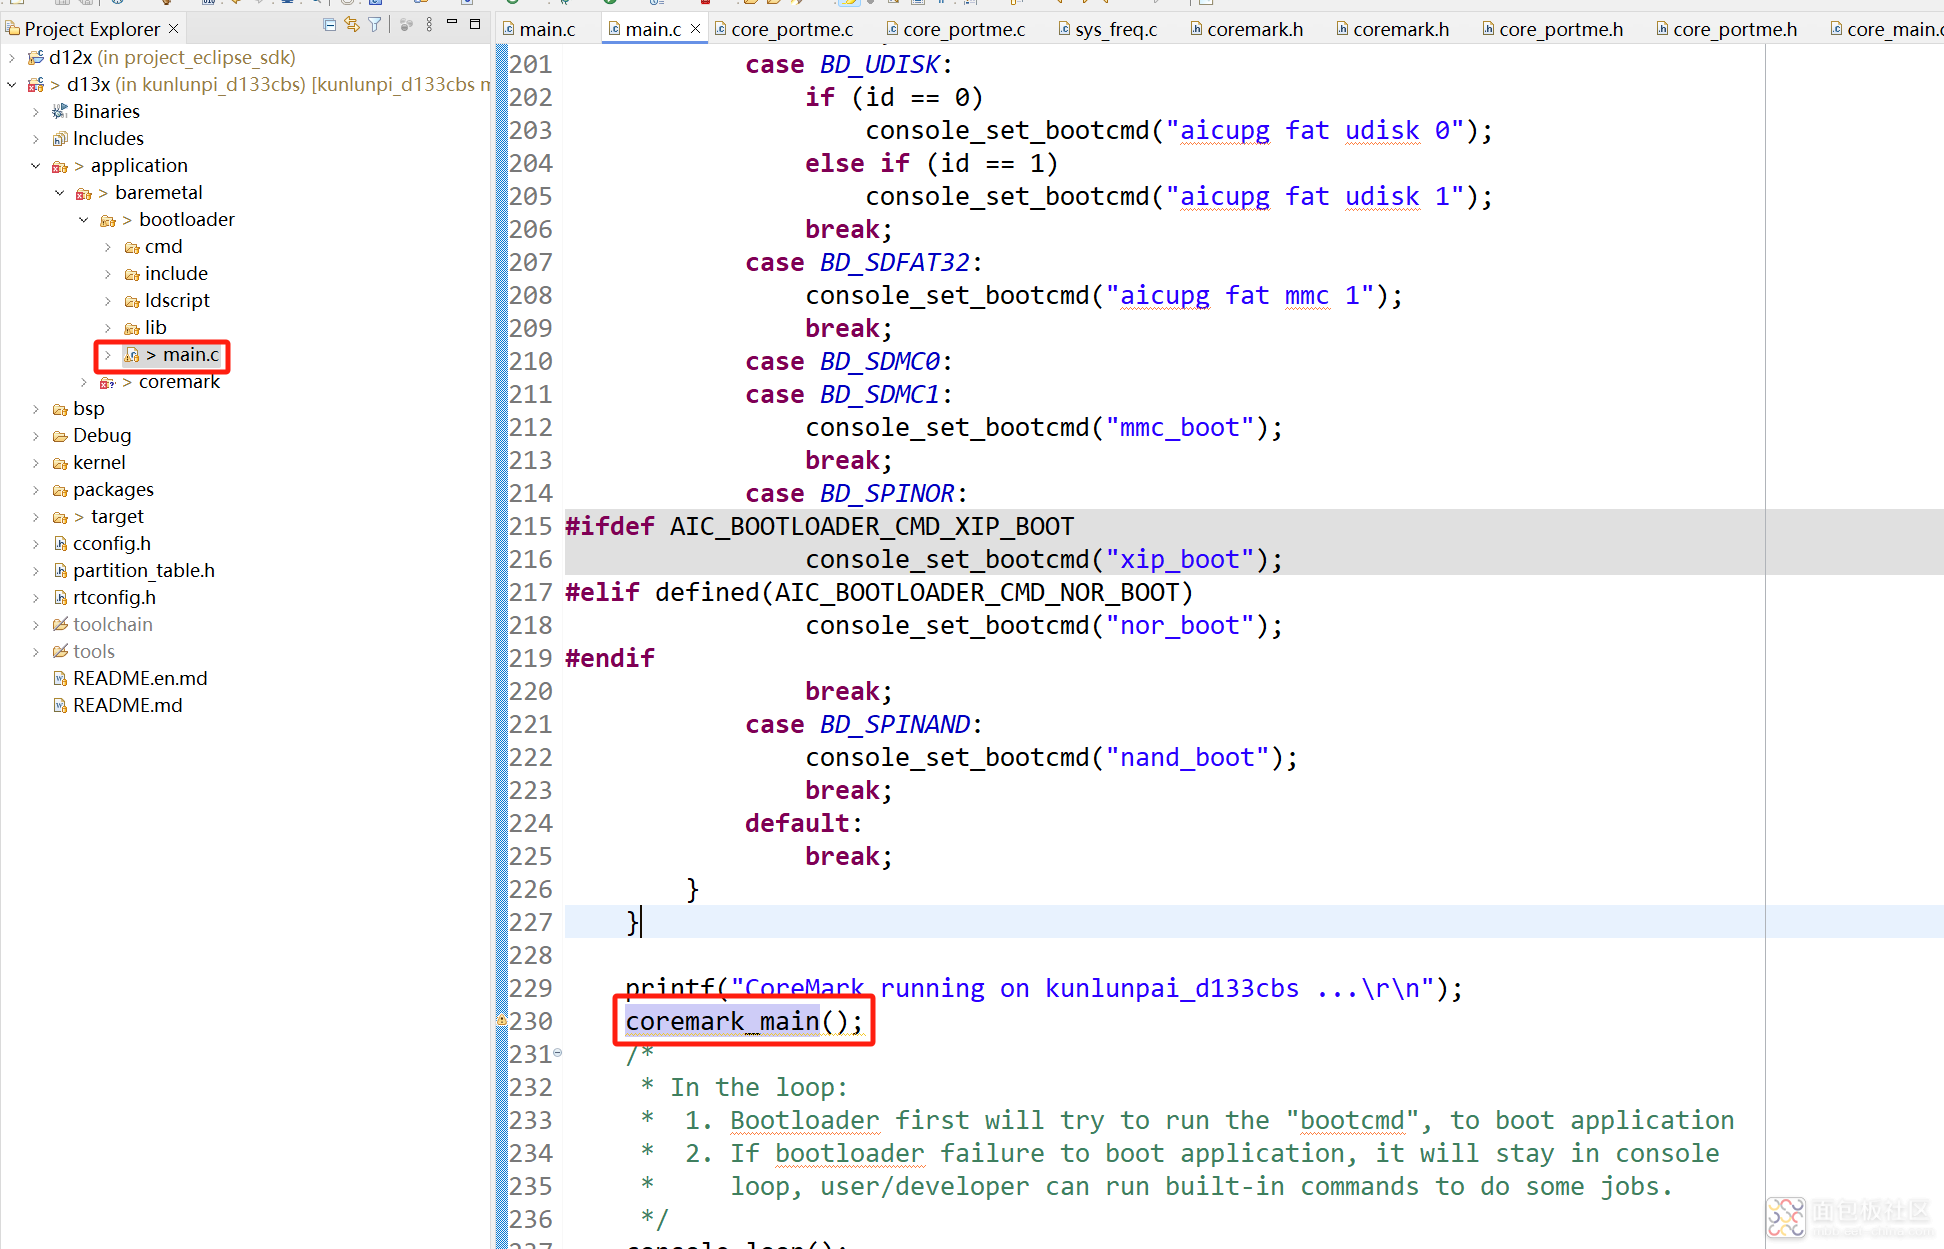
此时代码编译会报错:
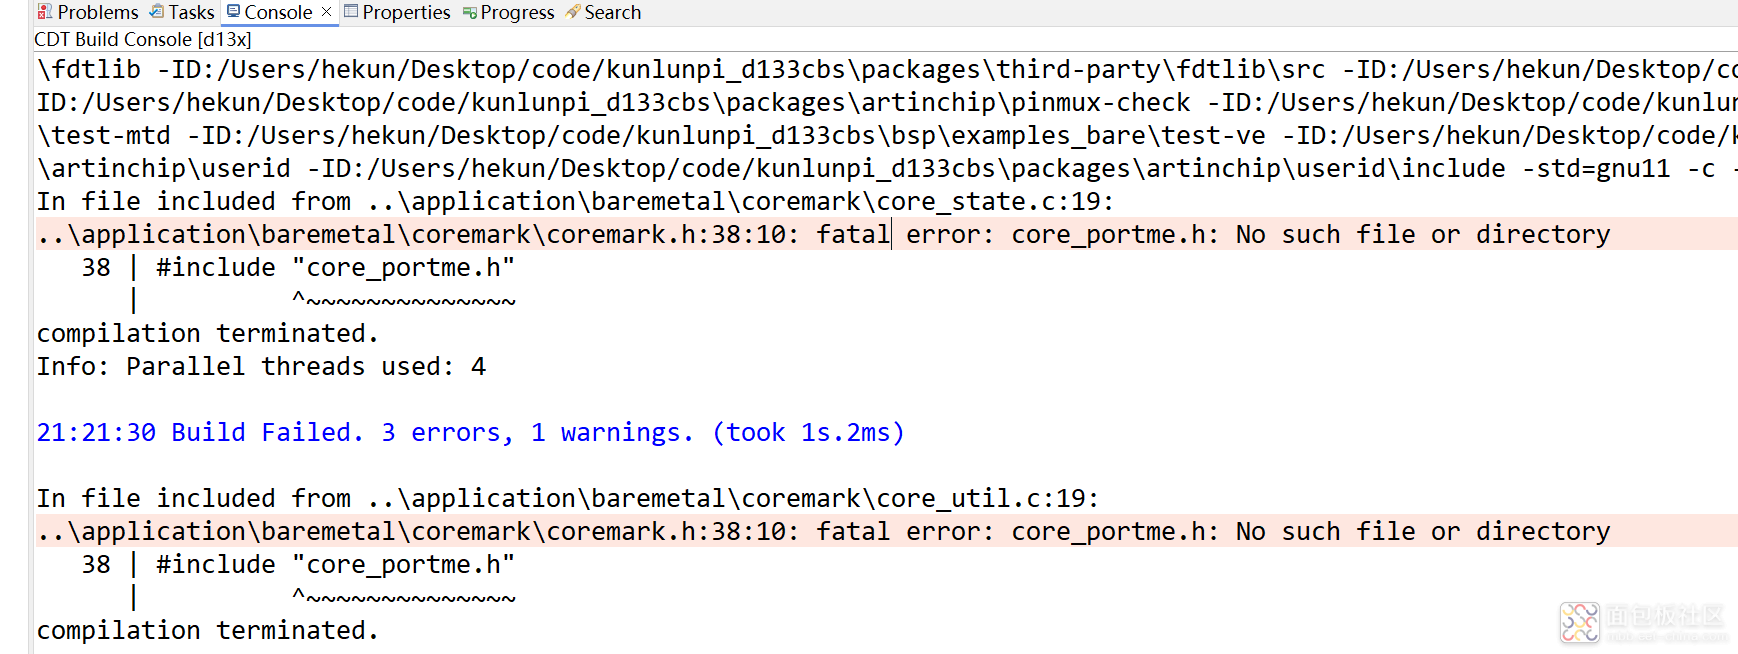
修改配置eclipse工程
如图:
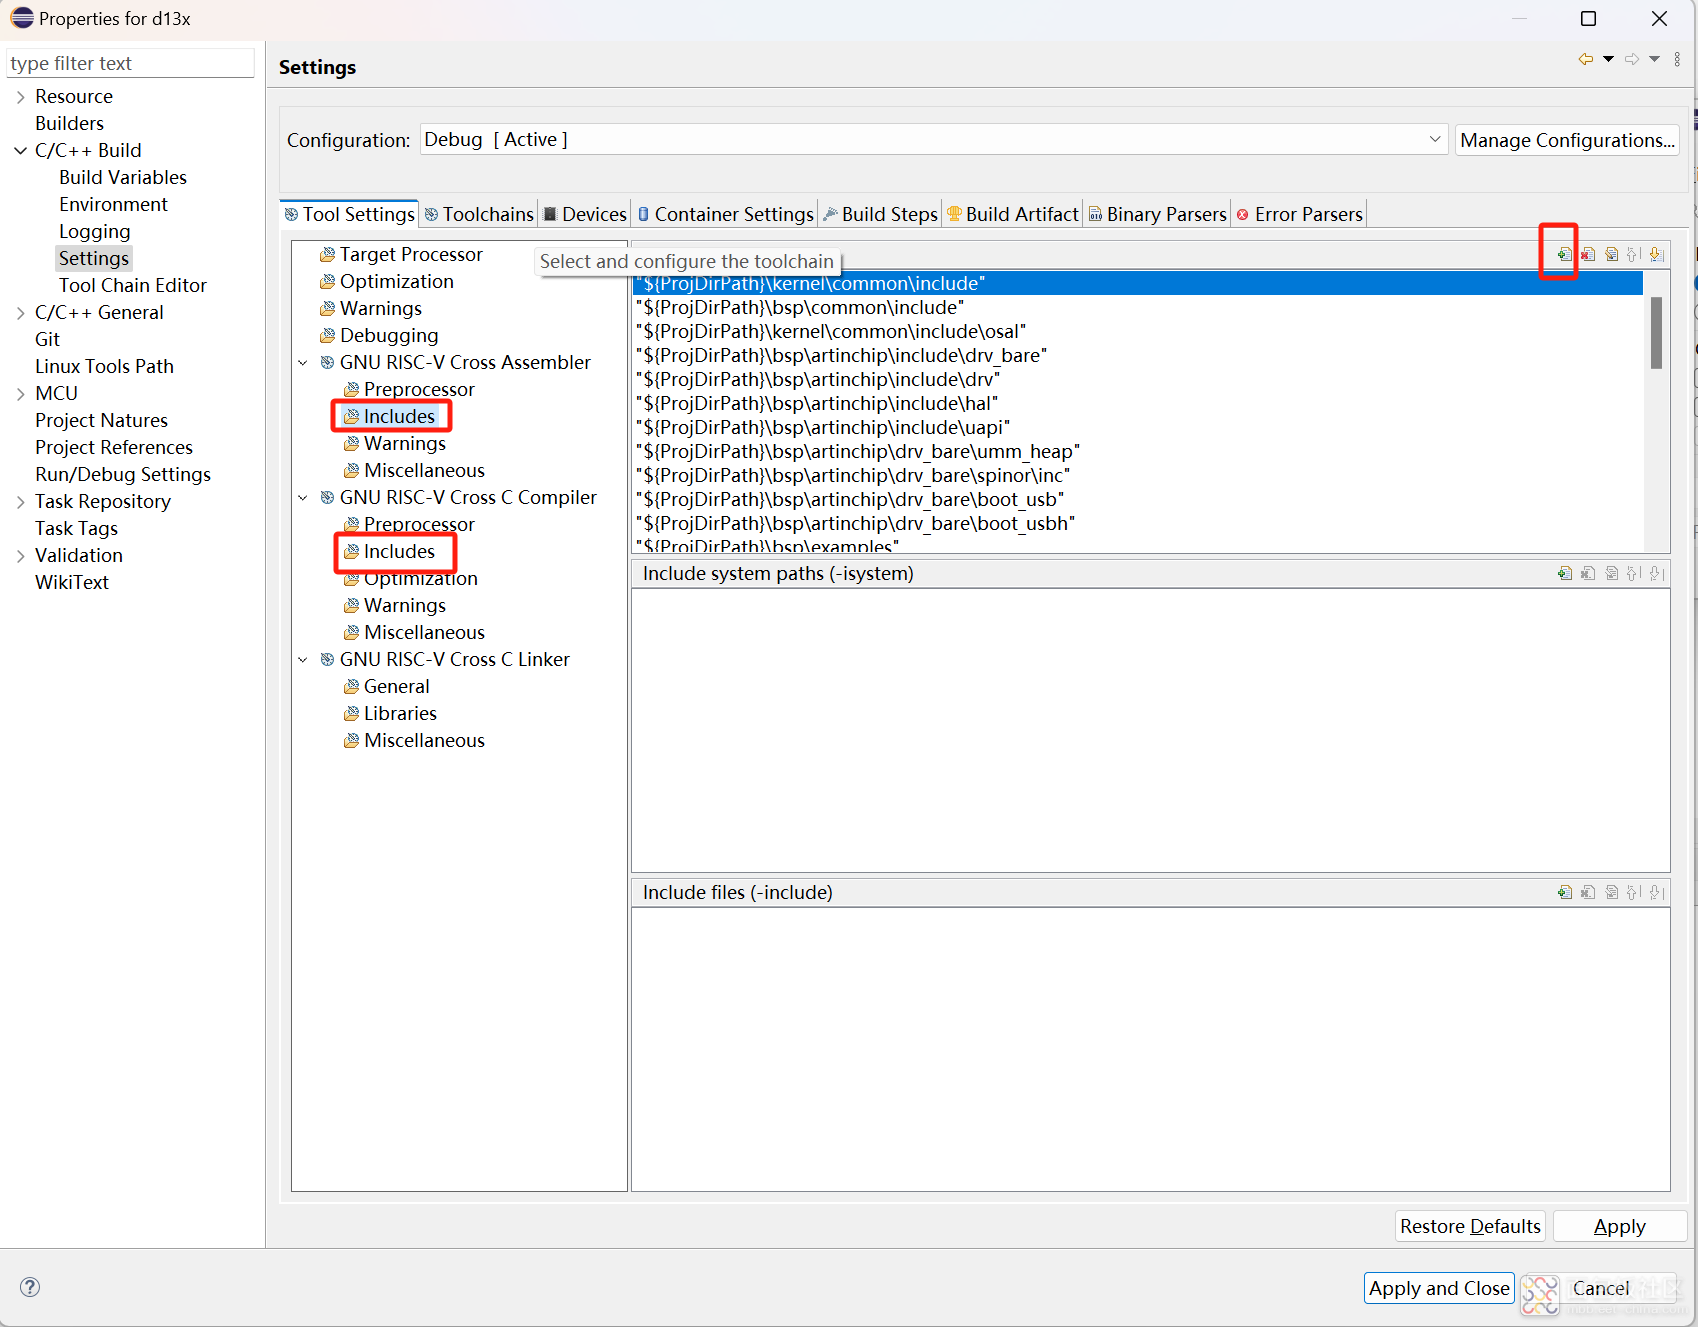
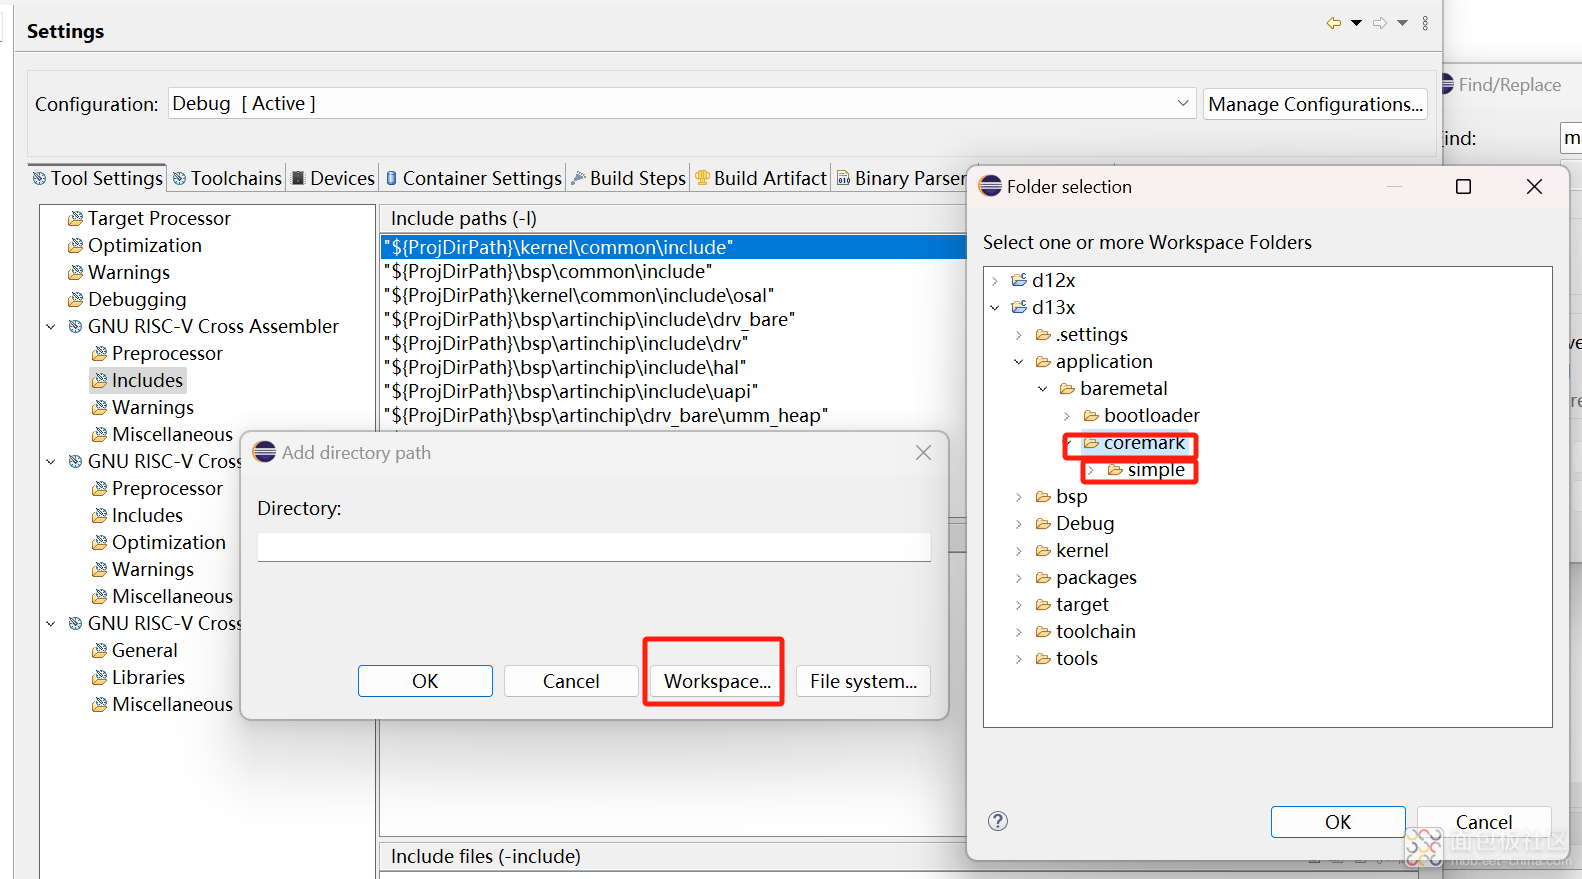
点击➕添加头文件路径
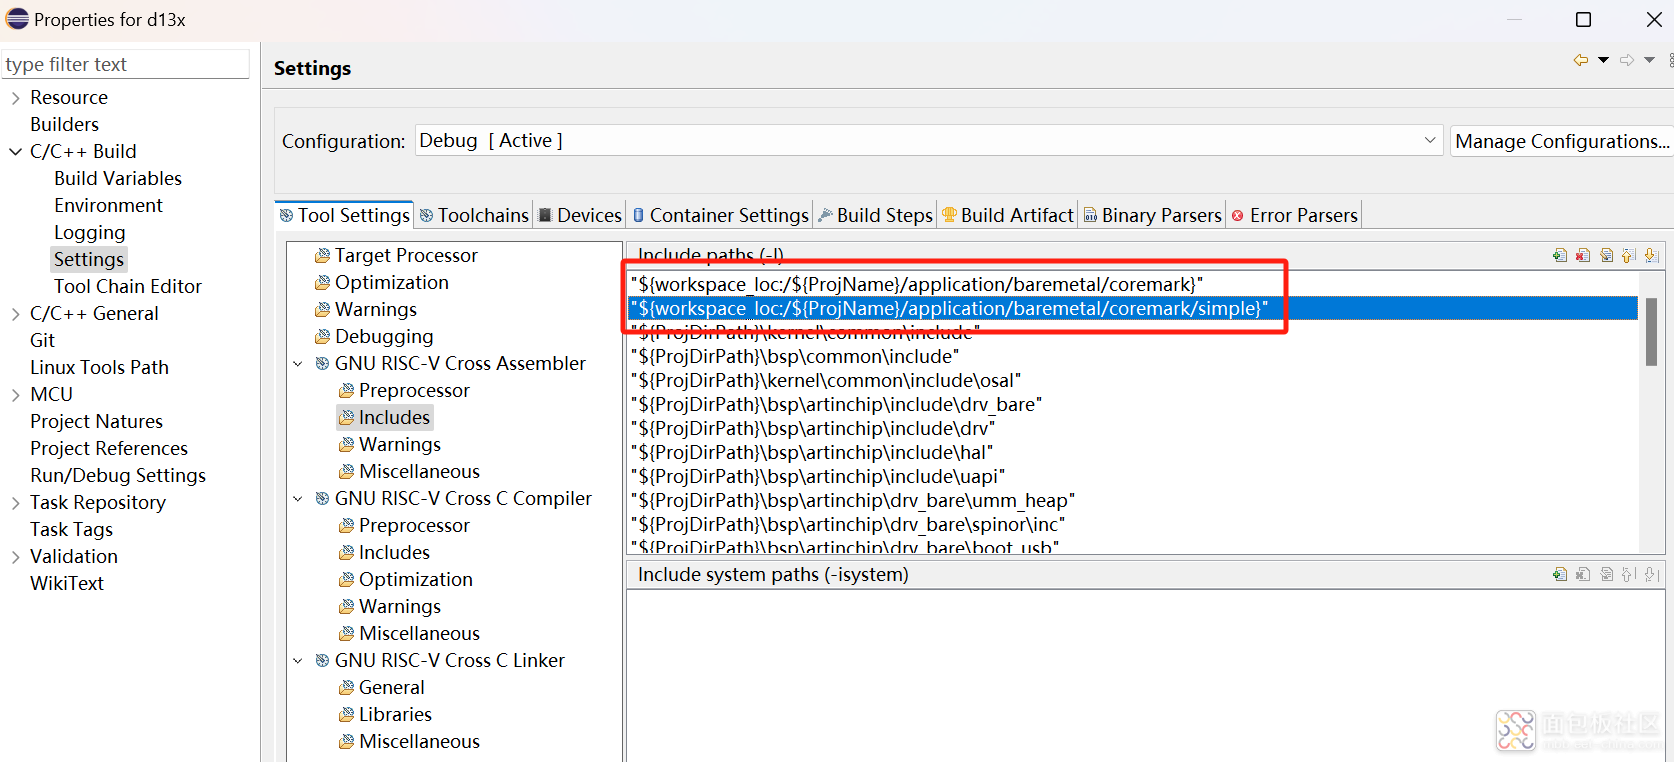
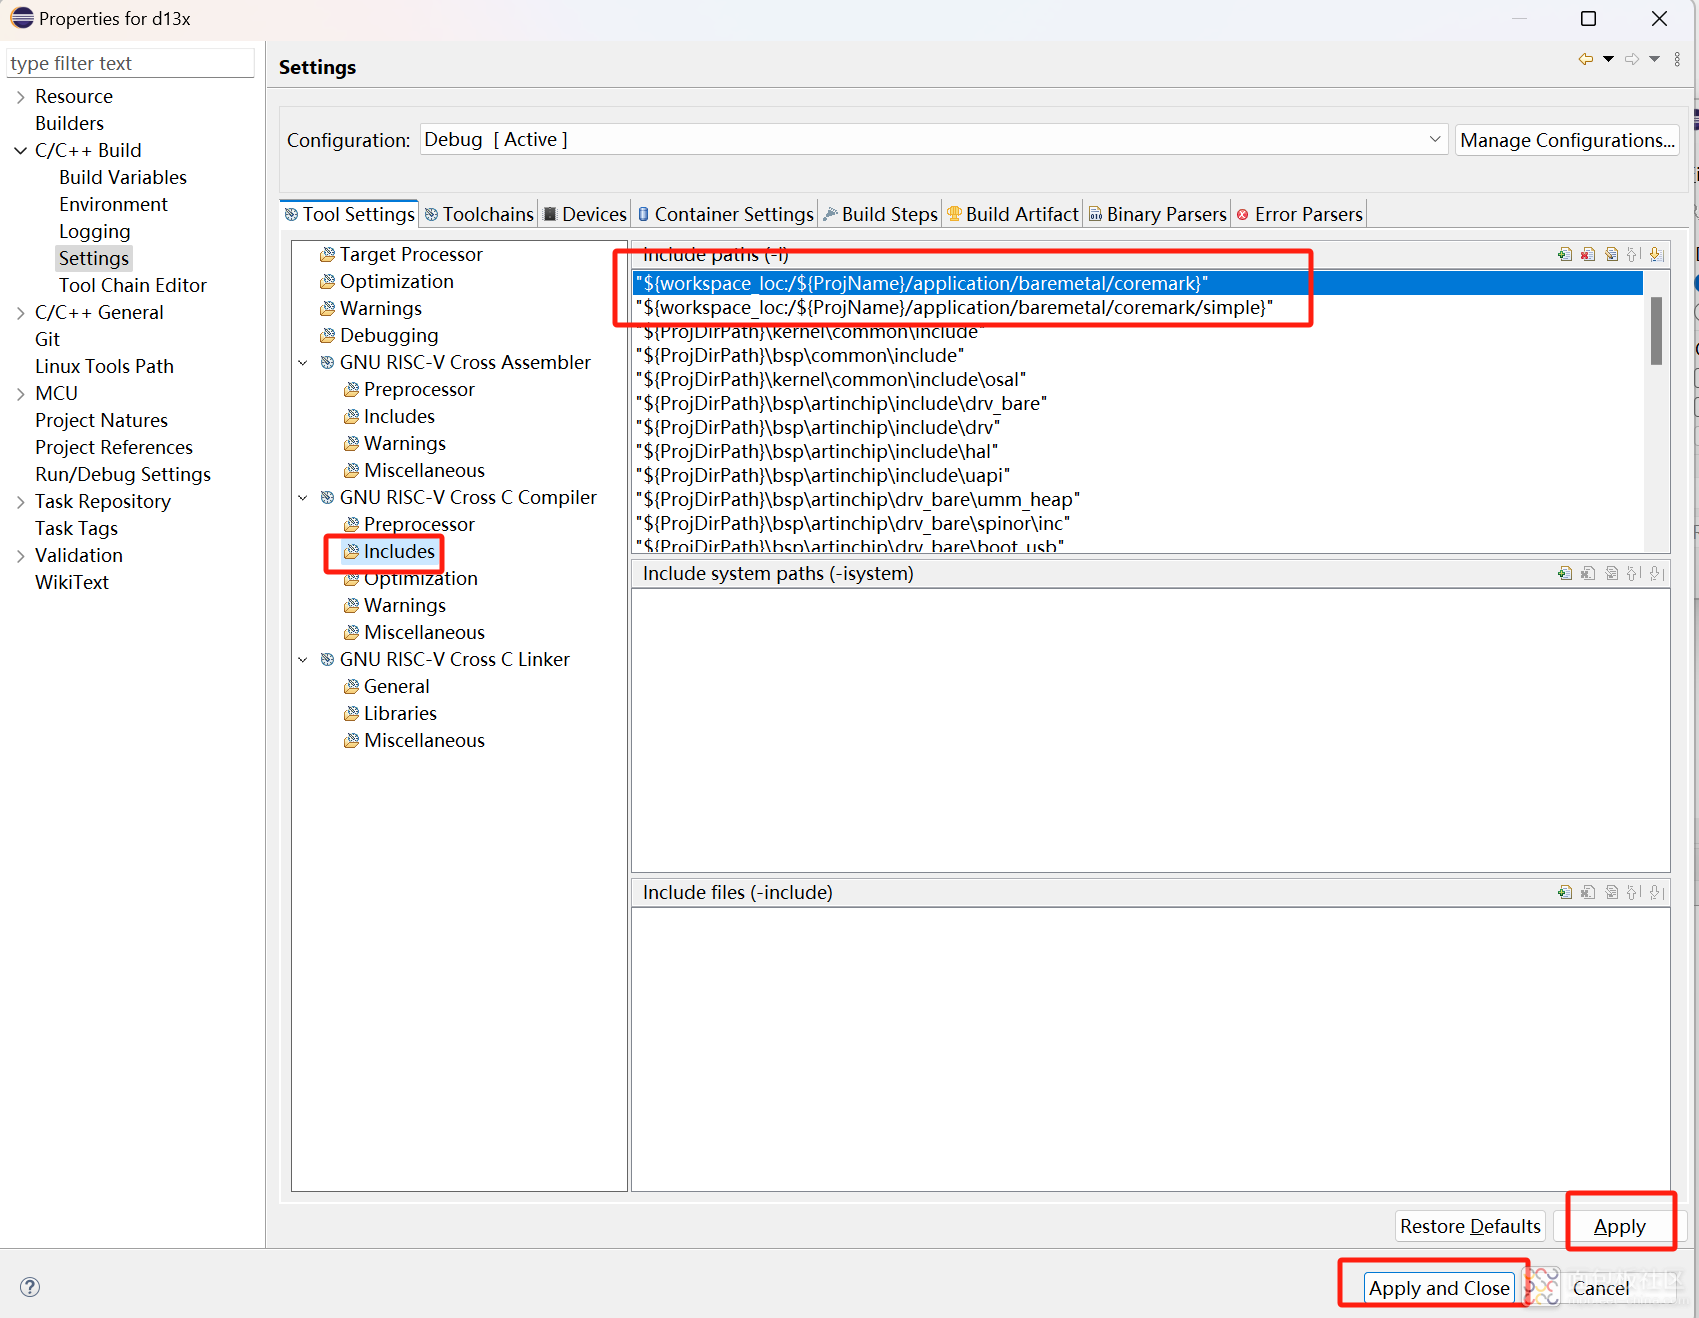
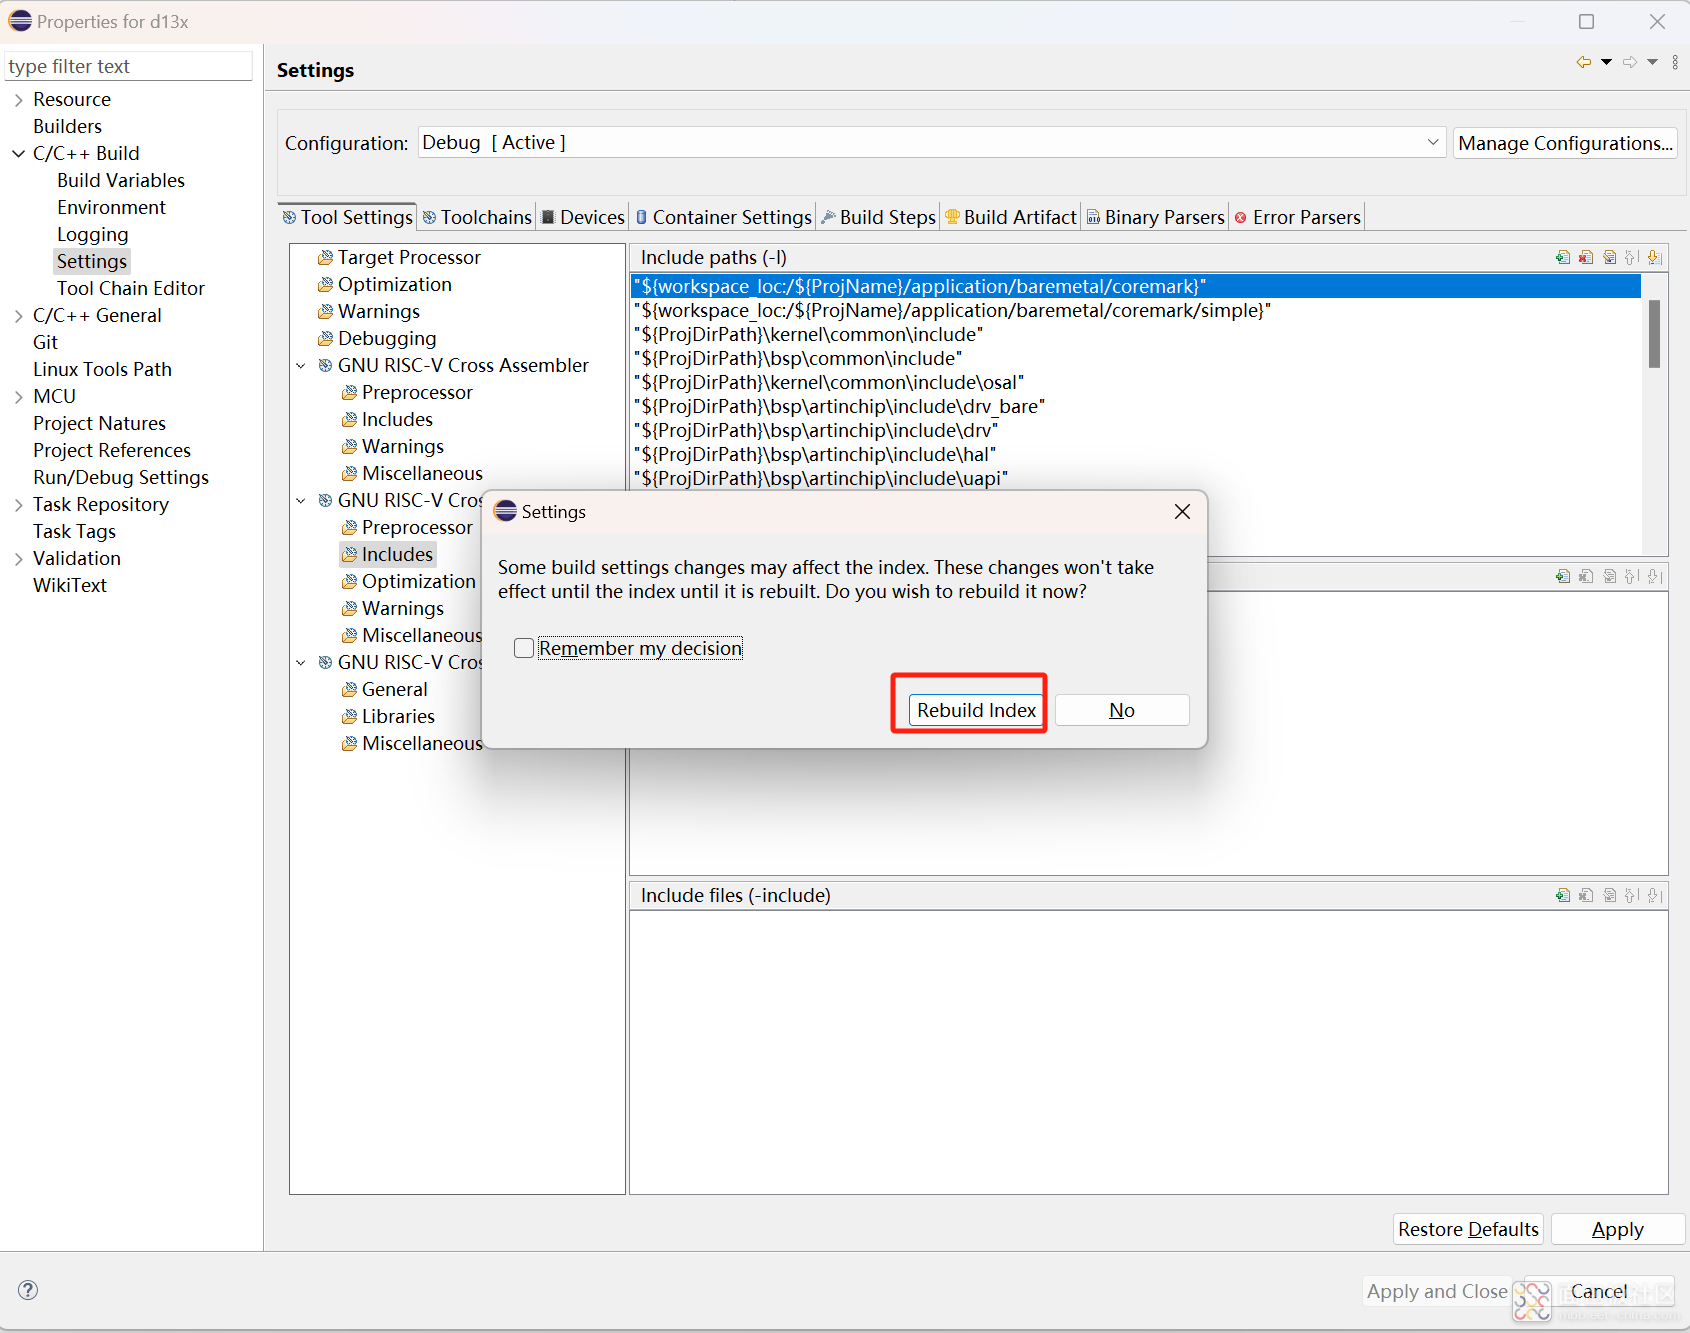
另外需要修改下优化等级为-Og
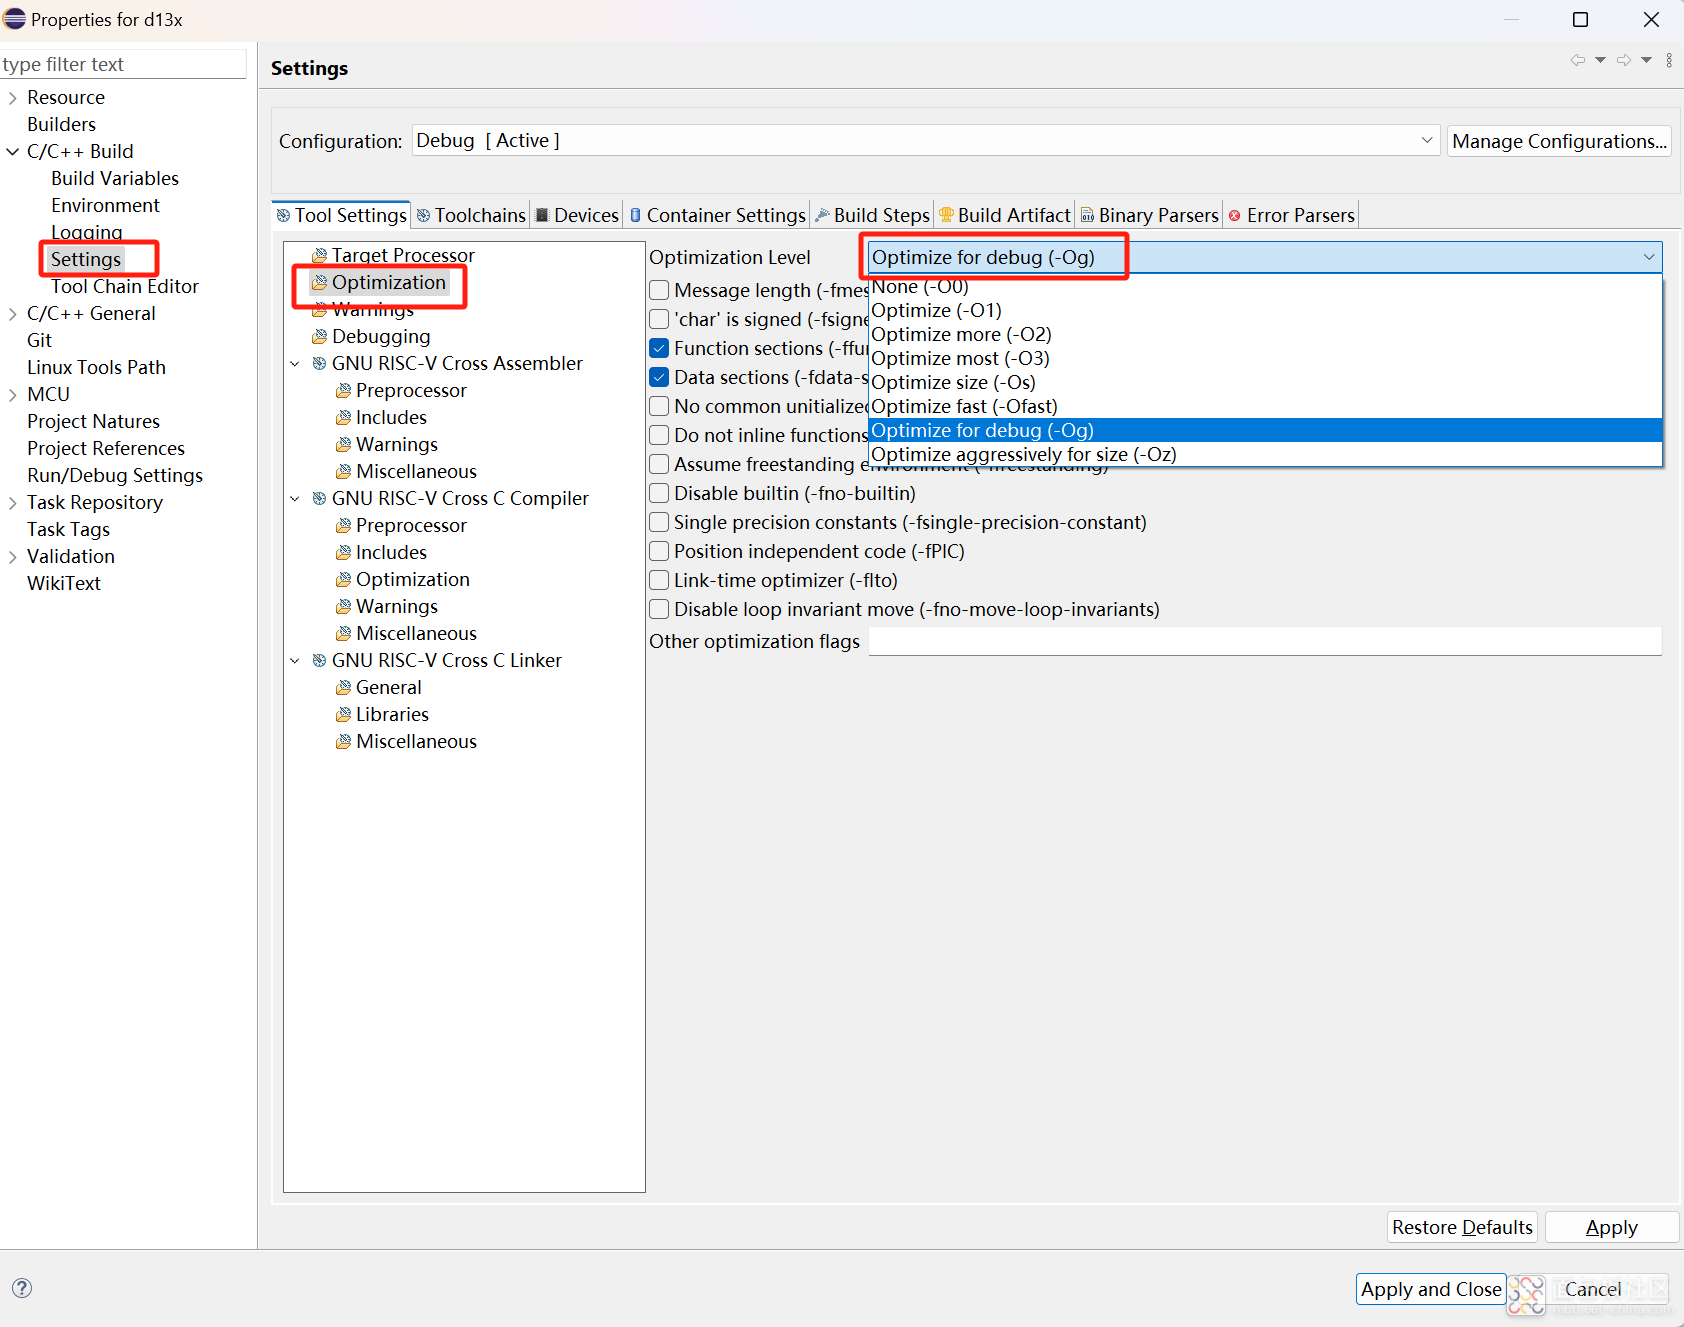
最后按下小锤子进行编译,执行结果如下:

从执行结果可以看出,只是生成了bin文件,看了官方文档,应该是生成一个img文件才能下载,我在群里咨询暂无回复。
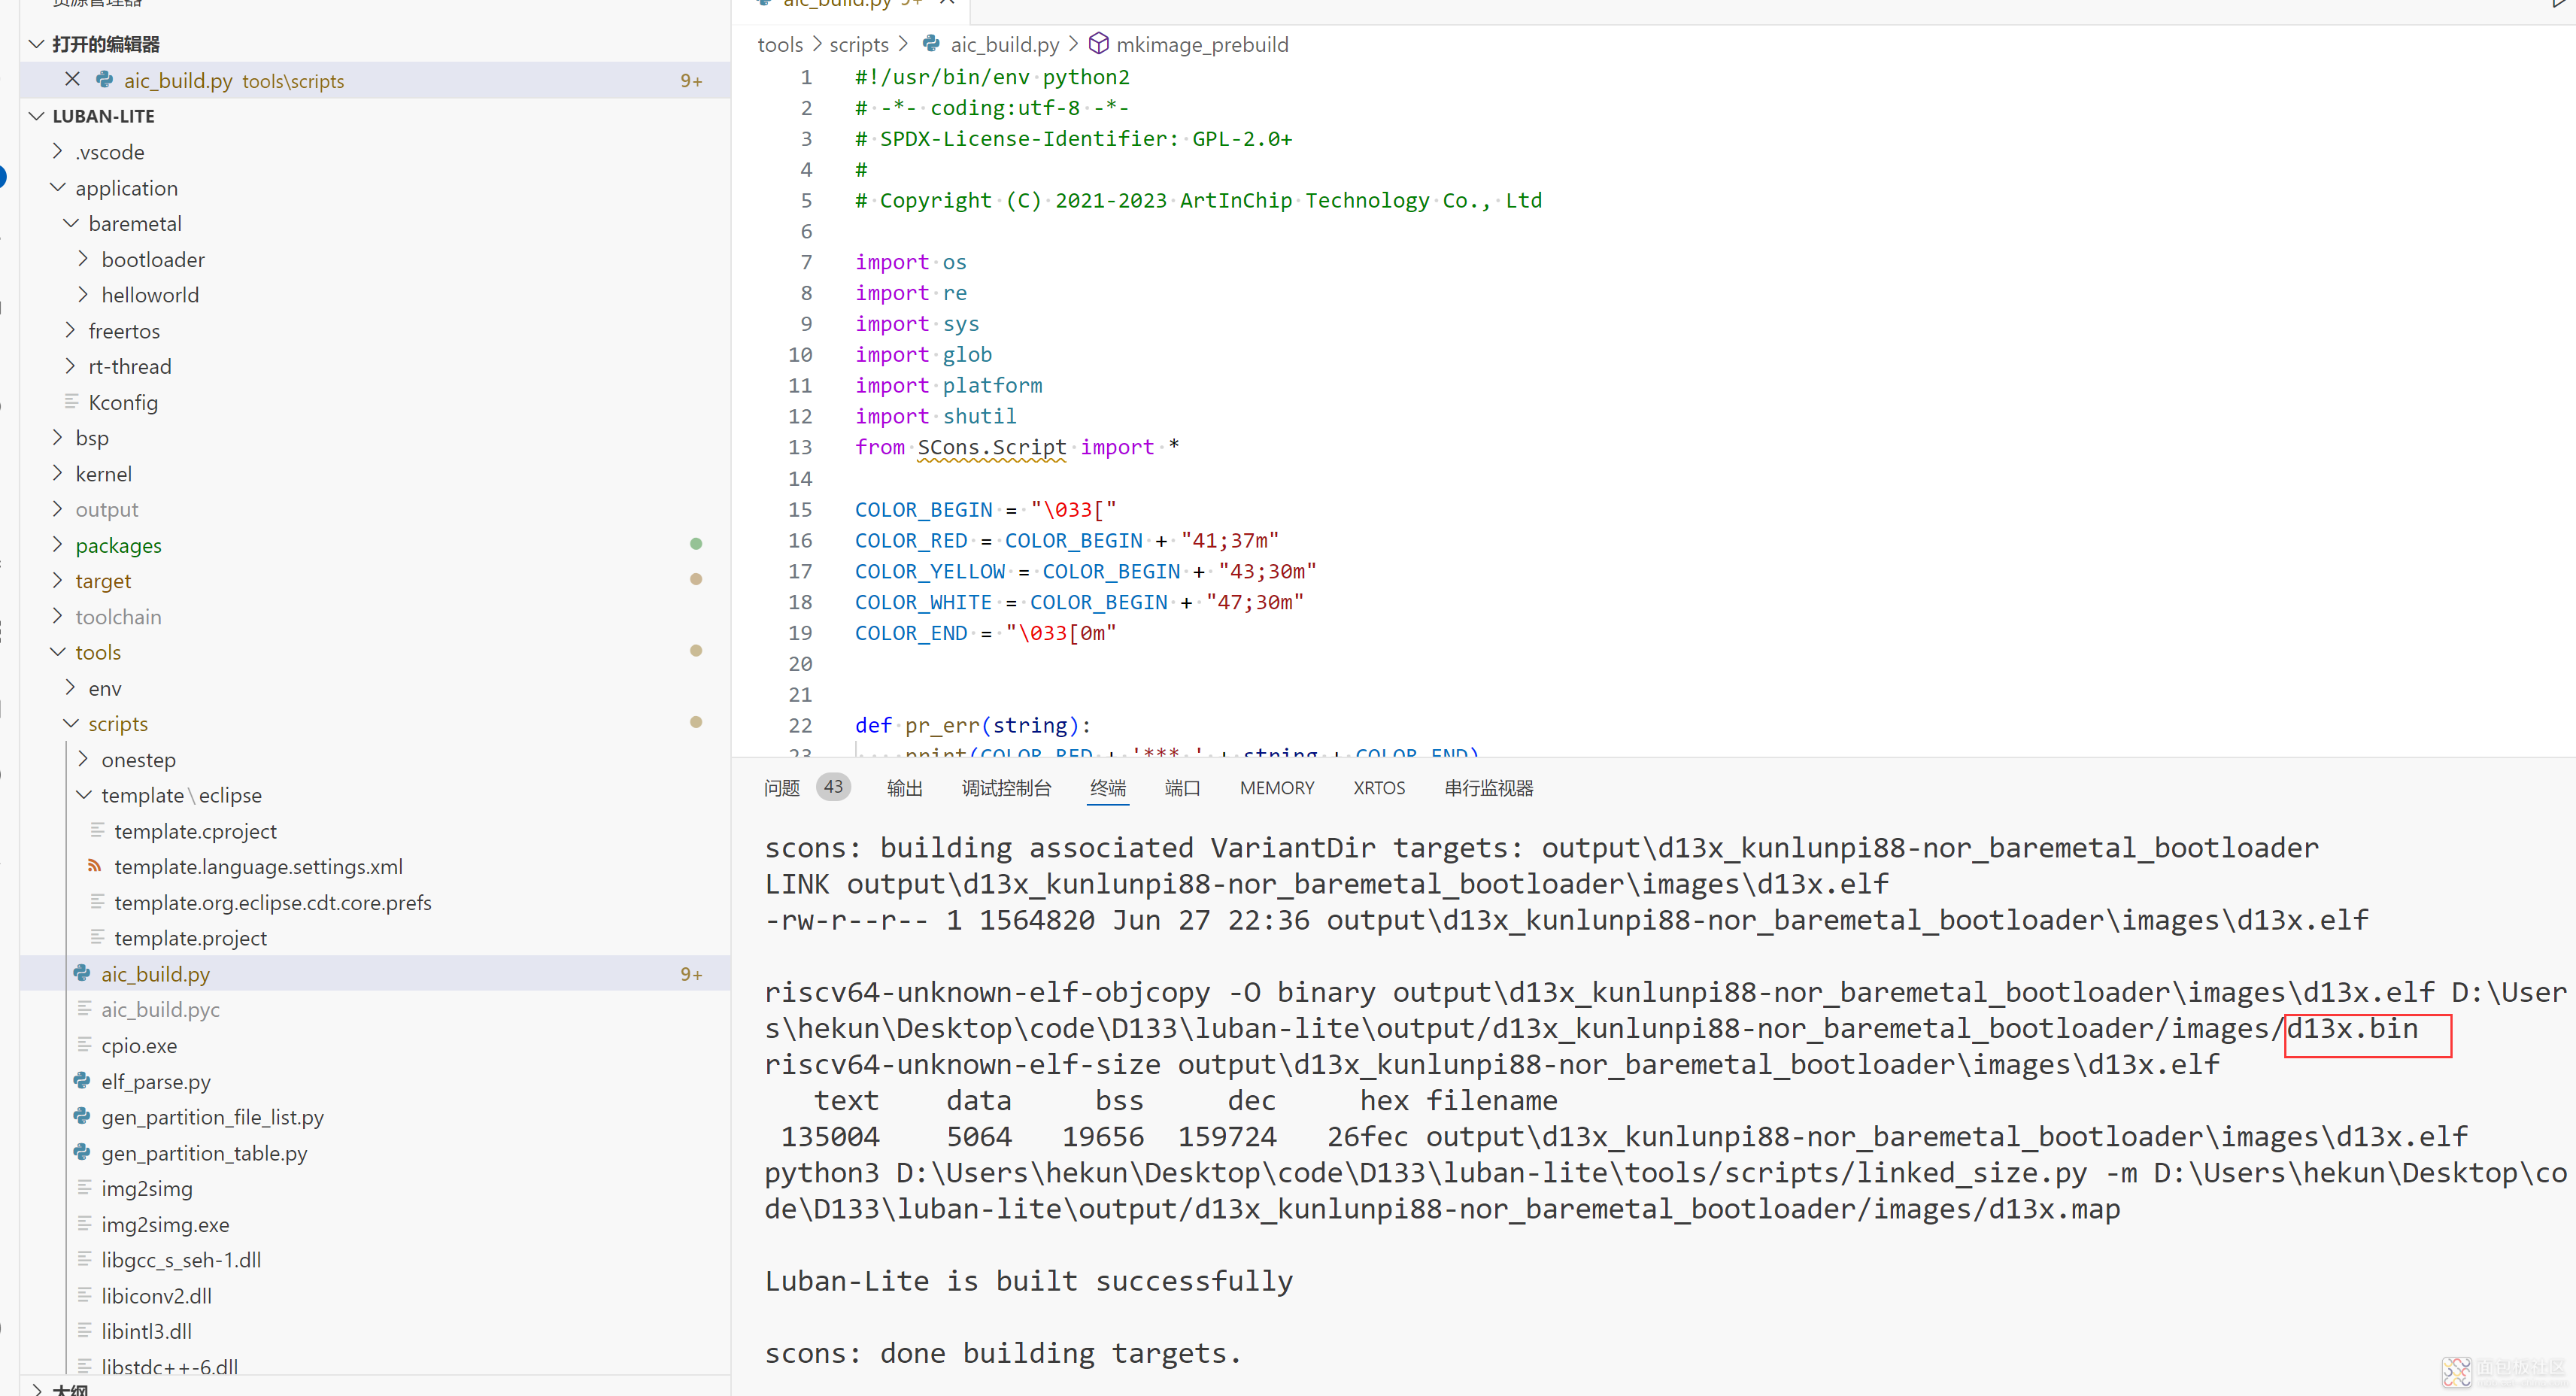
使用vscode编译官方SDK裸机代码,结果如下,发现也是没有生成img,这个后面有空了看下原因,然后进行跑分测试。


 /1
/1 

