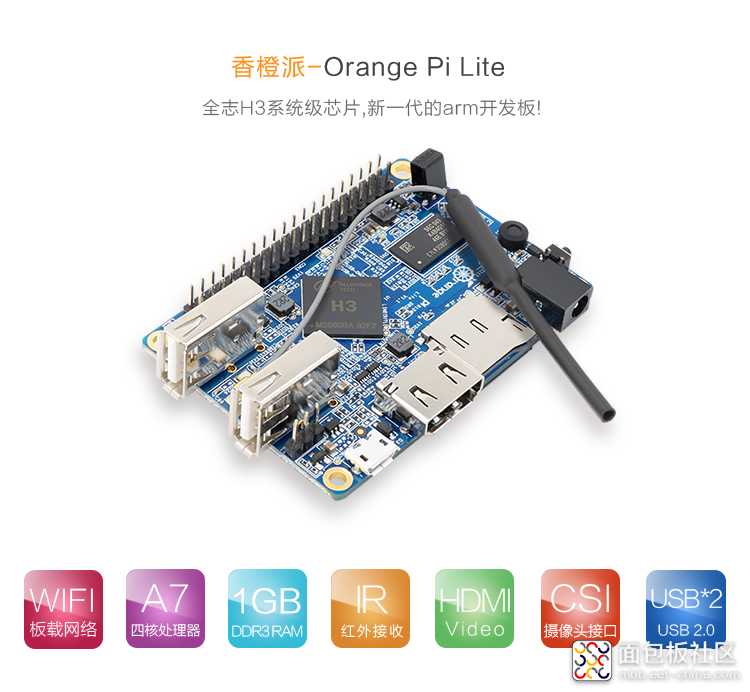
![Pi-Lite-详情页 (2).jpg Pi-Lite-详情页 (2).jpg](https://static.assets-stash.eet-china.com/forum/202107/14/181036jqea6e0q5w6qq6b6.jpg)
wiringOP安装
wiringOP 已适配 Orange Pi 开发板,使用 wiringOP 可以测试 GPIO,开始测试前,请确保已经安装好了 wiringOP
普通 GPIO 口测试
1) 下面以 7 号引脚——对应 GPIO 为 PA6 ——对应 wPi 序号为 2——为例演示如何 设置 GPIO 的高低电平
![图1.png 图1.png](https://static.assets-stash.eet-china.com/forum/202107/14/181414r1bpwdgpwqw1kbzg.png)
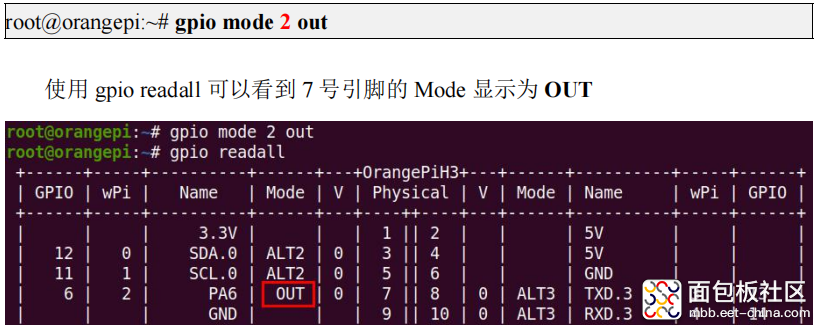
2) 首先设置 GPIO 口为输出模式,其中第三个参数需要输入引脚对应的 wPi 的序号
![图2.png 图2.png](https://static.assets-stash.eet-china.com/forum/202107/14/181425g4d1itllyeeut1fr.png)
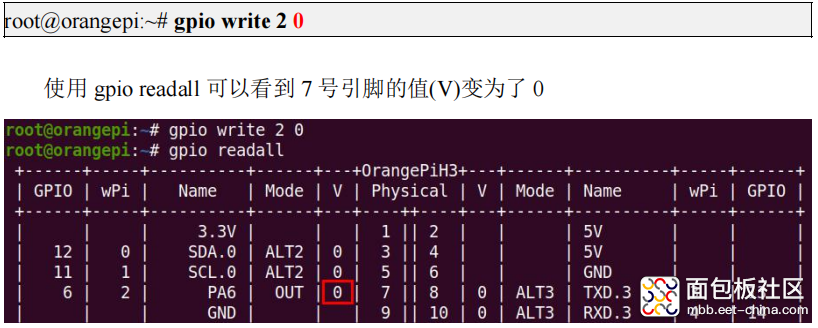
3) 然后设置 GPIO 口输出低电平,设置完后可以使用万用表测量引脚的电压的数值, 如果为 0v,说明设置低电平成功
![图3.png 图3.png](https://static.assets-stash.eet-china.com/forum/202107/14/181442ti3zmi1niciimu35.png)
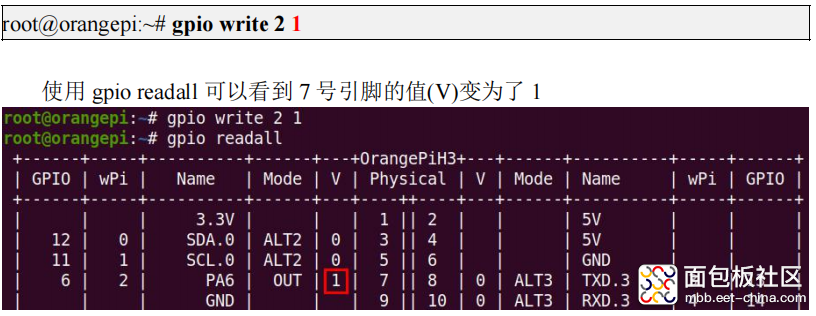
4) 然后设置 GPIO 口输出高电平,设置完后可以使用万用表测量引脚的电压的数值, 如果为 3.3v,说明设置高电平成功
![图4.png 图4.png](https://static.assets-stash.eet-china.com/forum/202107/14/181454i2g9i222tr49w88b.png)