其实RTThread对STM32的支持可以说已经非常完善了,这个教程其实RTThread官网就有了,不过为了后续的教程,还是有必要写一下这一篇的内容的。
2.移植介绍
RTThread分为Smart、标准和Nano三个版本,其中Smart主要适用与有MMU的芯片,Nano版本包含了内核和Shell部分,而标准版本在Nano版本之上添加了驱动框架、组件和软件包,让RTThread使用更方便!
那么这次主要介绍Nano版本的移植,Nano版本的移植非常简单,可以使用【STM32CubeMX】移植,也可以使用MDK移植,不过我是推荐【MDK】移植,因为【STM32CubeMX】移植的话,后期有些配置可能会被【STM32CubeMX】给还原回去,所以今天就介绍MDK移植,但是也少不了【STM32CubeMX】的配合。
我这里采用的是ST官方的【32F429IDISCOVERY】开发板,如下图1所示:
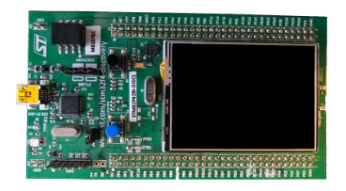
图1
3.MDK移植
首先说一下需要准备的软件和工具,【STM32CubeMX】用于创建基础工程,【MDK的RTThread支持包3.1.3】目前已经出到3.1.5了,不过3.1.3用的人还是比较多且稳定,【Keil MDK】用于程序的编译、链接和下载,【MobaXterm】使用shell命令控制窗口。
将上面的软件和工具准备并安装完成之后,就可以开始进行移植了。
首先通过【STM32CubeMX】选择官方的板子。
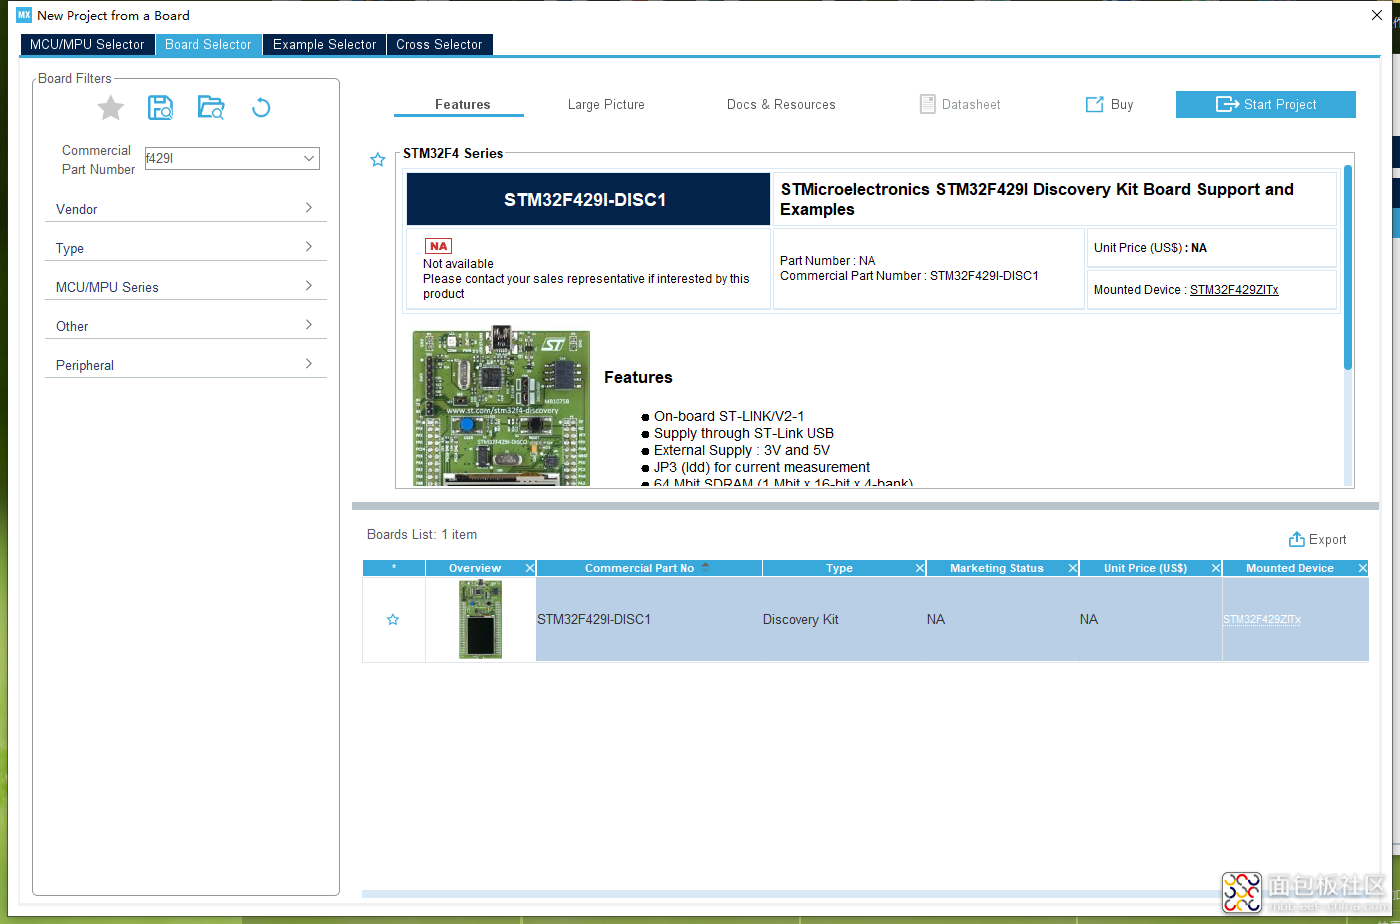
图2
如果选择的是官方的开发板,这里会弹出提示,十分需要配置外设,这里选择【No】,当然选择【Yes】也可以了。
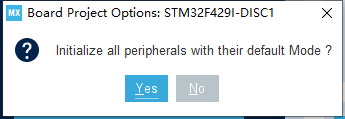
图3
然后就创建出了如下图4的工程了。
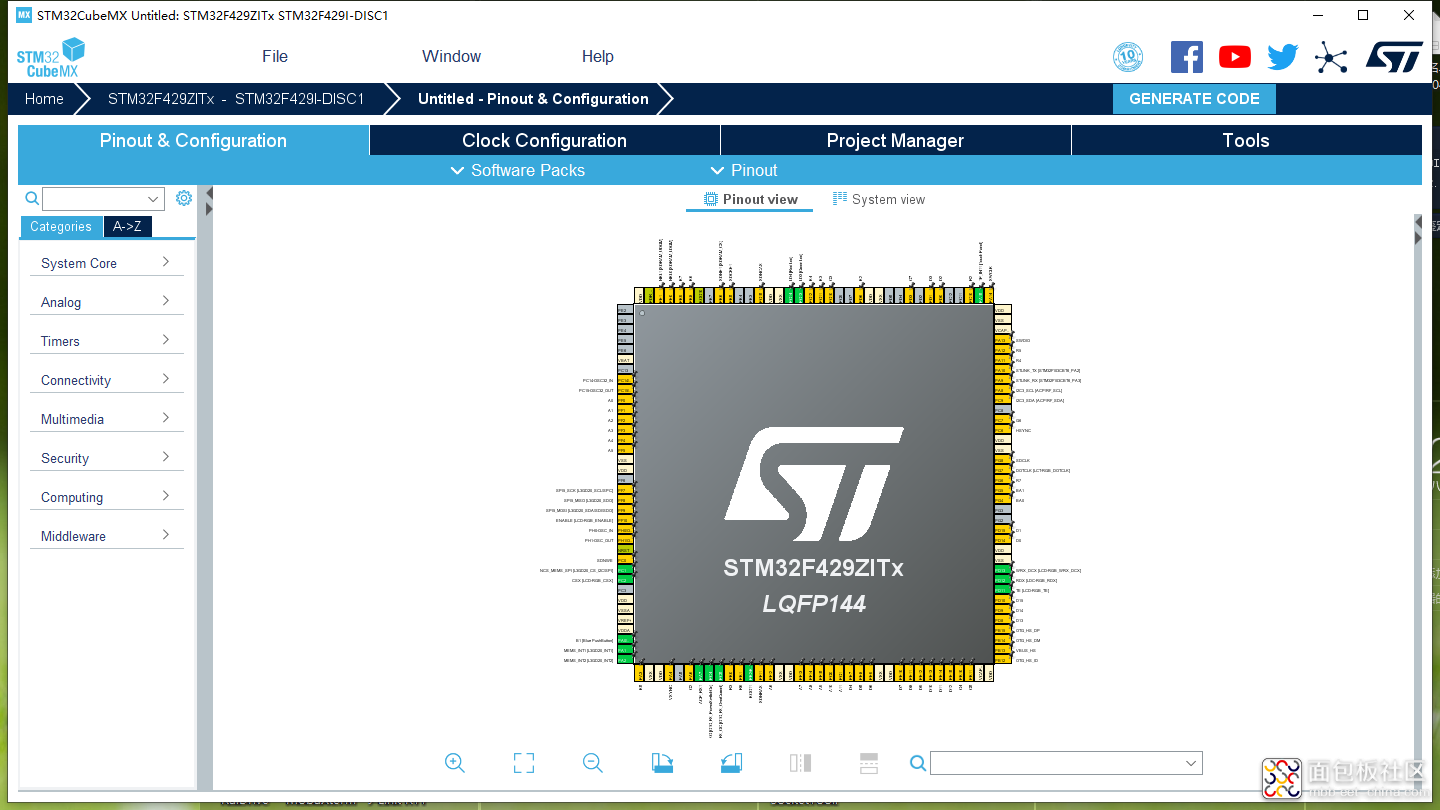
图4
根据板子的外部晶振,选择合适的时钟配置,这里就不过多讲解了,不配置时钟也没关系,因为默认会使用内部的时钟。
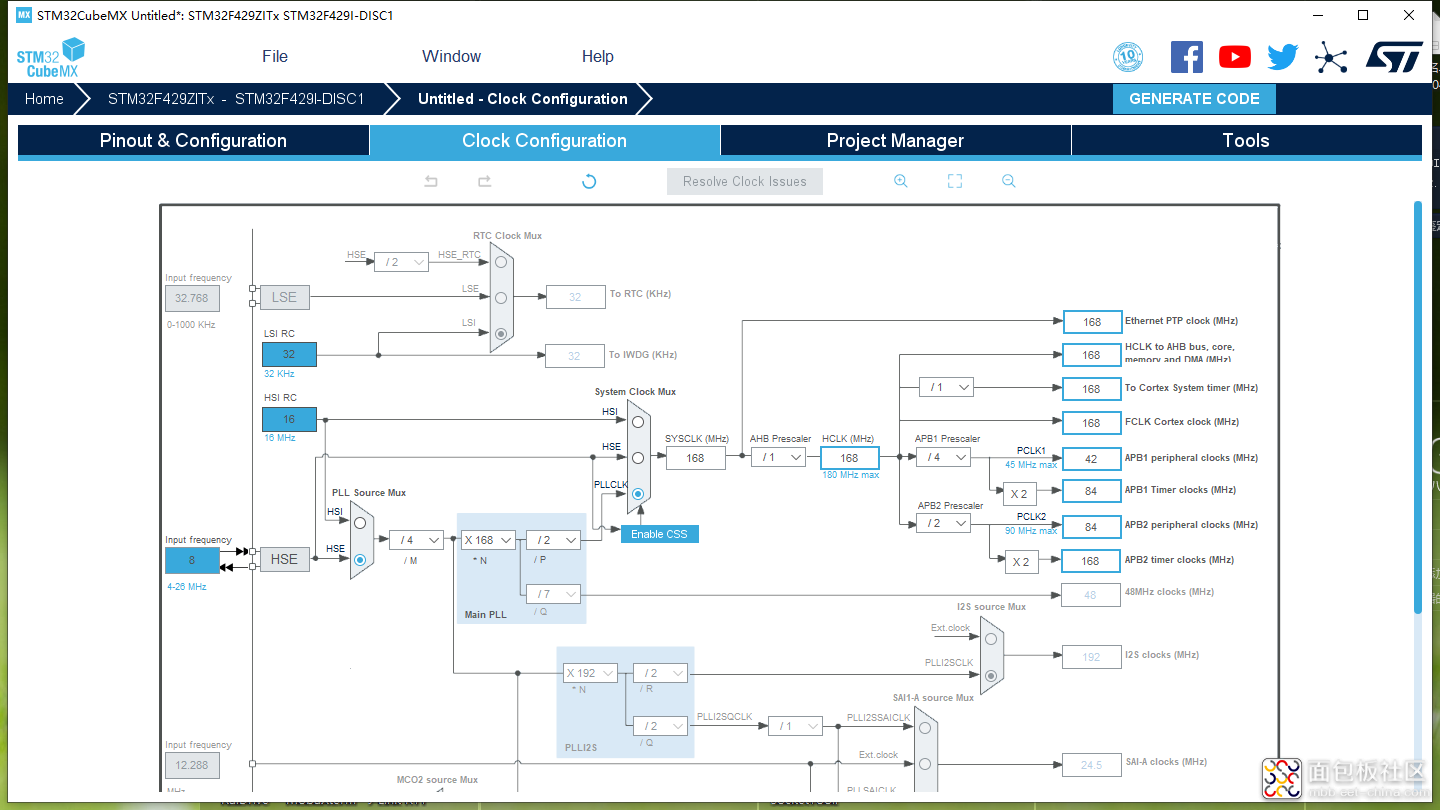
图5
由于要使用Finsh(shell)控件,所以开启串口外设,选择USART1即可。
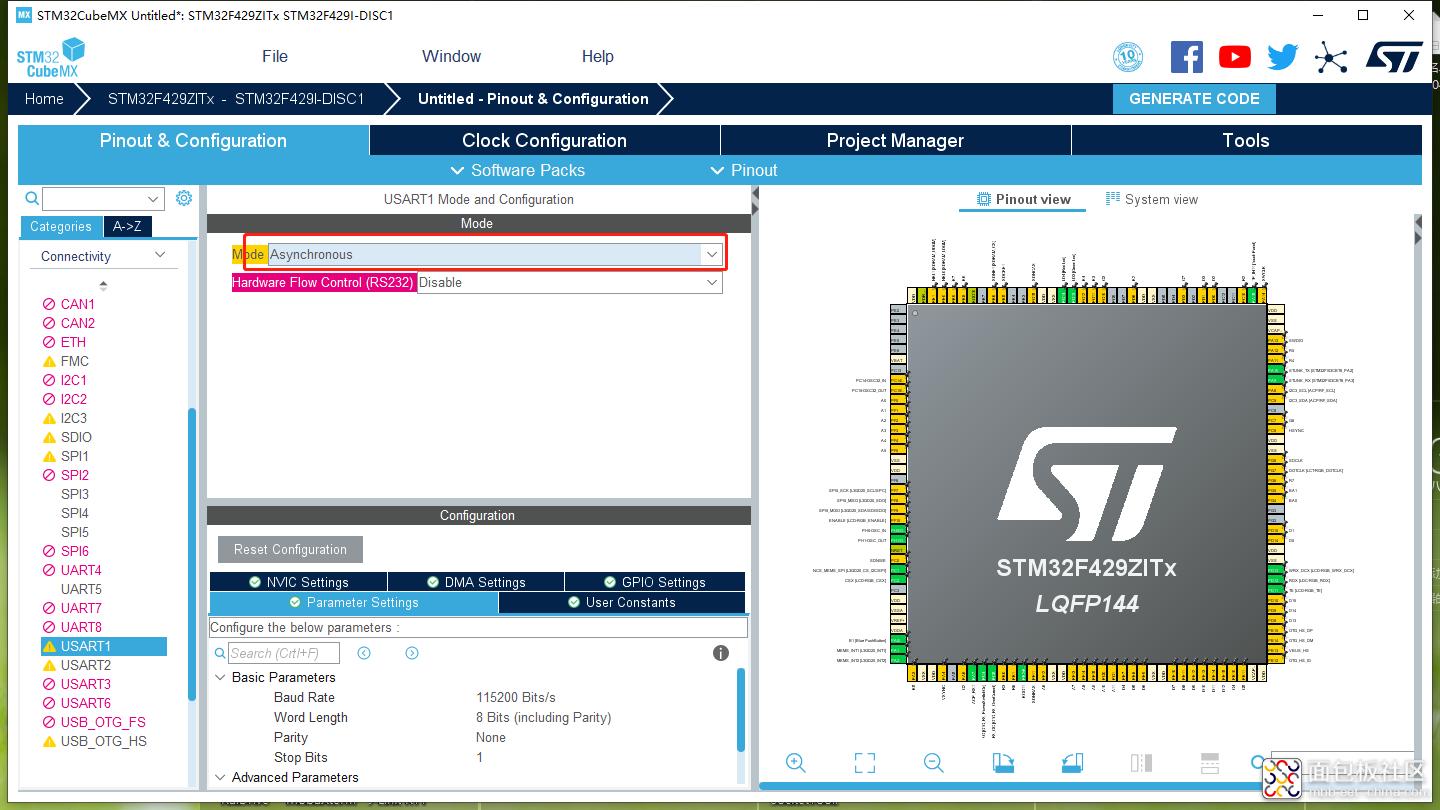
图6
需要配置一下中断管理,RTThread已经实现了一些中断函数,所以需要把一些中断去除,如下图7的三个中断去除即可。
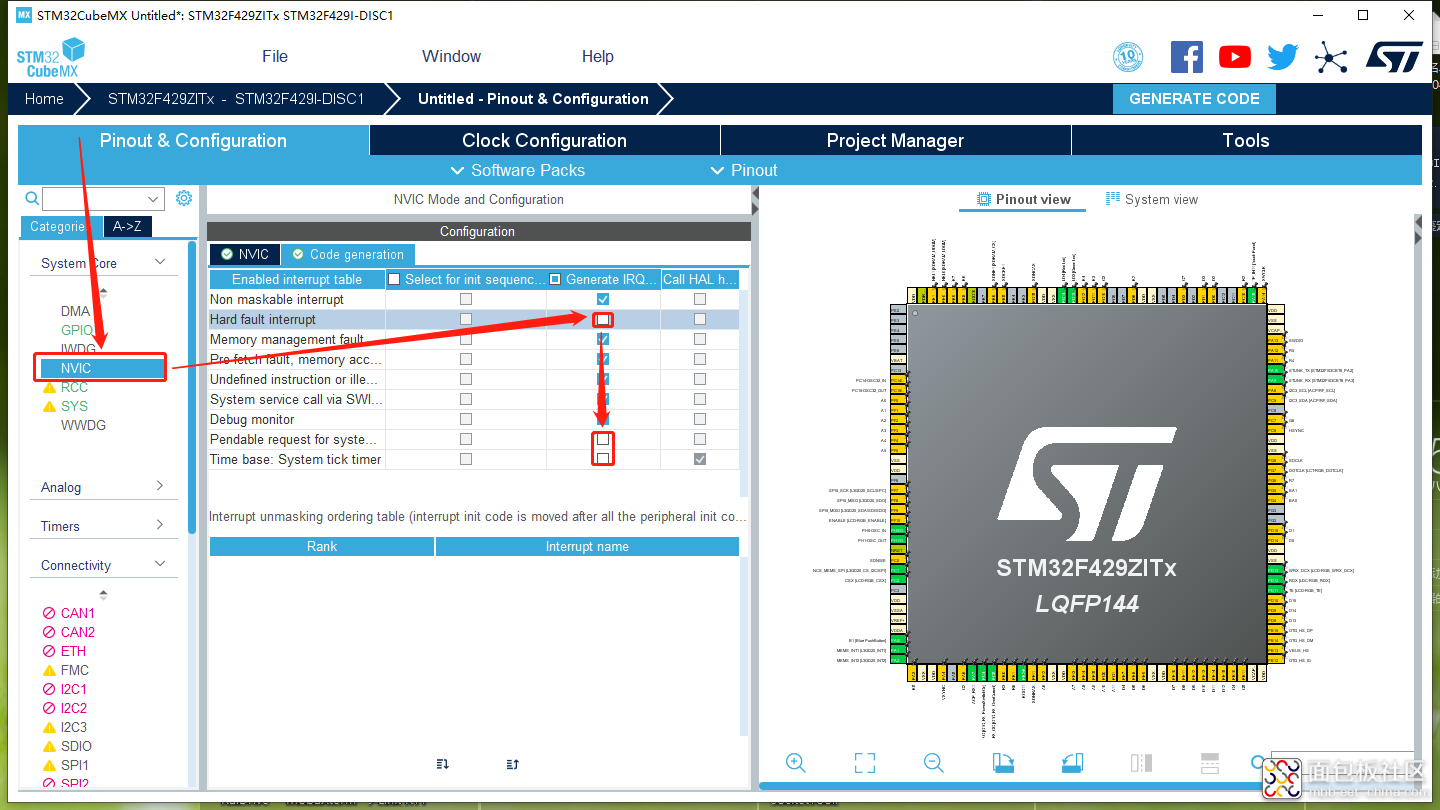
图7
需要配置一下工程,这一点很重要,下图8的配置为,对每一个外设自动生成一个C和H文件。
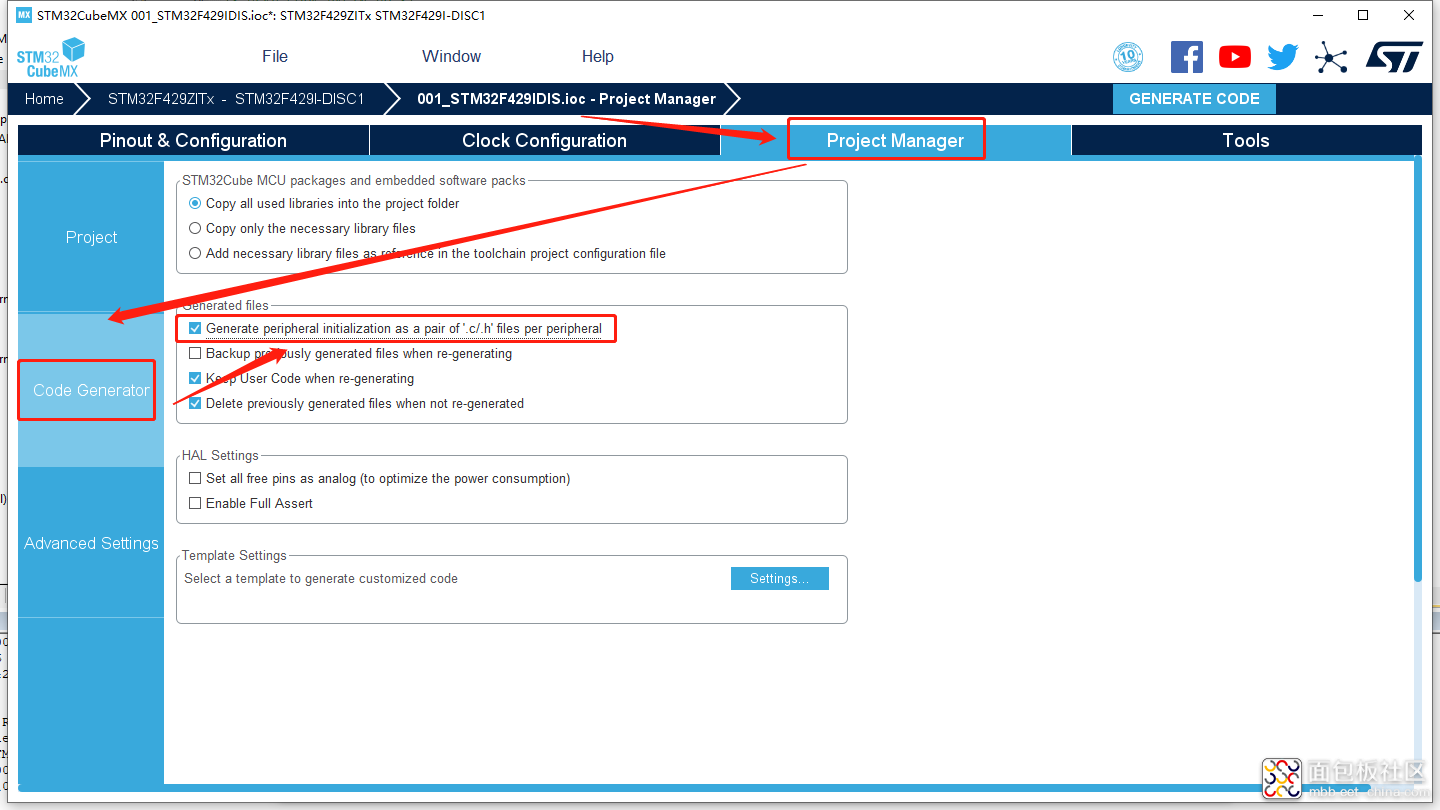
图8
最后选择【MDK-ARM】生成工程即可。
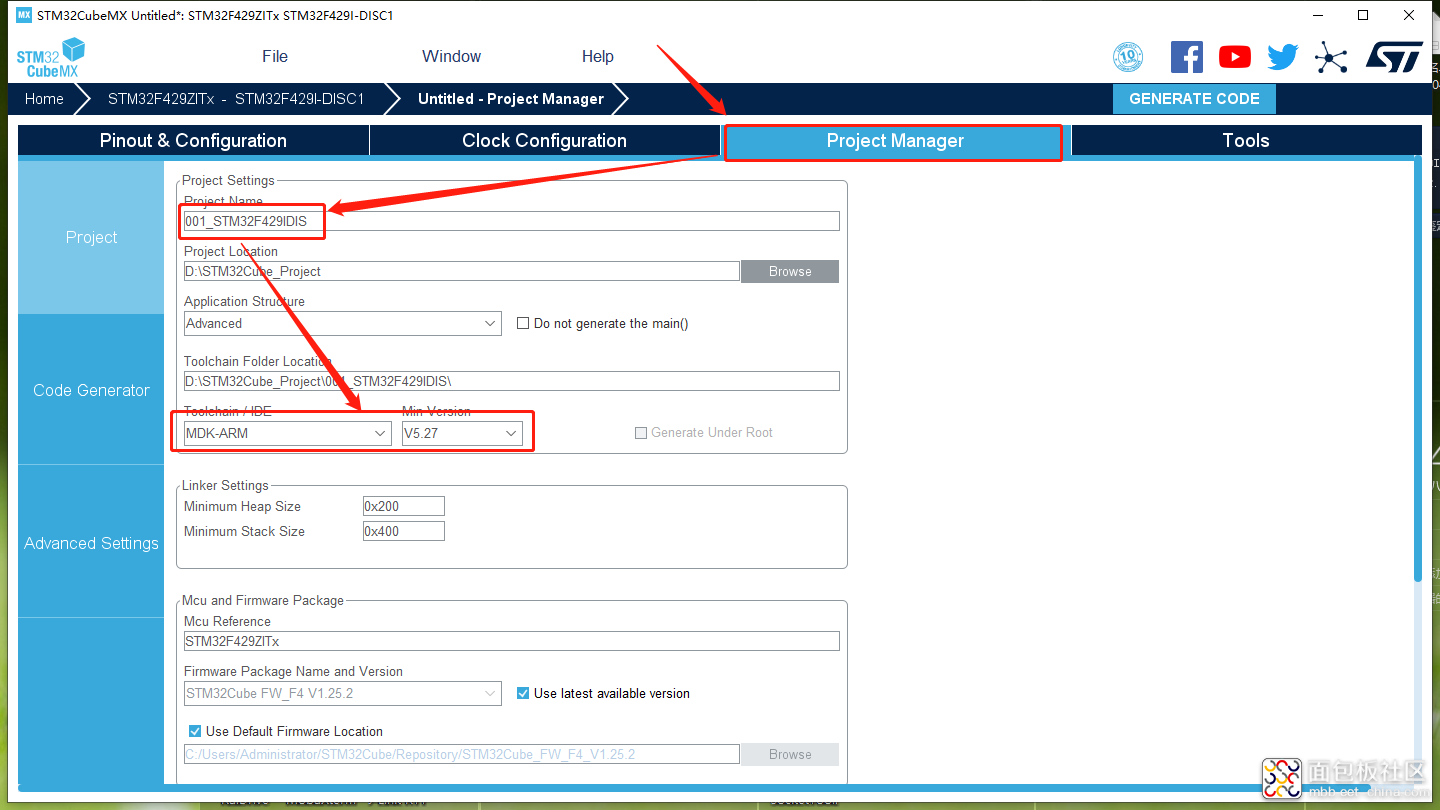
图9
打开MDK工程, 添加RTThread,如下图10所示操作,将【kernel】和【shell】都勾选上。
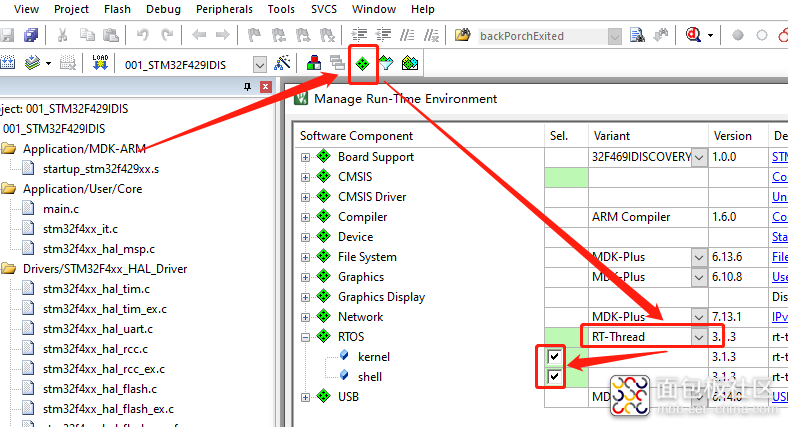
图10
这时编译会报错误(图10),因为【shell】需要一些函数的支持,添加一下代码即可。

图11
在【board.c】文件中修改代码,board文件在图11所示位置。
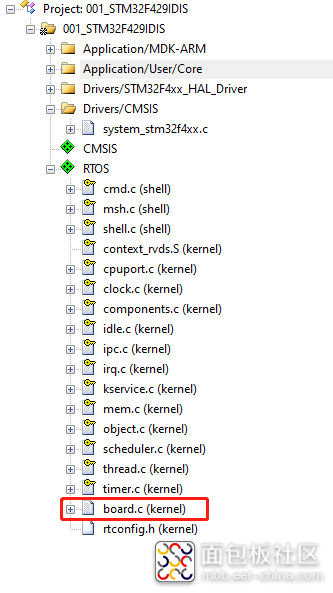
图12
代码修改如下所示:
#include <stdint.h>#include <rthw.h> #include <rtthread.h> #define _SCB_BASE (0xE000E010UL) #define _SYSTICK_CTRL (*(rt_uint32_t *)(_SCB_BASE + 0x0)) #define _SYSTICK_LOAD (*(rt_uint32_t *)(_SCB_BASE + 0x4)) #define _SYSTICK_VAL (*(rt_uint32_t *)(_SCB_BASE + 0x8)) #define _SYSTICK_CALIB (*(rt_uint32_t *)(_SCB_BASE + 0xC)) #define _SYSTICK_PRI (*(rt_uint8_t *)(0xE000ED23UL)) // Updates the variable SystemCoreClock and must be called // whenever the core clock is changed during program execution. extern void SystemCoreClockUpdate(void); // Holds the system core clock, which is the system clock // frequency supplied to the SysTick timer and the processor // core clock. extern uint32_t SystemCoreClock; static uint32_t _SysTick_Config(rt_uint32_t ticks) { if ((ticks - 1) > 0xFFFFFF) { return 1; } _SYSTICK_LOAD = ticks - 1; _SYSTICK_PRI = 0xFF; _SYSTICK_VAL = 0; _SYSTICK_CTRL = 0x07; return 0; } #if defined(RT_USING_USER_MAIN) && defined(RT_USING_HEAP) #define RT_HEAP_SIZE 1024 static uint32_t rt_heap[RT_HEAP_SIZE]; // heap default size: 4K(1024 * 4) RT_WEAK void *rt_heap_begin_get(void) { return rt_heap; } RT_WEAK void *rt_heap_end_get(void) { return rt_heap + RT_HEAP_SIZE; } #endif #include "main.h" #include "usart.h" #include "gpio.h" extern void SystemClock_Config(void); extern UART_HandleTypeDef huart1; /** * This function will initial your board. */ void rt_hw_board_init() { /* System Clock Update */ HAL_Init(); SystemClock_Config(); MX_GPIO_Init(); MX_USART1_UART_Init(); SystemCoreClockUpdate(); /* System Tick Configuration */ _SysTick_Config(SystemCoreClock / RT_TICK_PER_SECOND); /* Call components board initial (use INIT_BOARD_EXPORT()) */ #ifdef RT_USING_COMPONENTS_INIT rt_components_board_init(); #endif #if defined(RT_USING_USER_MAIN) && defined(RT_USING_HEAP) rt_system_heap_init(rt_heap_begin_get(), rt_heap_end_get()); #endif } void SysTick_Handler(void) { /* enter interrupt */ rt_interrupt_enter(); rt_tick_increase(); /* leave interrupt */ rt_interrupt_leave(); } void rt_hw_console_output(const char *str) { rt_size_t i=0,size=0; char a='\r'; __HAL_UNLOCK(&huart1); size=rt_strlen(str); for(i=0;i<size;i++) { if(*(str+i)== '\n') { HAL_UART_Transmit(&huart1,(uint8_t *)&a,1,1); } HAL_UART_Transmit(&huart1,(uint8_t *)(str+i),1,1); } } char rt_hw_console_getchar(void) { int ch=-1; if(__HAL_UART_GET_FLAG(&huart1,UART_FLAG_RXNE) !=RESET) { ch=huart1.Instance->DR &0xff; } else { if(__HAL_UART_GET_FLAG(&huart1,UART_FLAG_ORE) !=RESET) { __HAL_UART_CLEAR_OREFLAG(&huart1); } rt_thread_mdelay (10); } return ch; }
复制代码int main(void){ /* USER CODE BEGIN 1 */ #if 0 /* USER CODE END 1 */ /* MCU Configuration--------------------------------------------------------*/ /* Reset of all peripherals, Initializes the Flash interface and the Systick. */ HAL_Init(); /* USER CODE BEGIN Init */ /* USER CODE END Init */ /* Configure the system clock */ SystemClock_Config(); /* USER CODE BEGIN SysInit */ /* USER CODE END SysInit */ /* Initialize all configured peripherals */ MX_GPIO_Init(); MX_USART1_UART_Init(); /* USER CODE BEGIN 2 */ #endif /* USER CODE END 2 */ /* Infinite loop */ /* USER CODE BEGIN WHILE */ while (1) { break; /* USER CODE END WHILE */ /* USER CODE BEGIN 3 */ } /* USER CODE END 3 */ }
复制代码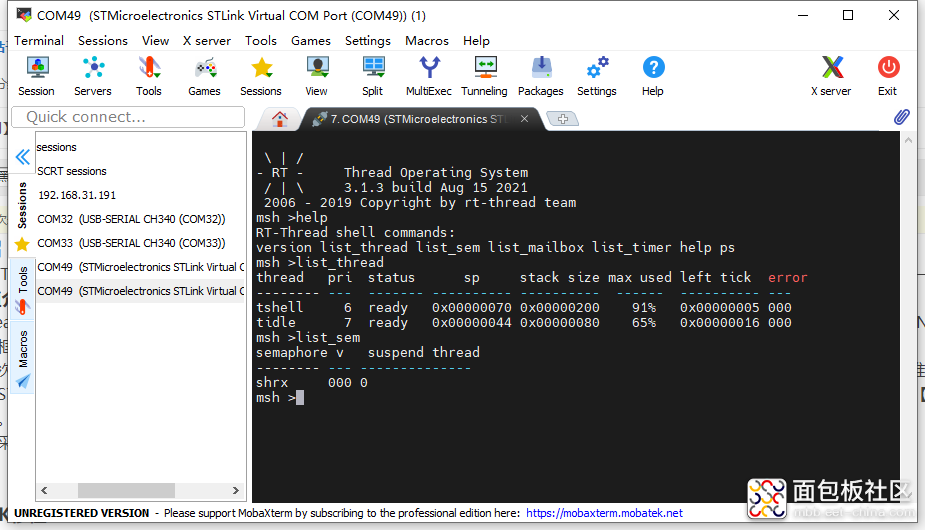
图13
4.总结
其实移植RTThread非常简单,只要操作过一次之后基本就没有问题了,而且RTThread的使用者也越来越多了,希望这篇帖子能够帮助到大家!


 /5
/5 


希望今后多多分享