该项目通过声音表现为波的现象,使声悬浮成为可能。当两个声波相互交叉时,它们可以相互建设性或破坏性干扰。(这就是降噪耳机的工作原理。)
该项目使用超声波距离传感器来产生悬浮效果。这是通过创建两个相反的声波相互干扰的“口袋”来实现的。当一个物体放在口袋里时,它会静止呆在那里,看起来像是在原地盘旋。
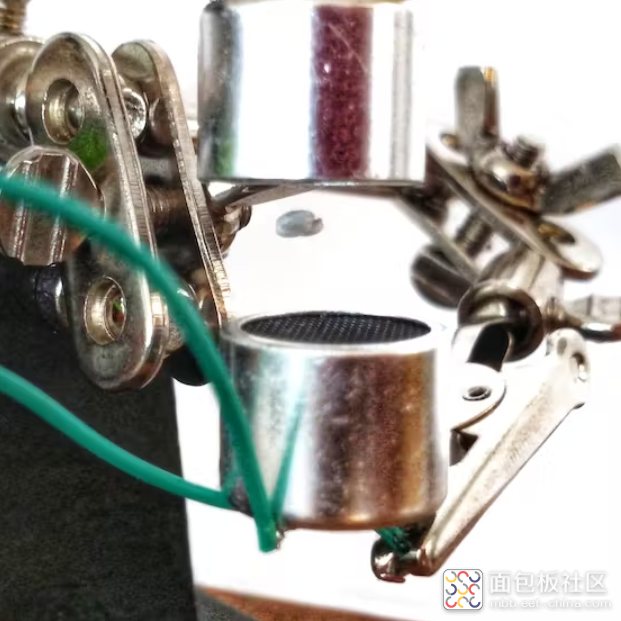
所需材料:
- Arduino 板
- H桥
- 距离传感器
- 面包板
- 跳线
- 二极管
- 电容器
第 1 步:获取超声波发射器
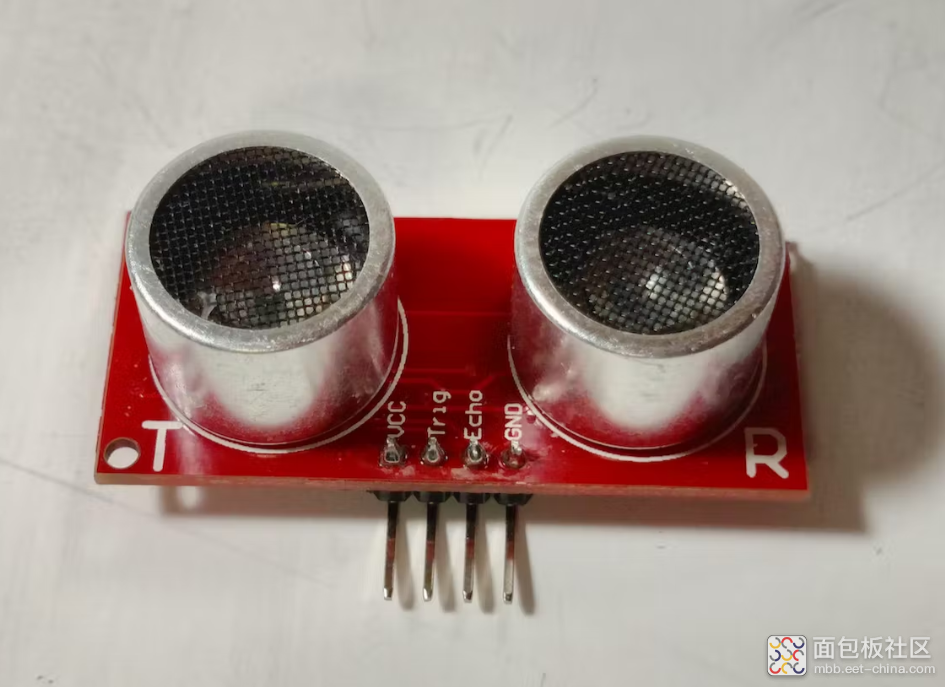
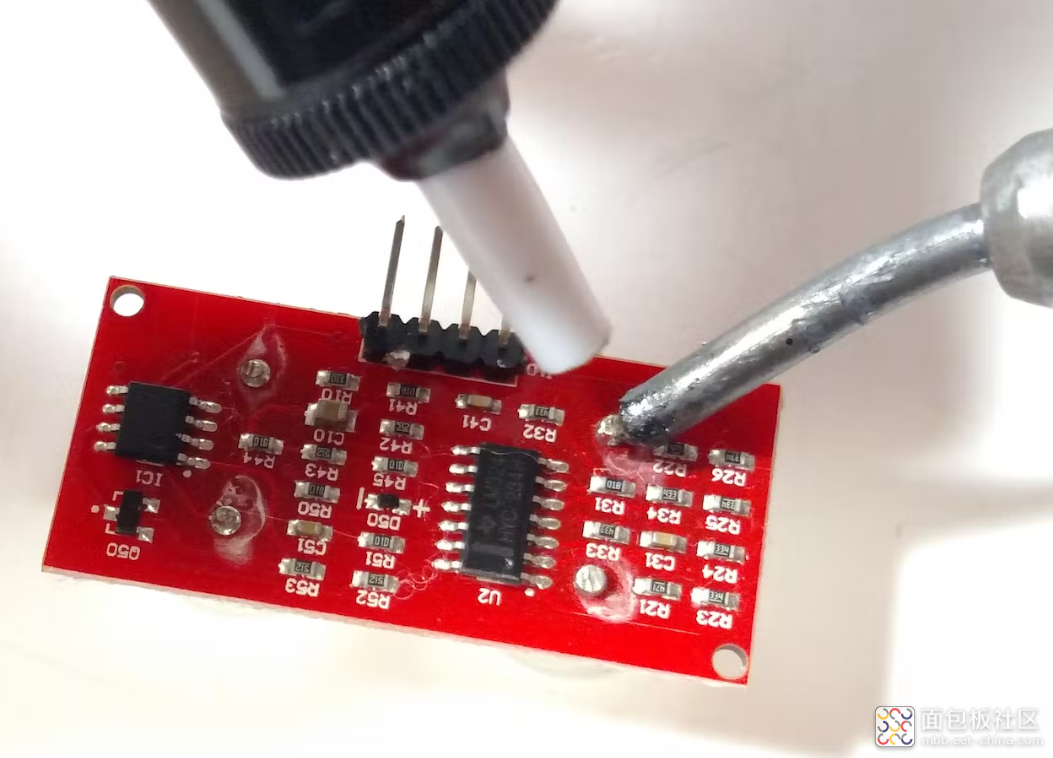
您需要为此步骤使用掉一个距离传感器。不过不用担心,相对来说比较便宜:
- 从板上拆焊并移除两个发射器
- 从一个中拆除并保存网筛
- 将导线焊接到两个发射器
第 2 步:创建电路
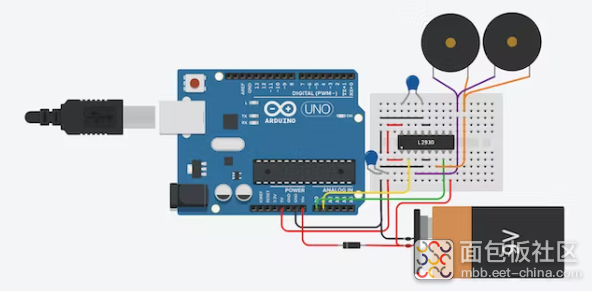
创建上述电路并注意以下几点:
- 不一定需要包括两个 100nF 电容器。(仅当电路板由于某种原因无法处理电路并且它不断自行关闭时)
- 9v 电池是任何直流电源的替代品 - 我的电池与 7.5v LiPo 电池一起工作正常
第 3 步:代码
将此代码上传到您的 Arduino:
将此代码上传到您的 Arduino:
//original code from: https://makezine.com/projects/micro-ultrasonic-levitator/
byte TP = 0b10101010; // Every other port receives the inverted signal
void setup() {
DDRC = 0b11111111; // Set all analog ports to be outputs
// Initialize Timer1
noInterrupts(); // Disable interrupts
TCCR1A = 0;
TCCR1B = 0;
TCNT1 = 0;
OCR1A = 200; // Set compare register (16MHz / 200 = 80kHz square wave -> 40kHz full wave)
TCCR1B |= (1 << WGM12); // CTC mode
TCCR1B |= (1 << CS10); // Set prescaler to 1 ==> no prescaling
TIMSK1 |= (1 << OCIE1A); // Enable compare timer interrupt
interrupts(); // Enable interrupts
}
ISR(TIMER1_COMPA_vect) {
PORTC = TP; // Send the value of TP to the outputs
TP = ~TP; // Invert TP for the next run
}
void loop() {
// Nothing left to do here
}
第 4 步:安装变送器并校准
byte TP = 0b10101010; // Every other port receives the inverted signal
void setup() {
DDRC = 0b11111111; // Set all analog ports to be outputs
// Initialize Timer1
noInterrupts(); // Disable interrupts
TCCR1A = 0;
TCCR1B = 0;
TCNT1 = 0;
OCR1A = 200; // Set compare register (16MHz / 200 = 80kHz square wave -> 40kHz full wave)
TCCR1B |= (1 << WGM12); // CTC mode
TCCR1B |= (1 << CS10); // Set prescaler to 1 ==> no prescaling
TIMSK1 |= (1 << OCIE1A); // Enable compare timer interrupt
interrupts(); // Enable interrupts
}
ISR(TIMER1_COMPA_vect) {
PORTC = TP; // Send the value of TP to the outputs
TP = ~TP; // Invert TP for the next run
}
void loop() {
// Nothing left to do here

}
第 4 步:安装变送器并校准
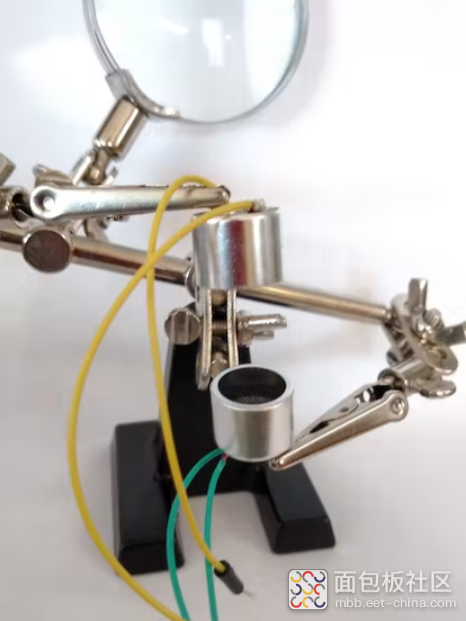
你可以使用任何东西来做到这一点,我借用了一些外力:
- 首先将发射器放置在彼此相距约 3/4" 的位置
- 取一小块大约一半豌豆大小的泡沫塑料(不需要是圆形的)
- 从步骤 1 开始,将聚苯乙烯泡沫塑料放在网筛上
- 使用镊子或钳子将其放在两个发射器之间(靠近时它应该开始摆动)
- 移动发射器(越来越近和越来越远),直到聚苯乙烯泡沫塑料保持静止
故障排除
我花了大约 15 分钟才让它第一次工作,但之后很容易让它再次运行。如果一开始不起作用,您可以从以下方面进行检查:
我花了大约 15 分钟才让它第一次工作,但之后很容易让它再次运行。如果一开始不起作用,您可以从以下方面进行检查:
- 确保你正确连接了所有东西
- 增加H桥的电压(不同的电池)
- 取一小块聚苯乙烯泡沫塑料
- 为发射器尝试不同的位置
- 尝试添加电容器
- 如果它仍然不起作用,则可能是某些东西坏了:尝试使用不同的发射器或新电池。
需上传到 Arduino 的 Code 片段:
//original code from: https://makezine.com/projects/micro-ultrasonic-levitator/
byte TP = 0b10101010; // Every other port receives the inverted signal
void setup() {
DDRC = 0b11111111; // Set all analog ports to be outputs
// Initialize Timer1
noInterrupts(); // Disable interrupts
TCCR1A = 0;
TCCR1B = 0;
TCNT1 = 0;
OCR1A = 200; // Set compare register (16MHz / 200 = 80kHz square wave -> 40kHz full wave)
TCCR1B |= (1 << WGM12); // CTC mode
TCCR1B |= (1 << CS10); // Set prescaler to 1 ==> no prescaling
TIMSK1 |= (1 << OCIE1A); // Enable compare timer interrupt
interrupts(); // Enable interrupts
}
ISR(TIMER1_COMPA_vect) {
PORTC = TP; // Send the value of TP to the outputs
TP = ~TP; // Invert TP for the next run
}
PORTC = TP; // Send the value of TP to the outputs
TP = ~TP; // Invert TP for the next run
}
void loop() {
// Nothing left to do here
}
// Nothing left to do here

}
(本文内容翻译自外网)
找国产替代芯片,查参数,下载datasheet,元器件购买,上道合顺大数据


 /5
/5 

