这个里面有个感兴趣的性能: DPPM 控制环路根据输入源电流的容量和负载电流的水平动态调节充电电流,以获得给定源和系统负载的最短充电时间。在移动设备中,充电器 IC 用于在使用外部电源时对电池进行充电。移动设备的系统负载可以由电池、输入源或两者供电,具体取决于电池和系统负载连接。为了控制这种电源选择,需要一种电源管理方案。
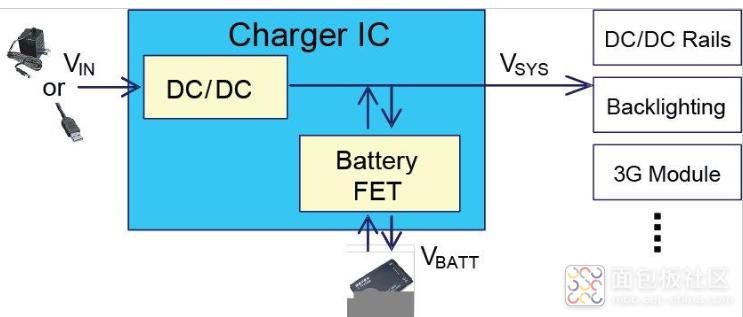
在 DPPM 中,系统负载连接到系统总线 (VSYS)。 VSYS 可通过电池 FET 由电池供电,或通过 DC/DC 转换器或低压差 (LDO) 稳压器由输入源供电。当输入源不可用时,电池 FET 完全导通,因此电池为系统负载供电。
当应用输入源时,VSYS 由输入 DC/DC 转换器或 LDO 调节。同时,VSYS 通过电池 FET 向电池提供充电电流。该充电模式优先给系统负载供电,剩余电量用于充电。根据输入源能力和系统负载水平动态调整充电电流,以获得最短充电时间。
在上述充电过程中,如果系统负载超过输入源的功率能力,VSYS将会下降。一旦 VSYS 下降到 DPPM 阈值,DPPM 控制环路就会激活并自动降低充电电流,以防止 VSYS 进一步下降。这个过程也称为DPPM模式。
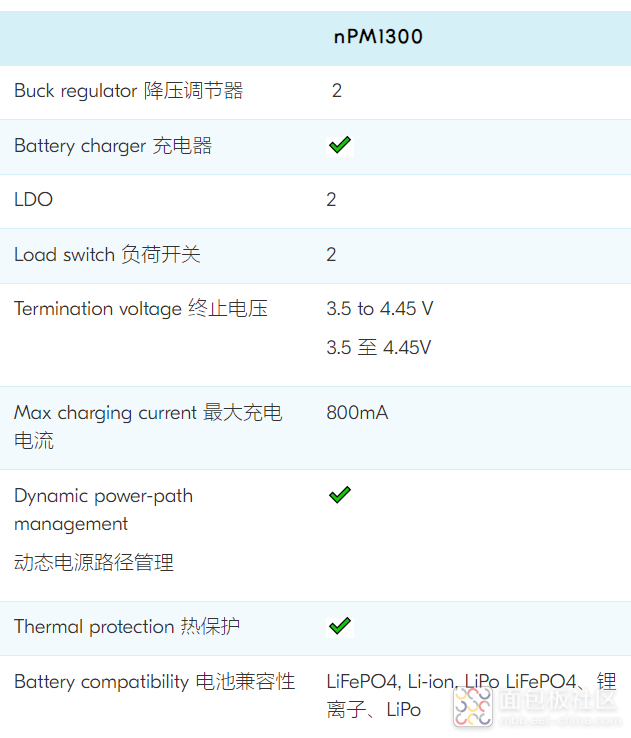
今天才更新了一下认识,发现这个芯片的强大之处:一个等价于8个

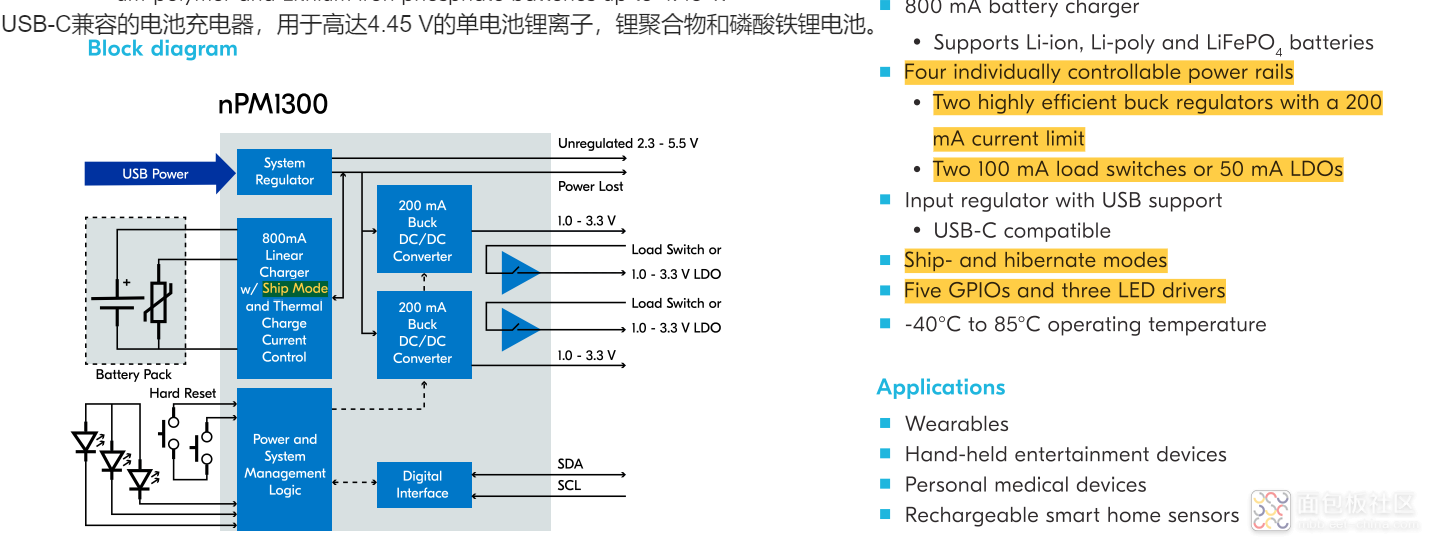
另外这个原理框图也给出一些关键特性的描述:
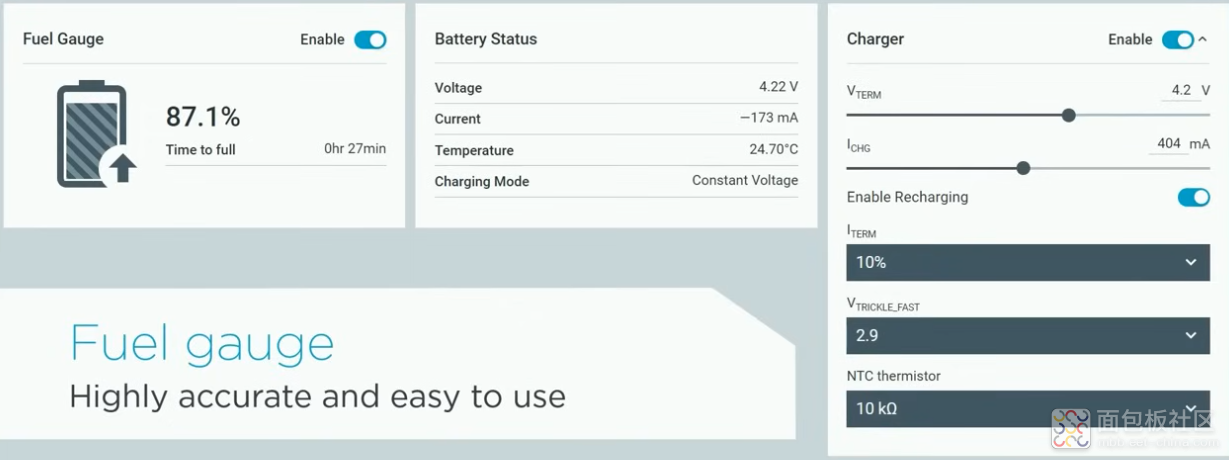
简单进行一个锂电池的充电操作:
参考论坛大佬的一篇文章,用到了一个rtos,于是打算也进行构建,具体步骤如下,可以参考下面网址进行:https://docs.zephyrproject.org/latest/develop/west/index.html
https://www.youtube.com/watch?v=02WjkF_v_30&ab_channel=CircuitDojo
https://docs.zephyrproject.org/latest/develop/toolchains/zephyr_sdk.html
Building Zephyr RTOS step by step involves setting up your development environment and then compiling the source code. Here's a detailed guide:
1. Set up the development environment:
a) Install dependencies:
- Git
- CMake
- Python 3 and pip
- Device Tree Compiler (dtc)
- Various compiler toolchains (depending on your target architecture)
b) Install West (Zephyr's meta-tool):
```
pip install west
```
2. Get Zephyr source code:
a) Create a new directory for Zephyr:
```
mkdir zephyrproject && cd zephyrproject
```
b) Initialize the repository:
```
west init -m https://github.com/zephyrproject-rtos/zephyr --mr v3.6.0
```
c) Update the repository and its modules:
```
west update
```
3. Set up Zephyr's Python dependencies:
```
pip install -r zephyr/scripts/requirements.txt
```
4. Set up environment variables:
```
source zephyr/zephyr-env.sh
```
5. Install the Zephyr SDK:
a) Download the SDK from the official Zephyr website
b) Extract it to a convenient location
c) Run the setup script in the SDK directory
6. Build a sample application:
a) Navigate to a sample project:
```
cd zephyr/samples/basic/blinky
```
b) Build for your target board (replace `<board>` with your board name):
```
west build -b <board>
```
7. Flash the application (if you have the hardware):
```
west flash
```
8. (Optional) Run in QEMU (if supported for your target):
```
west build -t run
```
Remember to consult the official Zephyr documentation for the most up-to-date instructions, as the process may change with different versions. Also, the exact steps might vary depending on your operating system and target hardware.
复制代码
在看看这个函数的返回值:
/**
* @brief Read multiple registers from npm1300
*
* @paramdev npm1300 mfd device
* @parambase Register base address (bits 15..8 of 16-bit address)
* @paramoffset Register offset address (bits 7..0 of 16-bit address)
* @paramdata Pointer to buffer for received data
* @paramlen Number of bytes to read
* @retval 0 If successful
* @retval -errno In case of any bus error (see i2c_write_read_dt())
*/
intmfd_npm1300_reg_read_burst(conststruct device *dev, uint8_tbase, uint8_toffset, void*data,
size_tlen);
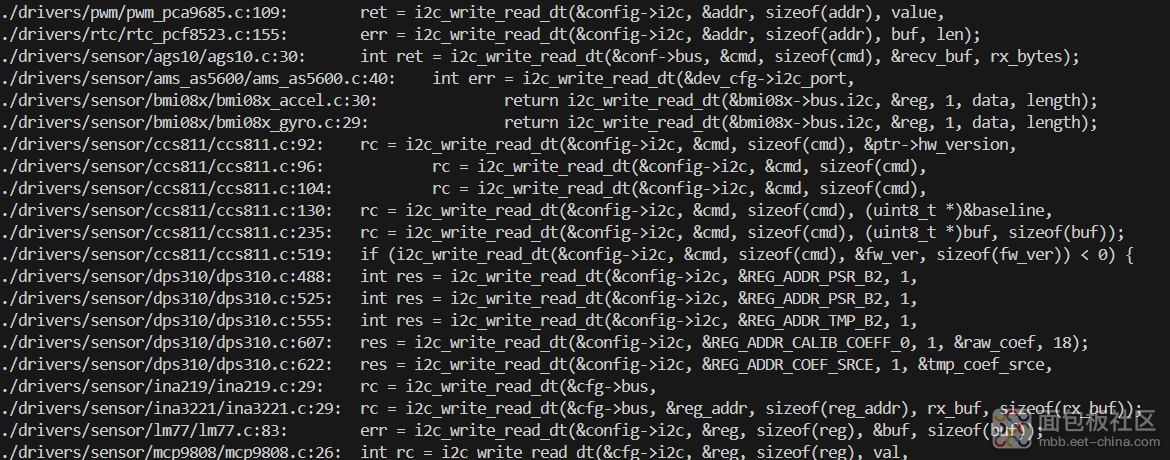
再看看这个i2c_write_read_dt函数的逻辑:内容比较个性化,似乎看起来内容比较多,随后有时间再详细读一读。
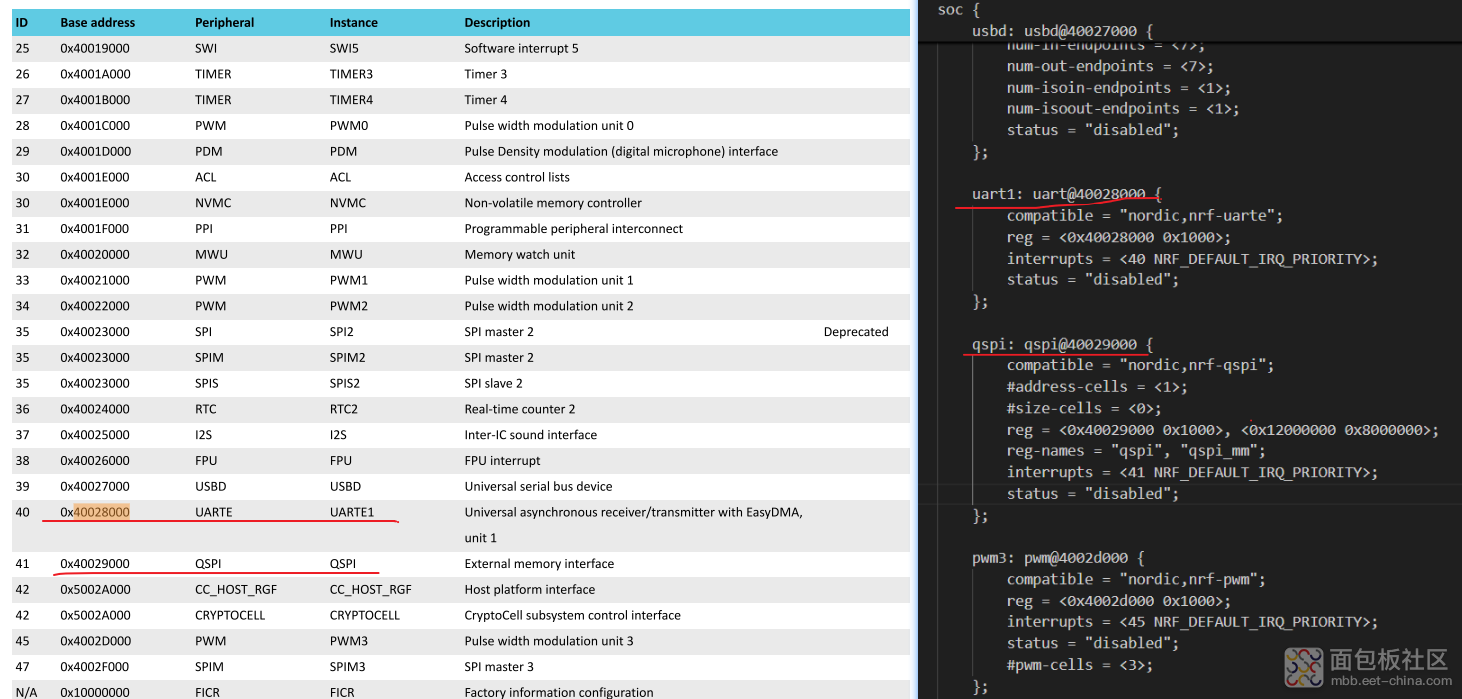
最后看了看设备树的结构:
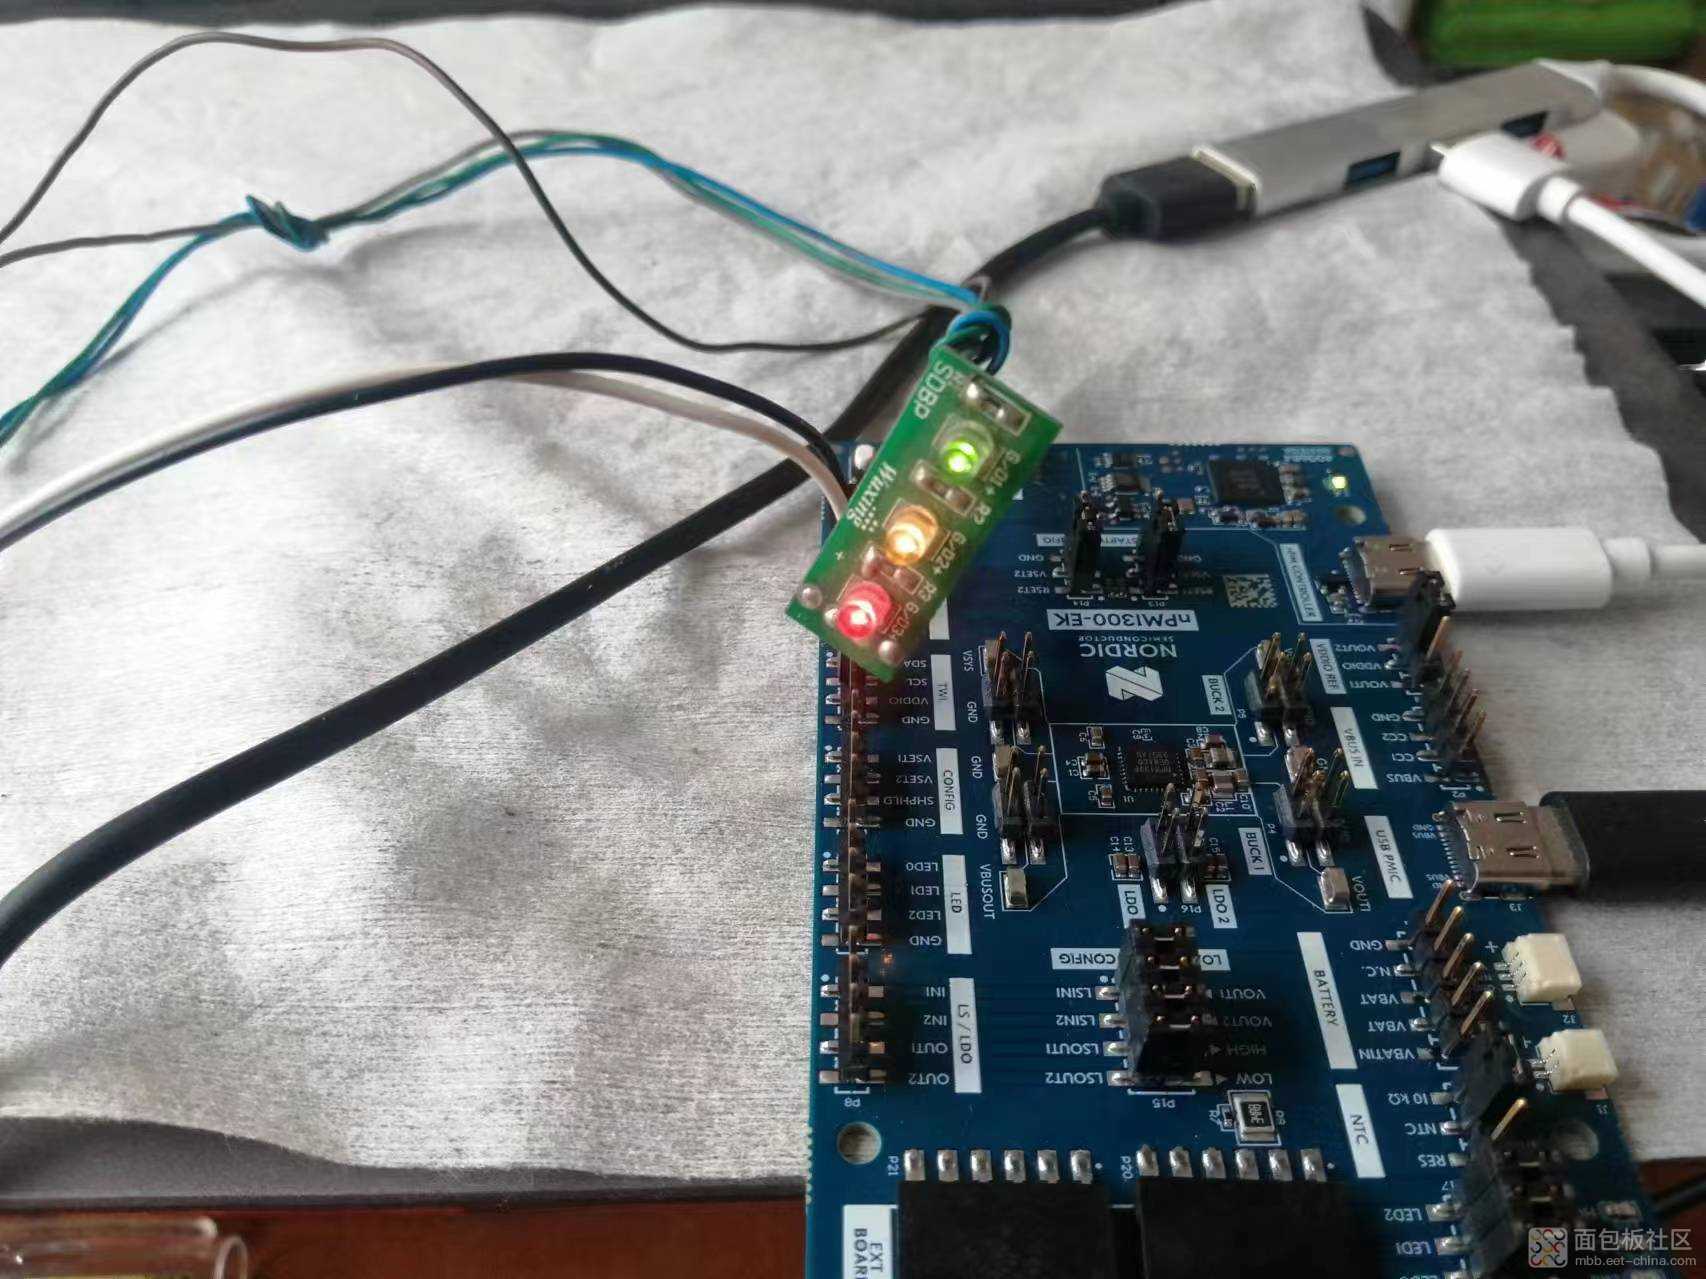
最后可以尝试运行一下这个blink项目,自行脑补。
https://github.com/bokfink/esp32_zephyr_helloworld/blob/master/src/main.c


 /4
/4 
