超声波传感器是一种简洁的多功能传感器,可以应用到您的Arduino项目中。顾名思义,它利用超声波来检测出现的物体以及物体的距离。这种设备可用于动作识别,或者在检测范围内出现目标对象时作出响应。

当然,您也许会想知道的是Arduino超声波传感器究竟是如何工作的?
为了描述它的工作原理,本指南将向您展示如何使用超声波传感器来组装一个简单的乐器。
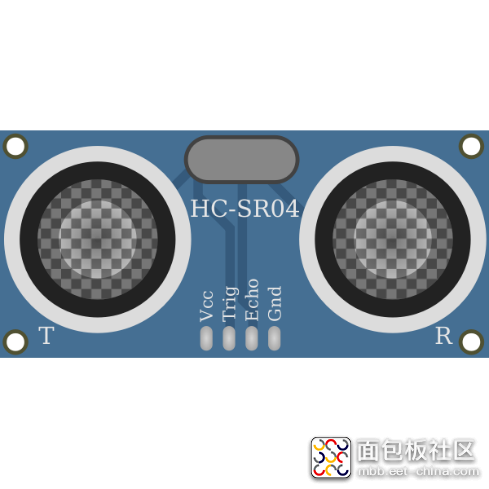
我们今天要了解的超声波传感器是HC-SR05, 它是旧版HC-SR04的5引脚升级版本。该设备具有两个圆柱形模块。一个是发出超声波信号的发射器,另一个是接收器,会捕获到达物体后反弹回来的信号。通过测量信号返回的时间,传感器可以计算出物体的距离。
虽然其他传感器(如被动红外线运动传感器)也具有类似的功能,但是超声波传感器的功用更强,因为它使您的项目不仅可以检测到面前经过的物体,还可以区分出不同物体的距离远近。
我们使用这种技术来创建一个浮动的乐器。该项目不是通过按下钢琴键来弹奏音符,而是让您把一个物体—比如一根棍子或者您的手指—放在传感器前面,根据物体与传感器之间的距离来播放不同的音符。这并不能打造出钢琴的效果,但是通过创建该项目,您可以了解能用这款便利的Arduino声音传感器来做什么。
所需组件
为了创建该项目,您需要具备以下组件:
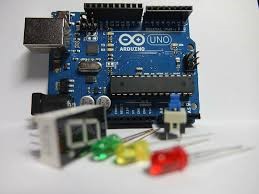
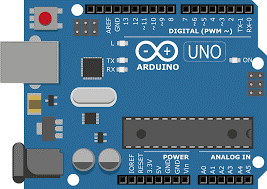
| Arduino Uno |

|
| HC-SR05 超声波传感器(可以使用HC-SR04或其他超声波传感器,但需要修改引脚配置) |

|
| Arduino IDE |

|
● 扬声器: 大多数简单的扬声器模块都可以,本项目使用的是该款简单的单声道扬声器。
● USB 电缆
如果您还没有设置Arduino IDE,可以先查阅我们之前发布的指南。
代码
首先,我们先来看一下要上传到Arduino Uno的代码,了解将要执行的操作。
void setup() {pinMode (6,OUTPUT); //Insert HC-SR-05 with VCC in pin 6 pinMode (5, INPUT); // Assign pin 5 to Echo pinMode (4, OUTPUT);// Assign pin 4 to Trig pinMode (2,OUTPUT); // Assign pin 2 to GND. Serial.begin(9600); // This will allow you to read how far away your sensor is later } void loop() { long duration, cm; // Initialize variables for duration and cm digitalWrite(6, HIGH); // Power the sensor digitalWrite(4, LOW); // Clear pulse before sending a 10 microsecond ping, delayMicroseconds(2); digitalWrite(4, HIGH); delayMicroseconds(10); digitalWrite(4, LOW); duration = pulseIn(5, HIGH); // Detect pulse length from the Echo pin, measured in microseconds cm = (duration/2)/29.155; // Divide duration in half (due to round trip), then convert distance to centimeters (1cm per 29.155 microseconds), assign to cm variable Serial.print(cm); // Print distance in cm to serial monitor Serial.print(“cm”); Serial.println(); delay(100); // Delay int note = 0; // Assign note based on distance, spacing notes per 6cm if(cm<=48&&cm>42) { note = 523; } else if(cm<=42&&cm>36) { note = 493; } else if(cm<=36&&cm>30) { note = 440; } else if(cm<=30&&cm>24) { note = 392; } else if(cm<=24&&cm>18) { note = 349; } else if(cm<=18&&cm>12) { note = 329; } else if(cm<=12&&cm>6) { note = 294; } else if(cm<=6) { note = 261; } if (note == 0) { // If distance isn’t within 48cm, play nothing noTone(9); } else { tone(9, note, 200); // Play assigned note for 200 milliseconds } delay(10); // Brief pause }
复制代码digitalWrite(6, HIGH); // Power the sensordigitalWrite(4, LOW); // Clear pulse before sending a 10 microsecond ping, delayMicroseconds(2); digitalWrite(4, HIGH); delayMicroseconds(10); digitalWrite(4, LOW); duration = pulseIn(5, HIGH); // Detect pulse length from the Echo pin, measured in microseconds cm = (duration/2)/29.155; // Divide duration in half (due to round trip), then convert distance to centimeters (1cm per 29.155 microseconds), assign to cm variable
复制代码接下来,pulseIn() 函数测量从脉冲离开传感器到接收器检测到返回信号所用的时间,单位为微秒。
然后将该时间除以2,因为这是信号往返花费的总时间。这为我们提供了40KHz声音传播到物体所需的微秒数。由于声音传播1厘米大约需要29.155微秒,所以我们可以将计算出的时间除以29.155。以此我们就可以计算出目标对象的距离,单位为厘米,然后将该距离值分配给cm变量。
接下来的几行代码会将距离(以厘米为单位)打印到串行监视器,这有助于确认代码运行正常,并便于我们在运行程序时查看物体的距离。
代码的最后主要相关部分是这样的:
int note = 0; // Assign note based on distance, spacing notes per 6cmif(cm<=48&&cm>42) { note = 523; } else if(cm<=42&&cm>36) { note = 493; } else if(cm<=36&&cm>30) { note = 440; } else if(cm<=30&&cm>24) { note = 392; } else if(cm<=24&&cm>18) { note = 349; } else if(cm<=18&&cm>12) { note = 329; } else if(cm<=12&&cm>6) { note = 294; } else if(cm<=6) { note = 261; } if (note == 0) { // If distance isn’t within 48cm, play nothing noTone(9); } else { tone(9, note, 200); // Play assigned note for 200 milliseconds }
复制代码在最后一部分中,tone() 函数 用来播放音符,如果48cm内没有检测到物体,noTone()函数 将会停止前一个声音的播放。在开始循环之前的最后一个指令是delay()。这些延迟有助于避免程序更改音符过快,因为传感器的精确度没有那么高。

接线
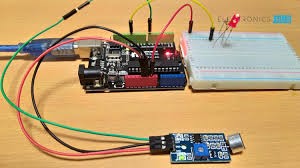
了解了代码如何运行之后,您就可以将其上传到Arduino Uno上了,然后拔掉设备。现在,是时候将它们连接起来了。我们已经完成了代码的编写以尽可能简化该过程。您所要做的就是按照以下步骤进行操作:
● 将HC-SR05传感器插入数字引脚2到6,GND插入引脚2,VCC插入引脚6。这样连接可以使传感器朝向外侧,远离Arduino。
● 将扬声器上的正极线(通常为红色)插入引脚9。
● 将另一根扬声器线(通常为黑色)插入其中一个GND引脚。
连接好所有电线好,插入Arduino,并在传感器前留出大约50厘米的空间。接下来是最有趣的部分。将您的手或者一根小棍子放在传感器前面,您会听到扬声器发出的声音。物体放置的越远,音调越高。
您可以尝试使用delay()和tone()所带来的持续时间使声音听起来更平滑,或调整频率值以获得不同的音符。该传感器还可以用作报警器,以在物体进入一定范围内的区域时发出警报,或者当您的手处于某一距离范围内时向您的计算机发送指令。
来源:techclass.rohm


 /5
/5 

