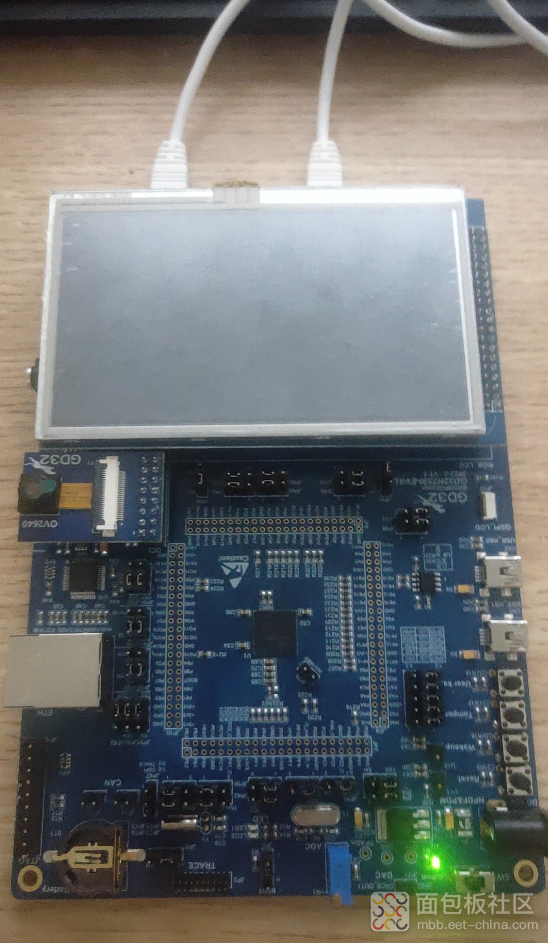
GD32H759I-EVAL开发板,使用GD32H759IMK6作为主控制器。MCU主频高达600MHz,配备了3840KB的片上Flash及1024KB的SRAM,其中包含512KB可配置超大紧耦合内存(ITCM, DTCM),可确保关键指令与数据的零等待执行;还配备了64KB L1-Cache高速缓存(I-Cache, D-Cache),有效提升CPU处理效率和实时性。外部总线扩展(EXMC)支持访问SDRAM、SRAM、ROM、NOR Flash和NAND Flash等多种片外存储器。GD32H7内置了可实时跟踪指令和数据的宏单元ETM(Embedded Trace Macrocell),提供在不干扰CPU正常运行情况下的高级调试功能。GD32H7内置的大容量存储空间能够支持复杂操作系统及嵌入式AI、机器学习(ML)等多种高级算法,实现兼具高性能和低延迟的实时控制。
首先下载资料:
网址:兆易创新GigaDevice-资料下载兆易创新GD32 MCU
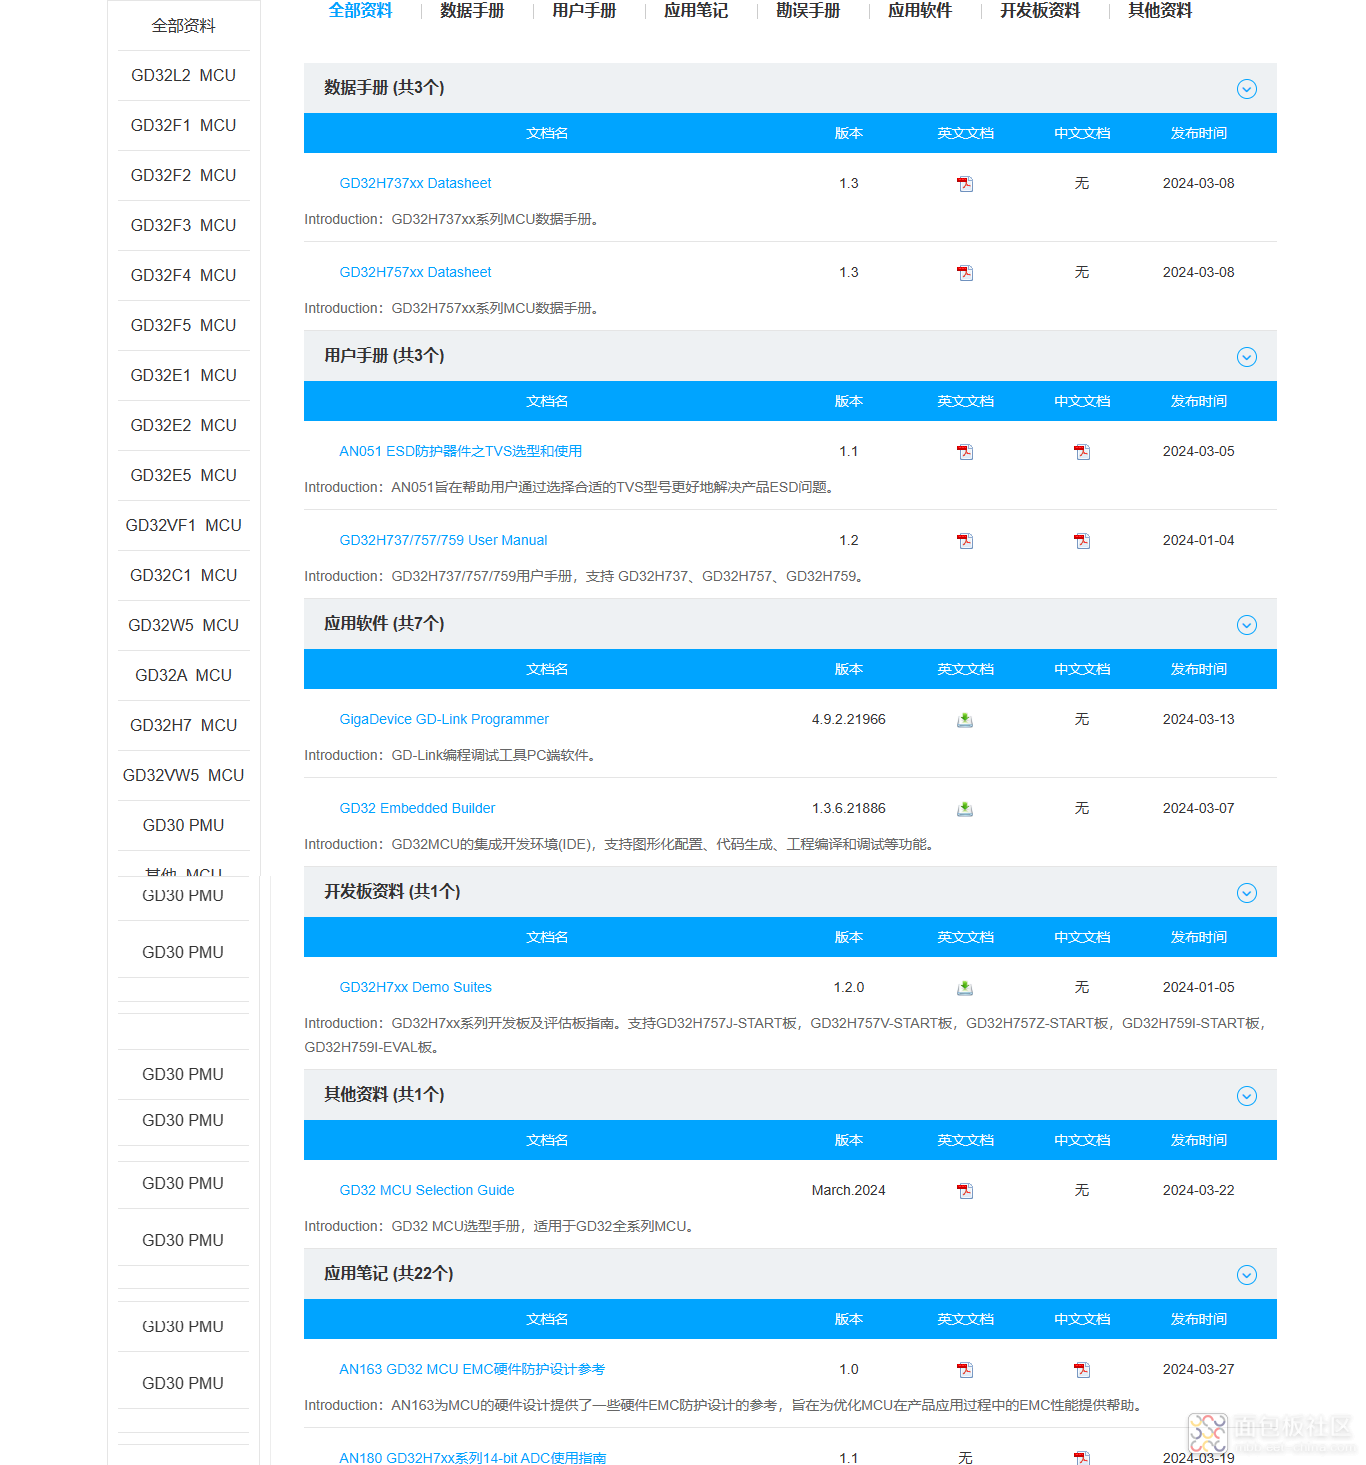
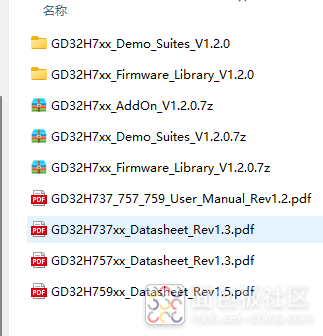
下载了mcu的用户手册和数据手册以及软件包和开发板历程。
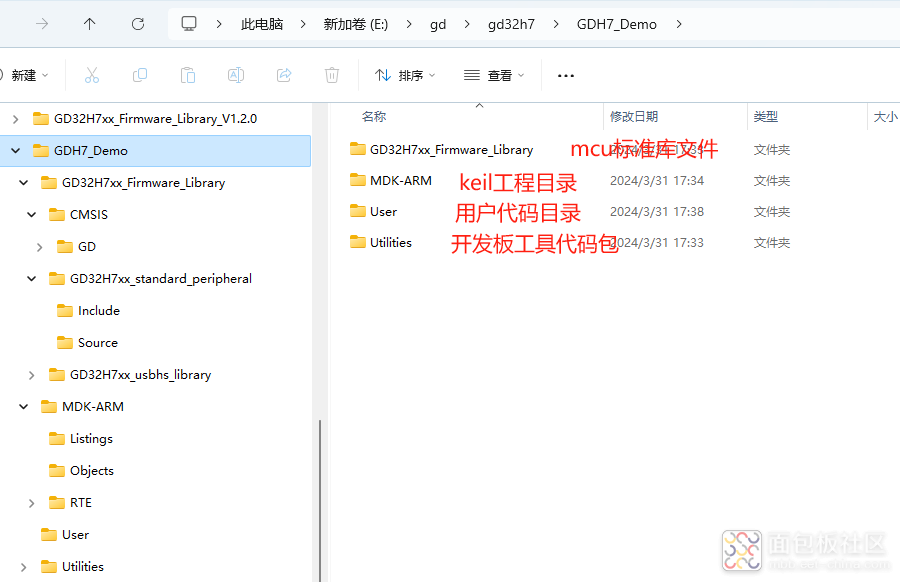
因为例程都在库里面公用的,所以先搞个单独的工程出来,方便后面在模板基础上继续开发。
下面就是我新建的基础工程目录
打开keil工程,将代码文件添加到工程中。然后对工程进行一些设置。主要设置编译器优化参数,头文件路径包含,以及debug下载器设置。
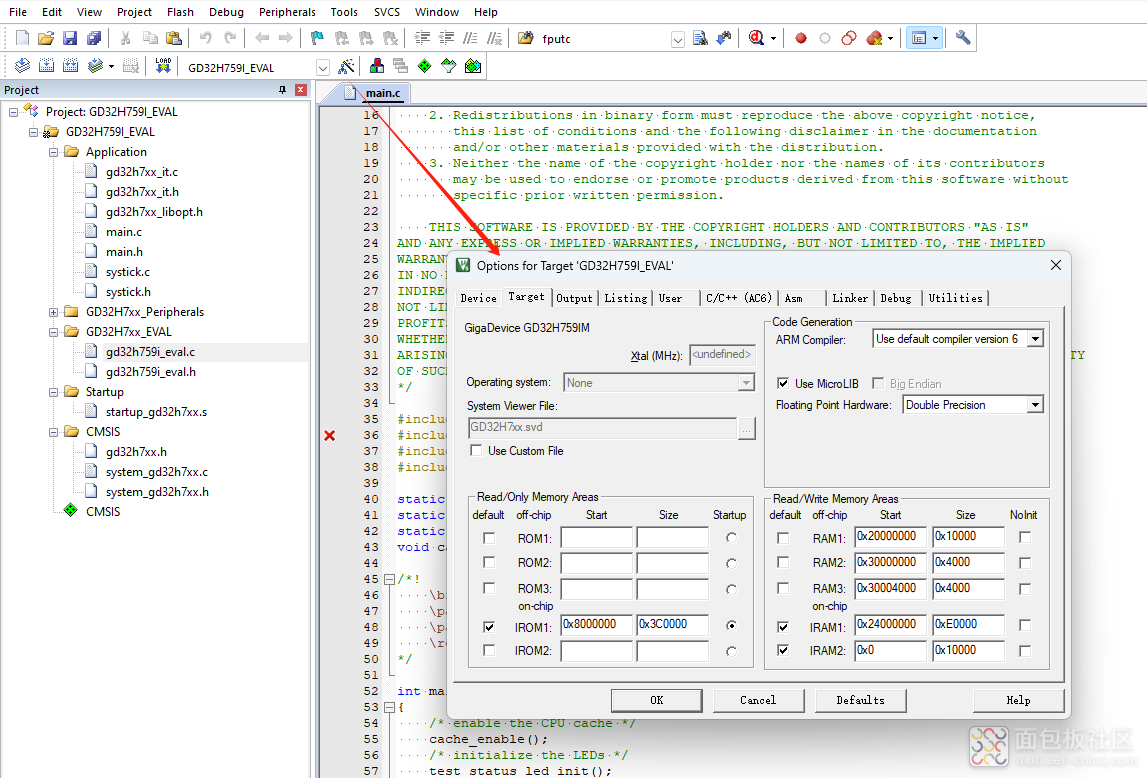
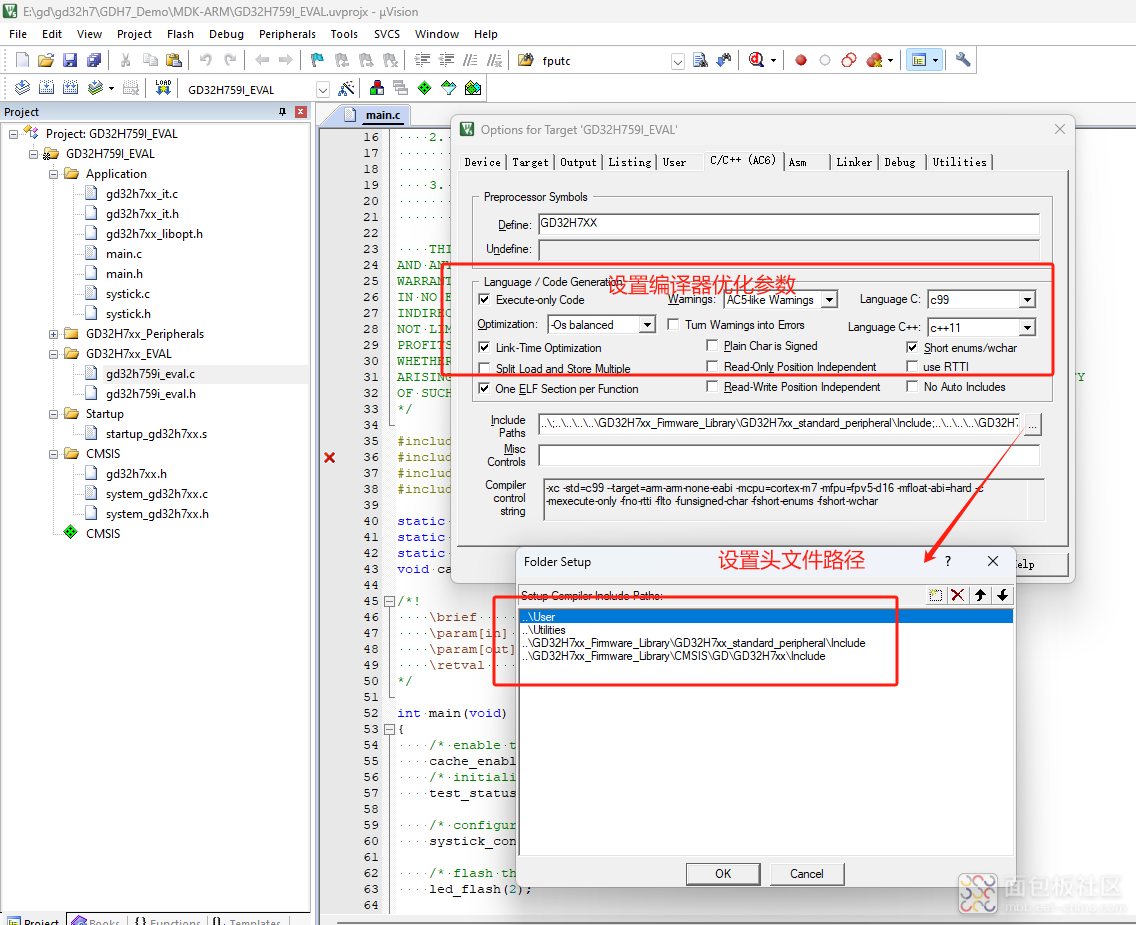
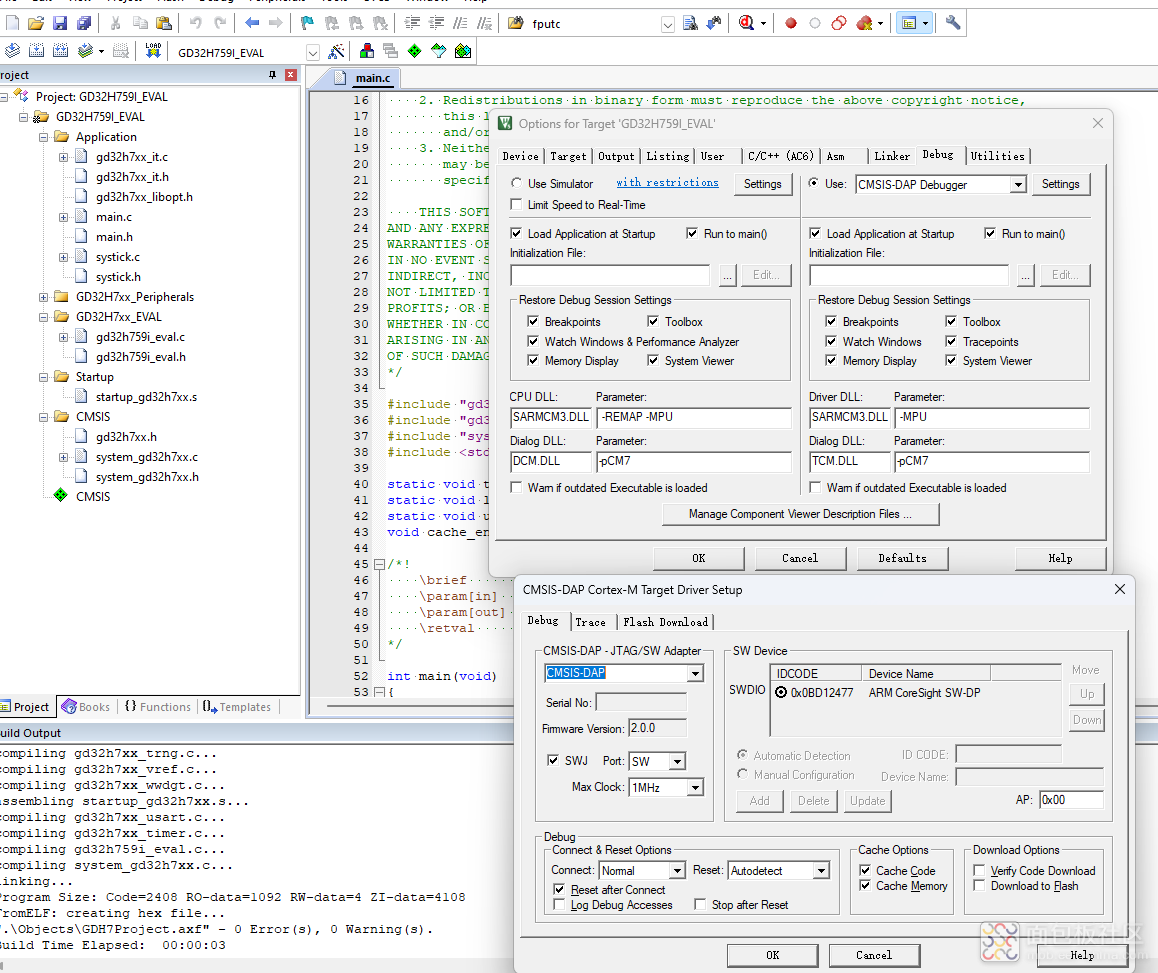
下面接着修改main.c文件代码。
#include "main.h"
/*!
\brief gpio configure
\param[in] none
\param[out] none
\retval none
*/
static void gpio_config(void)
{
/* enable the gpio clock */
rcu_periph_clock_enable(RCU_GPIOA);
rcu_periph_clock_enable(RCU_GPIOC);
rcu_periph_clock_enable(RCU_GPIOF);
GPIO_BC(GPIOA) = GPIO_PIN_6;
GPIO_BC(GPIOF) = GPIO_PIN_10;
/* configure led GPIO port */
gpio_mode_set(GPIOA, GPIO_MODE_OUTPUT, GPIO_PUPD_NONE, GPIO_PIN_6); //LED2
gpio_output_options_set(GPIOA, GPIO_OTYPE_PP, GPIO_OSPEED_60MHZ, GPIO_PIN_6);
gpio_mode_set(GPIOF, GPIO_MODE_OUTPUT, GPIO_PUPD_NONE, GPIO_PIN_10);//LED1
gpio_output_options_set(GPIOF, GPIO_OTYPE_PP, GPIO_OSPEED_60MHZ, GPIO_PIN_10);
/* configure button pin as input */
gpio_mode_set(GPIOA, GPIO_MODE_INPUT, GPIO_PUPD_NONE, GPIO_PIN_0); //WAKEUP KEY
gpio_mode_set(GPIOC, GPIO_MODE_INPUT, GPIO_PUPD_NONE, GPIO_PIN_13); //TAMPER_KEY
gpio_mode_set(GPIOF, GPIO_MODE_INPUT, GPIO_PUPD_NONE, GPIO_PIN_8); //USER_KEY
}
/*!
\brief usart configure
\param[in] none
\param[out] none
\retval none
*/
static void usart_config(void)
{
/* enable GPIO clock */
rcu_periph_clock_enable(EVAL_COM_GPIO_CLK);
/* connect port to USART0 TX */
gpio_af_set(EVAL_COM_GPIO_PORT, EVAL_COM_AF, EVAL_COM_TX_PIN);
/* connect port to USART0 RX */
gpio_af_set(EVAL_COM_GPIO_PORT, EVAL_COM_AF, EVAL_COM_RX_PIN);
/* configure USART TX as alternate function push-pull */
gpio_mode_set(EVAL_COM_GPIO_PORT, GPIO_MODE_AF, GPIO_PUPD_PULLUP, EVAL_COM_TX_PIN);
gpio_output_options_set(EVAL_COM_GPIO_PORT, GPIO_OTYPE_PP, GPIO_OSPEED_60MHZ, EVAL_COM_TX_PIN);
/* configure USART RX as alternate function push-pull */
gpio_mode_set(EVAL_COM_GPIO_PORT, GPIO_MODE_AF, GPIO_PUPD_PULLUP, EVAL_COM_RX_PIN);
gpio_output_options_set(EVAL_COM_GPIO_PORT, GPIO_OTYPE_PP, GPIO_OSPEED_60MHZ, EVAL_COM_RX_PIN);
/* enable USART clock */
rcu_periph_clock_enable(EVAL_COM_CLK);
/* USART configure */
usart_deinit(EVAL_COM);
usart_word_length_set(EVAL_COM, USART_WL_8BIT);
usart_stop_bit_set(EVAL_COM, USART_STB_1BIT);
usart_parity_config(EVAL_COM, USART_PM_NONE);
usart_baudrate_set(EVAL_COM, 115200U);
usart_receive_config(EVAL_COM, USART_RECEIVE_ENABLE);
usart_transmit_config(EVAL_COM, USART_TRANSMIT_ENABLE);
usart_enable(EVAL_COM);
}
/* retarget the C library printf function to the USART */
int fputc(int ch, FILE *f)
{
usart_data_transmit(EVAL_COM, (uint8_t)ch);
while(RESET == usart_flag_get(EVAL_COM, USART_FLAG_TBE));
return ch;
}
/*!
\brief main function
\param[in] none
\param[out] none
\retval none
*/
int main(void)
{
/* enable the CPU cache */
/* enable i-cache */
SCB_EnableICache();
/* enable d-cache */
SCB_EnableDCache();
/* configure systick */
systick_config();
gpio_config();
usart_config();
/* output a message on hyperterminal using printf function */
printf("\r\n USART printf example.\r\n");
while(1)
{
GPIO_TG(LED2_GPIO_PORT) = LED2_PIN;
delay_1ms(100);
GPIO_TG(LED1_GPIO_PORT) = LED1_PIN;
delay_1ms(100);
if(gpio_input_bit_get(TAMPER_KEY_GPIO_PORT, TAMPER_KEY_PIN) == RESET)
{
printf("\r\n TAMPER_KEY Press.\r\n");
}
if(gpio_input_bit_get(WAKEUP_KEY_GPIO_PORT, WAKEUP_KEY_PIN) == RESET)
{
printf("\r\n WAKEUP_KEY Press.\r\n");
}
if(gpio_input_bit_get(USER_KEY_GPIO_PORT, USER_KEY_PIN) == RESET)
{
printf("\r\n USER_KEY Press.\r\n");
}
}
}
复制代码#ifndef MAIN_H
#define MAIN_H
#include <stdio.h>
#include <stdlib.h>
#include <string.h>
#include <stdint.h>
#include "gd32h7xx.h"
#include "gd32h759i_eval.h"
#include "systick.h"
#endif /* MAIN_H */
复制代码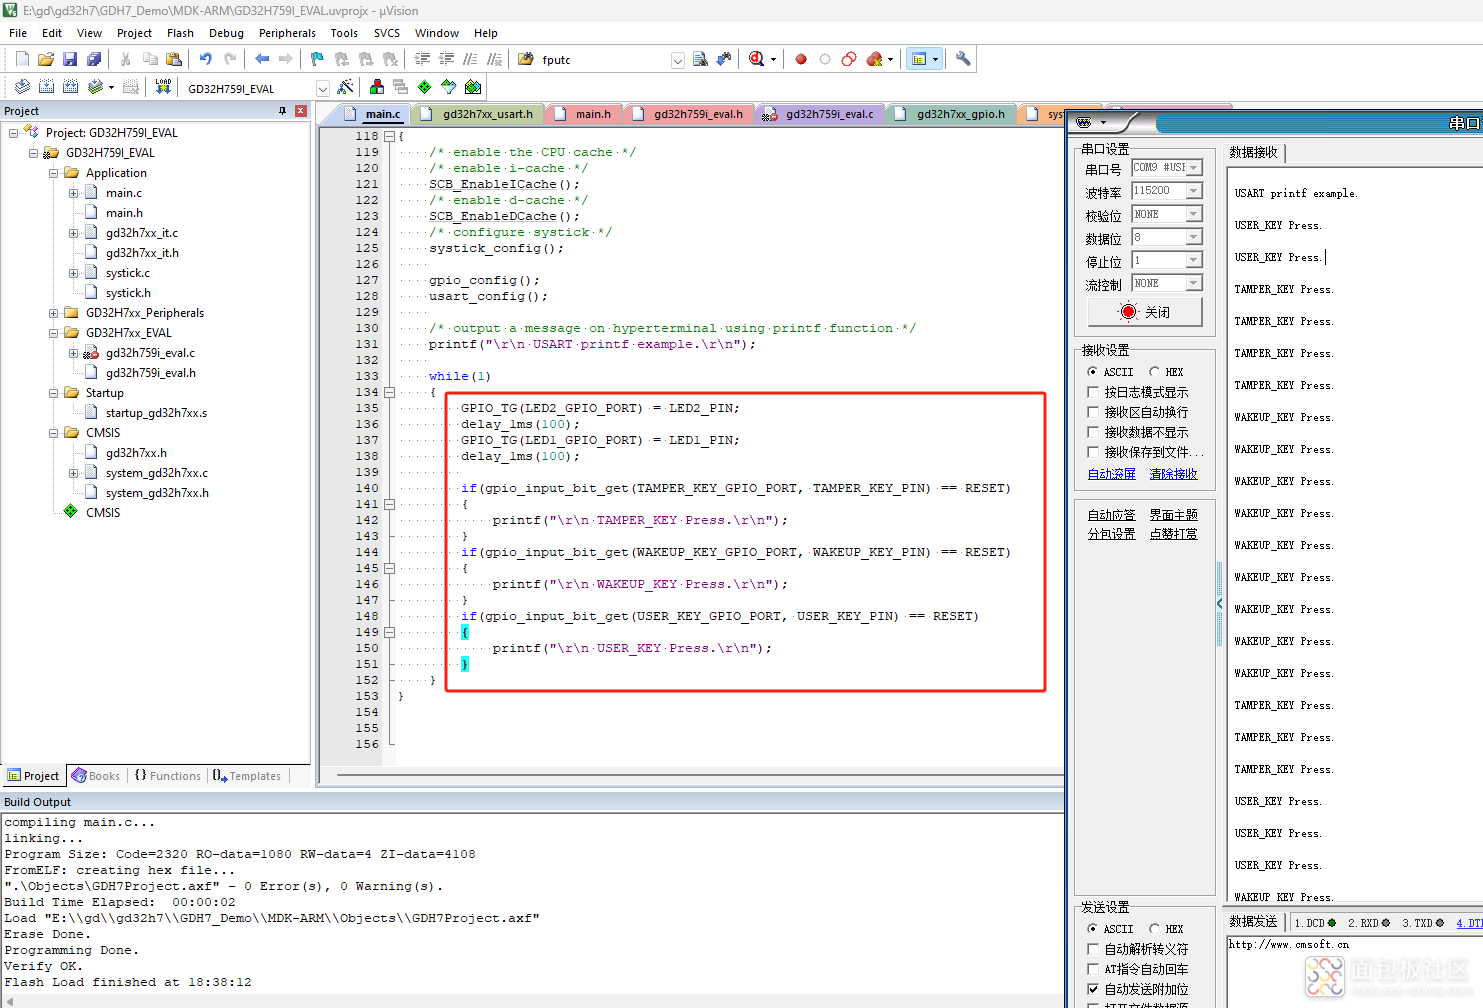
下载之后就可以看到led闪烁了,不过要注意一下跳线帽的位置。
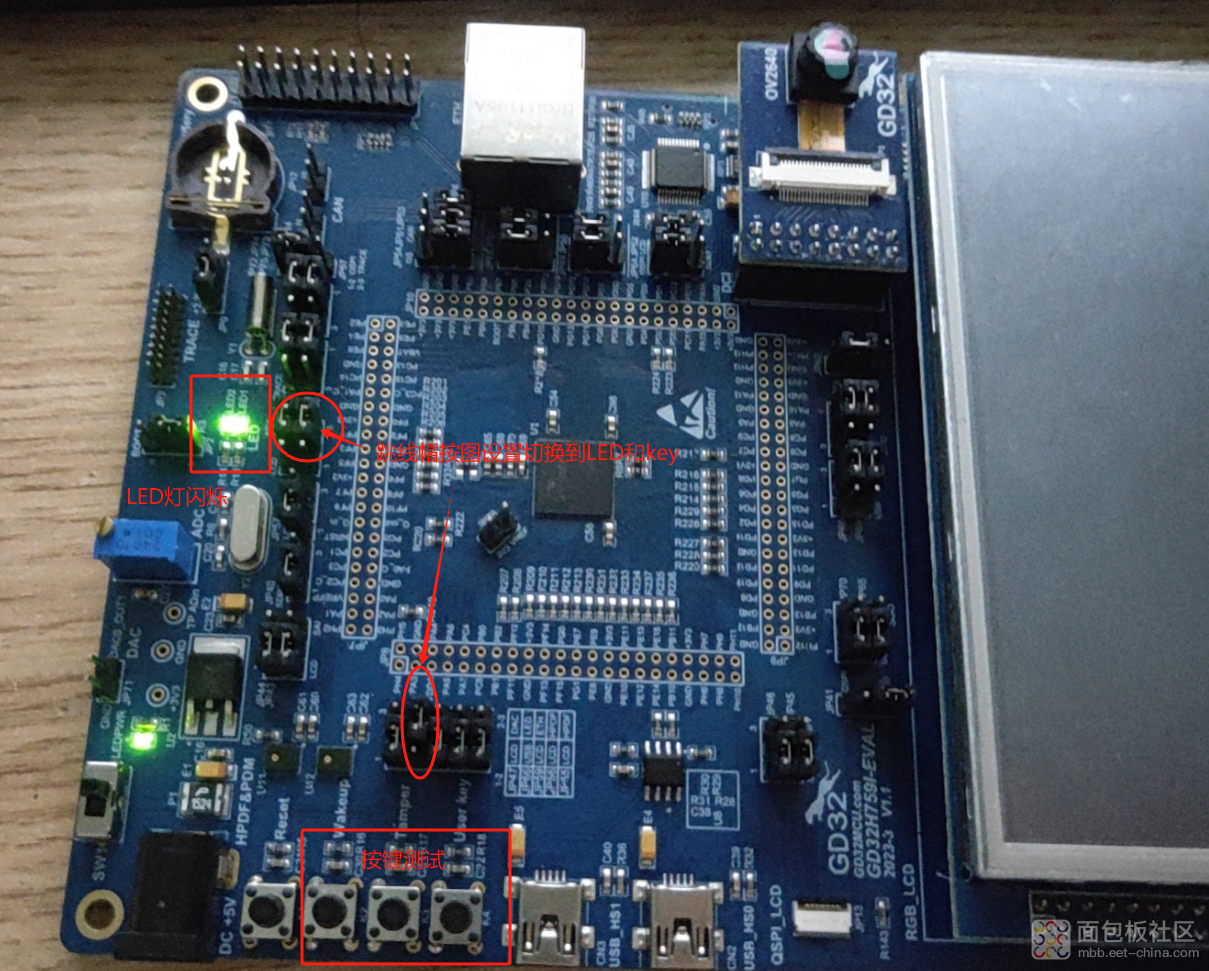
整个工程测试没有问题了,下一步在此模板基础上做一些应用测试了。
下面是代码工程:
 GDH7_Demo.zip
(899.24 KB, 下载次数: 1)
热门活动
全部回复 0
 暂无评论,快来抢沙发吧


 /5
/5 


