HPM5301的ADC高达16位,而RTT又能快速的对其进行驱动,本篇展示如何快速驱动ADC并通过串口展示转换结果显示。
【实验步骤】
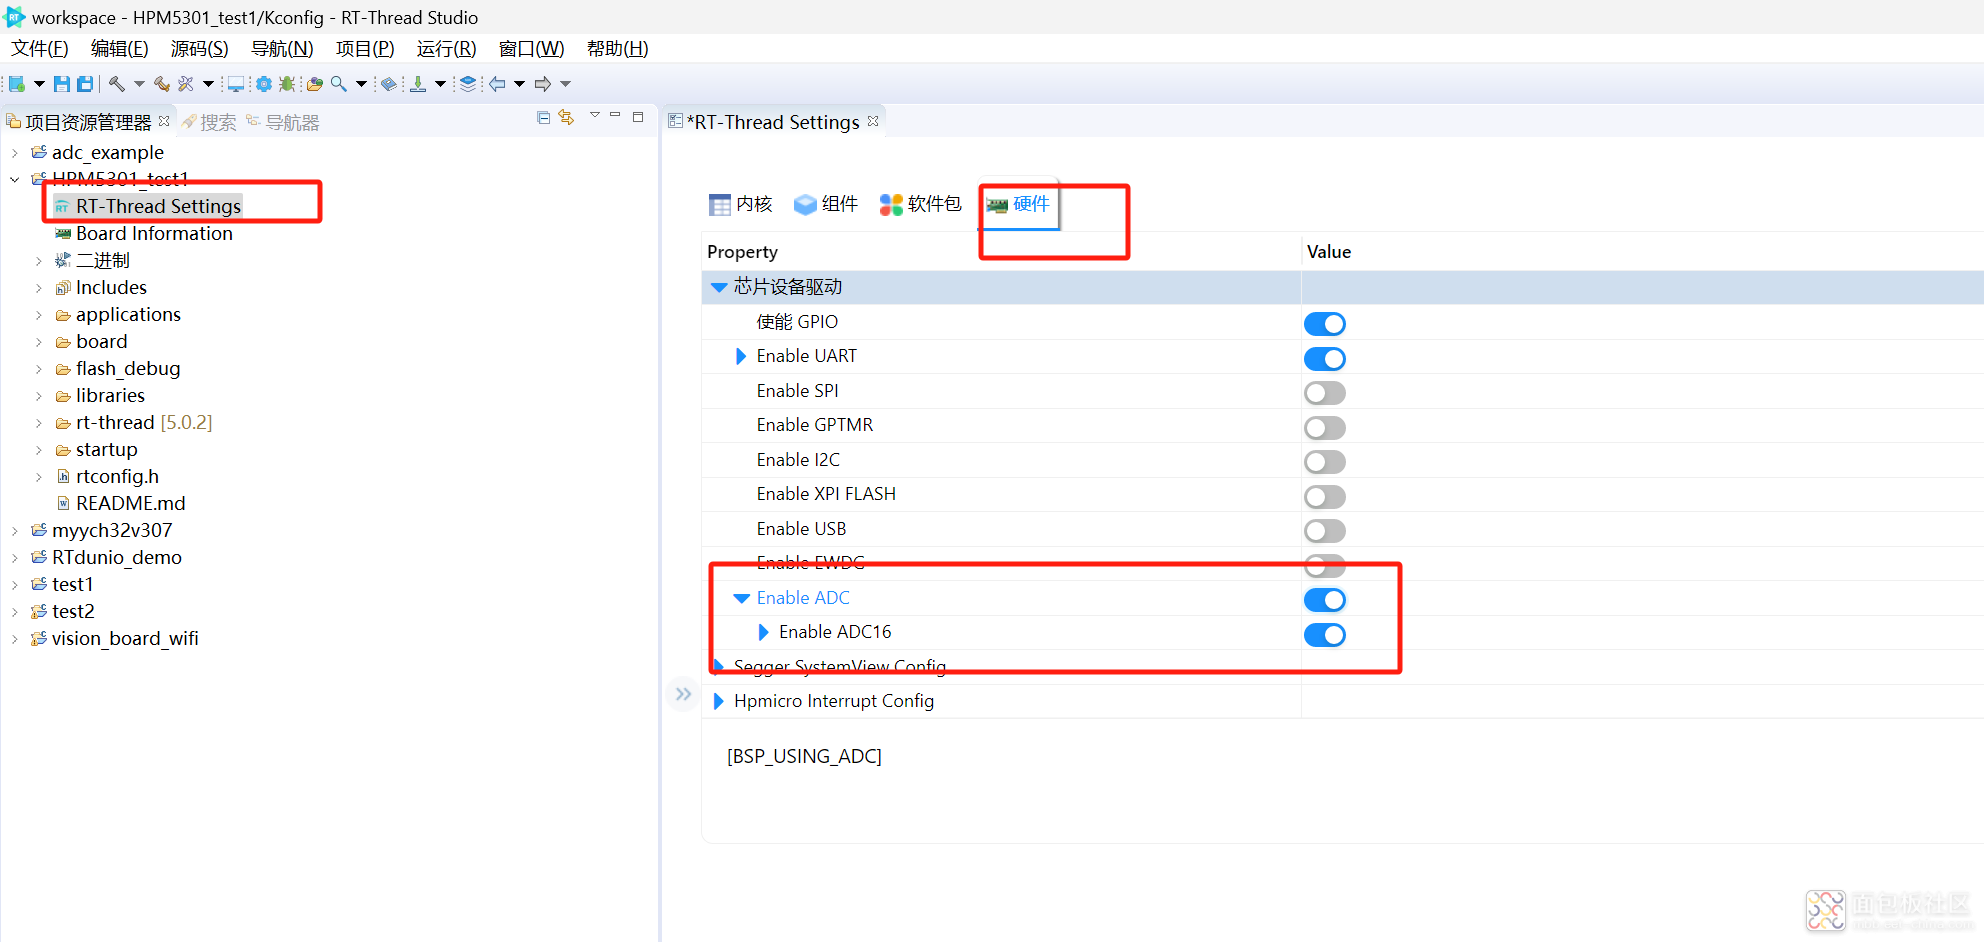
1、在前面的基础之上添加ADC的硬件驱动,首先打开settings进行配置,打开ADC,并使能16位转换,配置如下图所示:

保存退出。
2、添加adc的一些配置的定义
/* ADC配置定义 2024年8月2日 */
#include "hpm_adc16_drv.h"
#define ADC_DEV_NAME "adc0"
#define ADC_DEV_CHANNEL 11
#define REFER_VOLTAGE 330 /*3.3v*/
#define CONVERT_BITS (1 << 16) /*16 bit*/
/* ADC配置定义 结束 */
复制代码void adc_thread_entry(void *arg)
{
rt_uint32_t round = 0;
rt_adc_device_t adc_dev;
rt_uint32_t value, vol;
rt_err_t ret = RT_EOK;
adc_dev = (rt_adc_device_t)rt_device_find(ADC_DEV_NAME);
if (adc_dev == RT_NULL) {
rt_kprintf("adc sample run failed! can't find %s device!\n", ADC_DEV_NAME);
}
/* enable device */
ret = rt_adc_enable(adc_dev, ADC_DEV_CHANNEL);
while (1) {
rt_kprintf("\n-----------------Oneshot read #%4d-----------------\n", ++round);
/* read channel */
value = rt_adc_read(adc_dev, ADC_DEV_CHANNEL);
rt_kprintf("the value is :%d \n", value);
/* conversion */
vol = value * REFER_VOLTAGE / CONVERT_BITS;
rt_kprintf("the voltage is :%d.%02d \n", vol / 100, vol % 100);
rt_thread_mdelay(1000);
}
}
复制代码4、添加命令参数,使得可以通的shell开启任务
void monitor_voltage(void)
{
static bool thread_running = false;
if (!thread_running)
{
static uint32_t adc_thread_arg = 0;
rt_thread_t adc_thread = rt_thread_create("adc_demo", adc_thread_entry, &adc_thread_arg, 1024, 1, 10);
rt_thread_startup(adc_thread);
thread_running = true;
}
}
/* EXPORT to msh command list */
MSH_CMD_EXPORT(monitor_voltage, Monitor Pin volatge);
复制代码【实验现象】
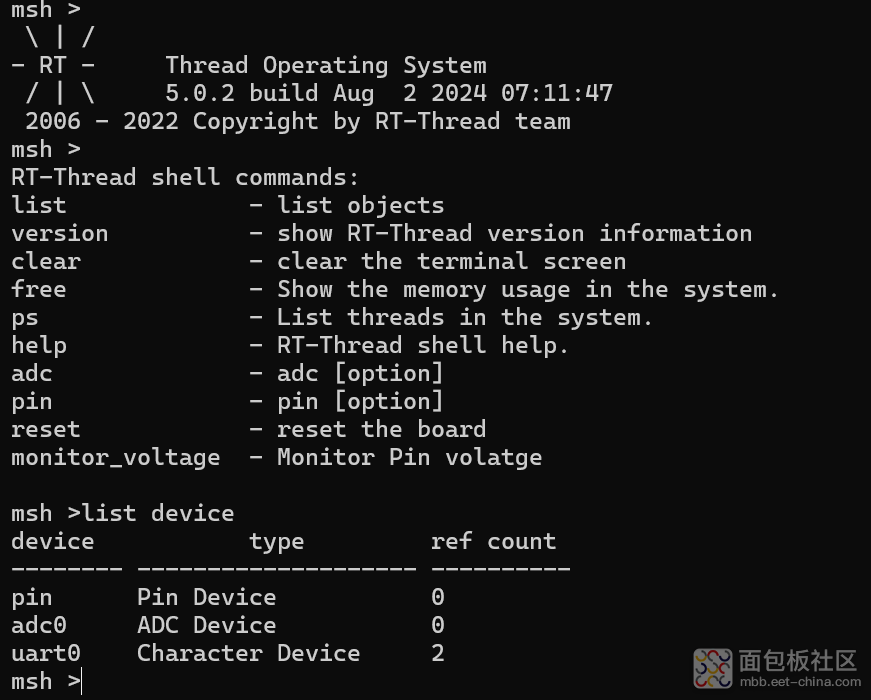
下载到开发板后,打开串口终端:

查看device,可以看到adc0已经注册到了系中,同时也生成了monitor_voltage的命令。
【电压测量】
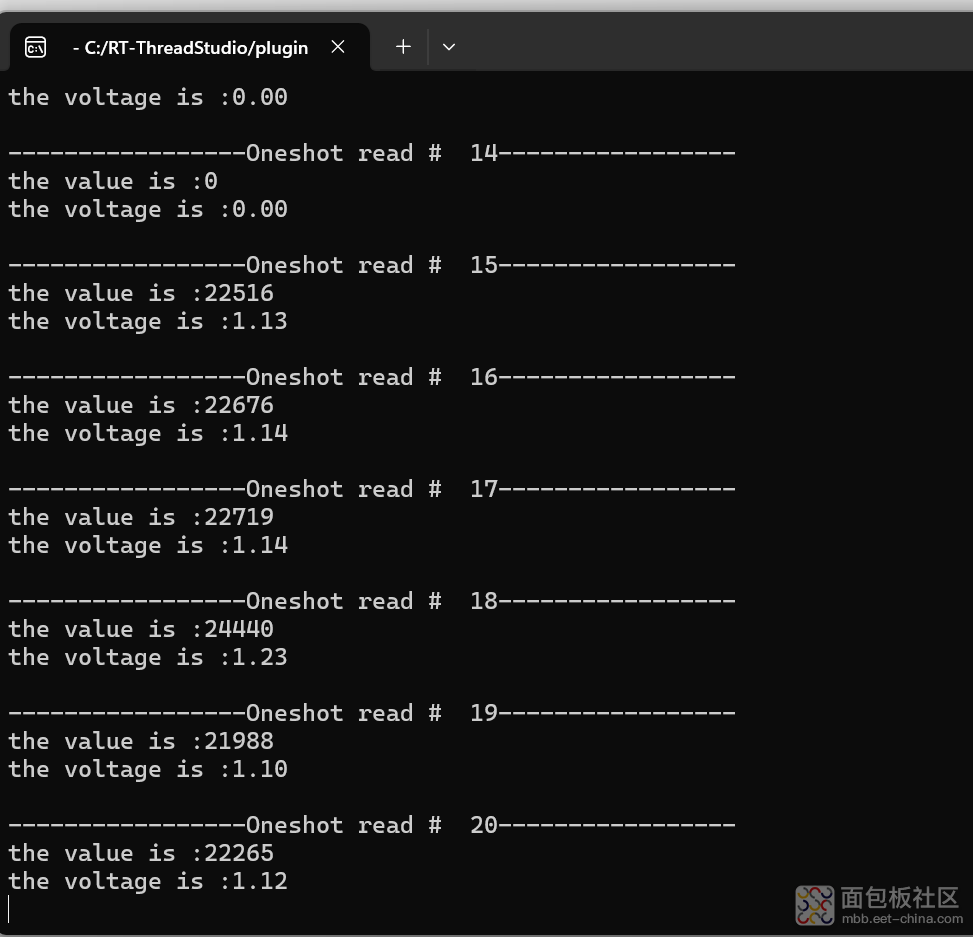
在PB08上接入一个电位器,调节电位器,可以采集到电压器的变化。

【总结】
HPM5301拥有16位的ADC,通过RTT可以快速的驱动,并实现电压的测量。


 /5
/5 


