前面我们进行了开发环境的搭建,这一篇来进行实战,先从LED点灯开始。
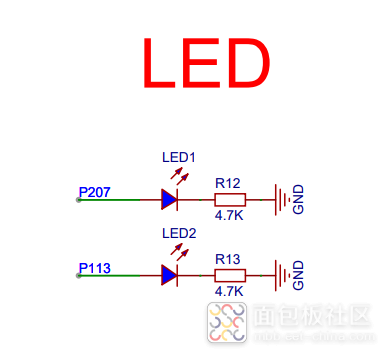
先看原理图,有两个用户LED分别由P207和P113控制,高点亮
我们打开RA配置软件
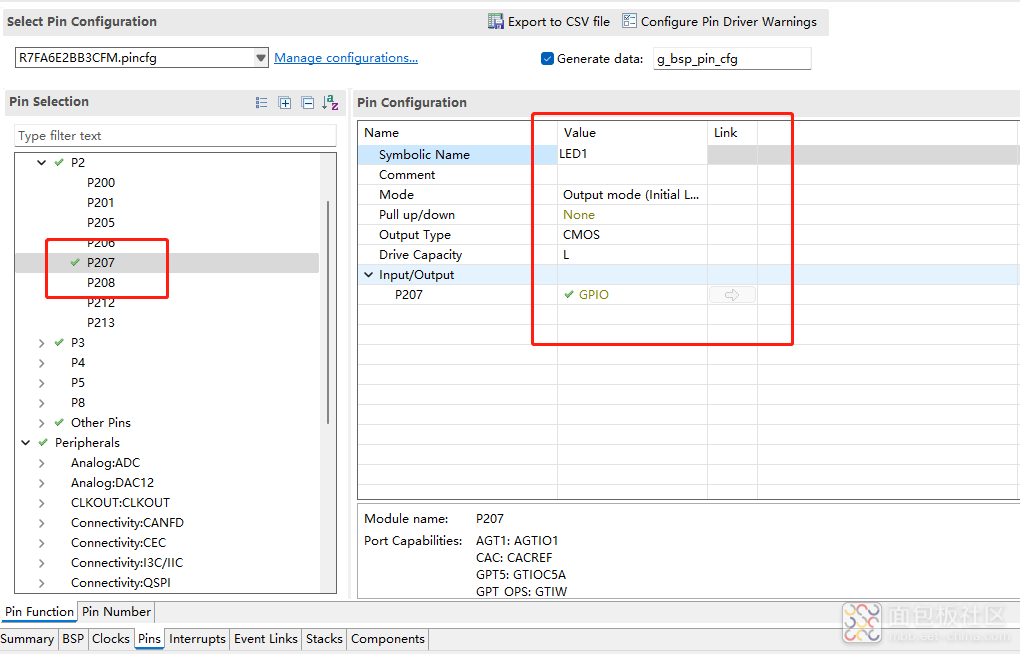
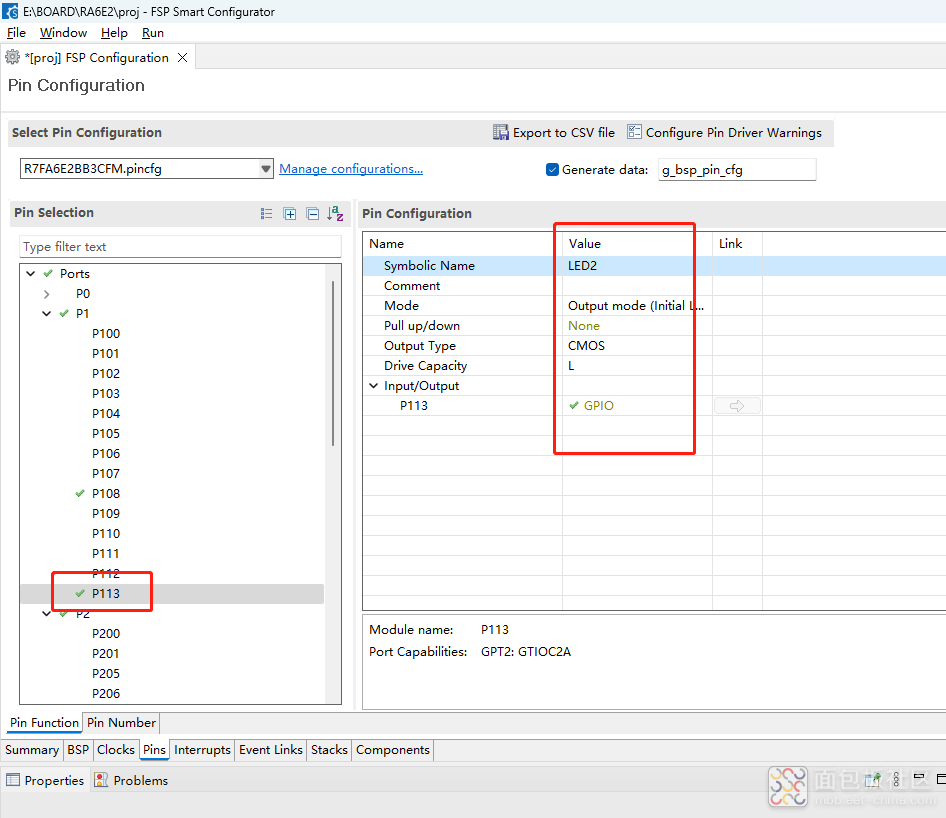
配置完生成工程
可以看代码增加了该引脚的信息
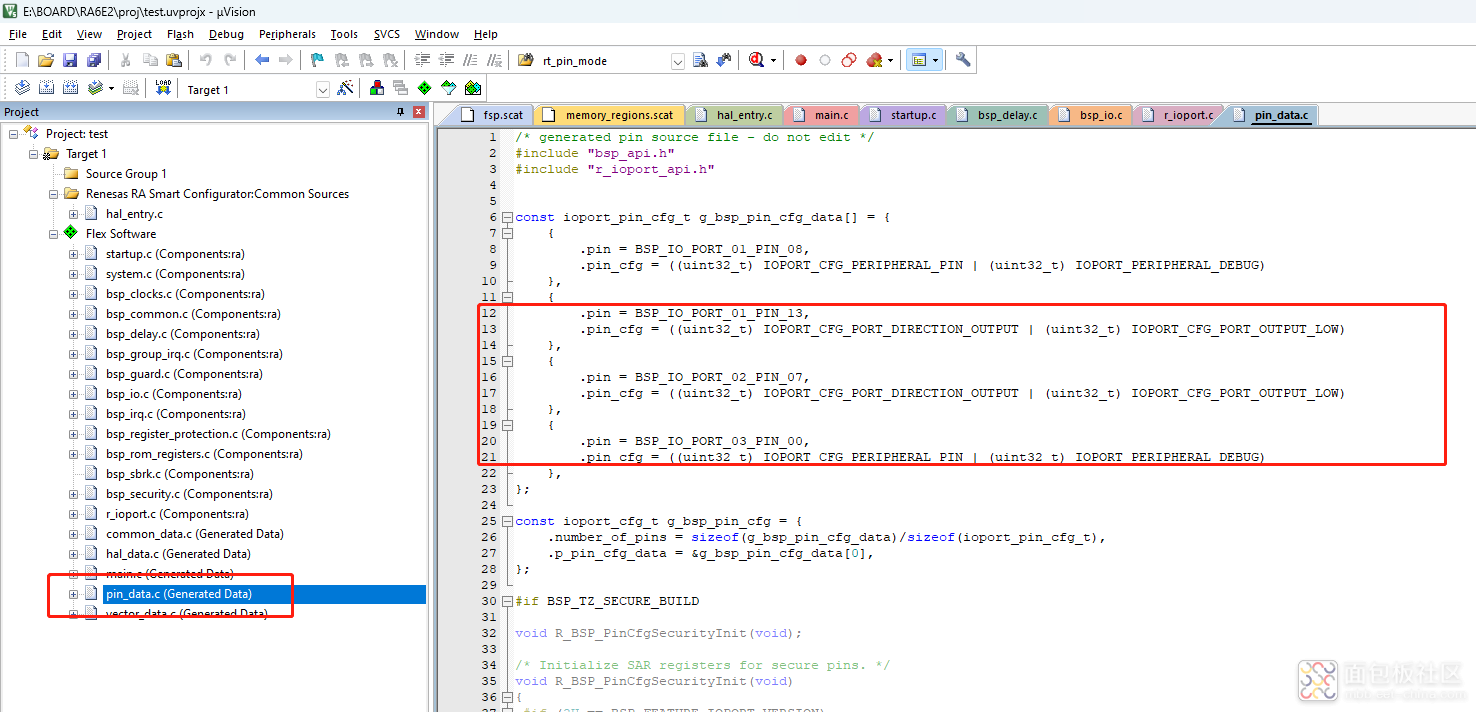
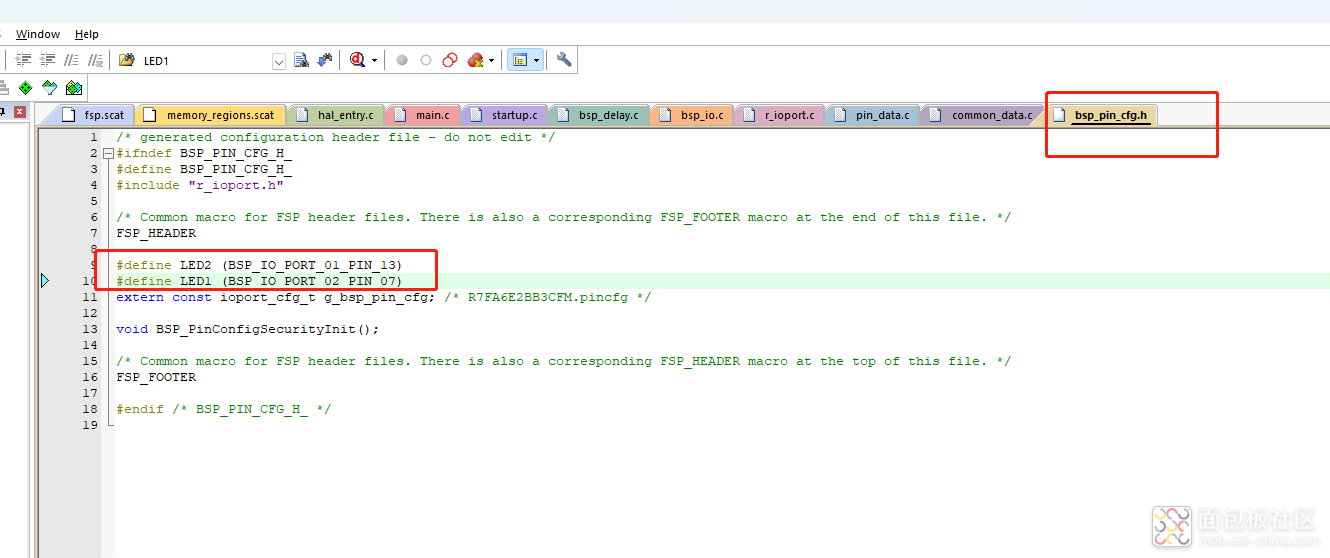
R_BSP_WarmStart->R_IOPORT_Open(&g_ioport_ctrl, g_ioport.p_cfg);会根据该配置初始化引脚
编写如下测试代码
void hal_entry(void)
{
/* TODO: add your own code here */
while(1)
{
R_IOPORT_PinWrite (&g_ioport_ctrl, LED1, BSP_IO_LEVEL_HIGH);
R_IOPORT_PinWrite (&g_ioport_ctrl, LED2, BSP_IO_LEVEL_HIGH);
R_BSP_SoftwareDelay(500,BSP_DELAY_UNITS_MILLISECONDS);
R_IOPORT_PinWrite (&g_ioport_ctrl, LED1, BSP_IO_LEVEL_LOW);
R_IOPORT_PinWrite (&g_ioport_ctrl, LED2, BSP_IO_LEVEL_LOW);
R_BSP_SoftwareDelay(500,BSP_DELAY_UNITS_MILLISECONDS);
}
#if BSP_TZ_SECURE_BUILD
/* Enter non-secure code */
R_BSP_NonSecureEnter();
#endif
}
使用RA配置工具可以快速配置模板工程,进行开发比较高效。


 /1
/1 

