


图 1
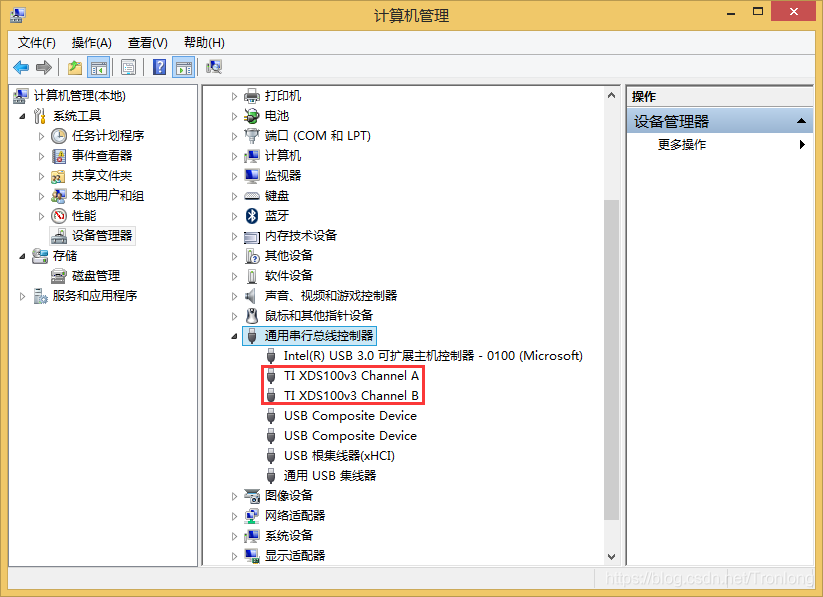
图 2
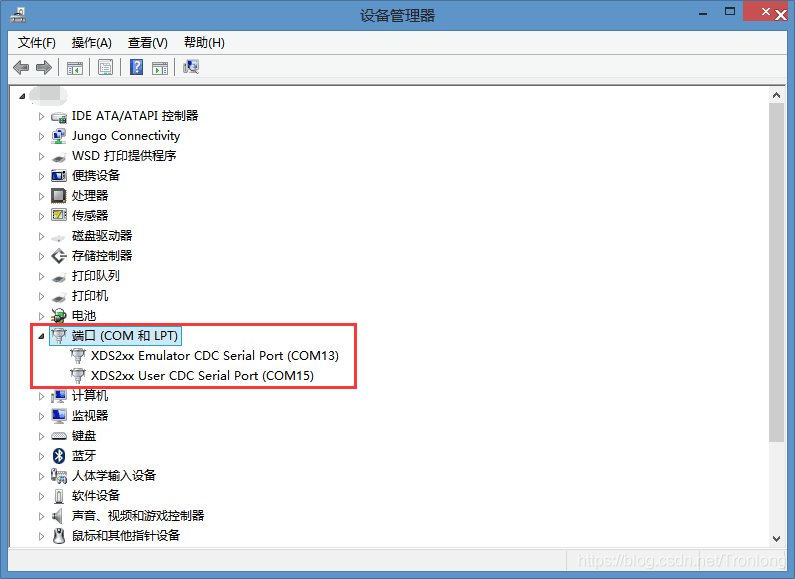
CCS集成开发环境自带XDS100及XDS200系列仿真器驱动。如果仿真器无法正常使用,请检查是否存在驱动冲突,XDS100系列仿真器使用FTDI芯片,请检查是否与已经安装使用FTDI的USB转串口驱动冲突,如使用XDS200仿真器,请检查计算机中是否正确安装USB转串口驱动或者尝试重新安装计算机主板芯片组驱动。
设置工程配置文件信息
注:如果使用XDS220仿真器,其通过USB的配置方式与XDS200配置相同,但XDS220仿真器有网络仿真功能,详细配置方式,请参考1.2.2章节:网络仿真配置。
- 单个仿真器配置
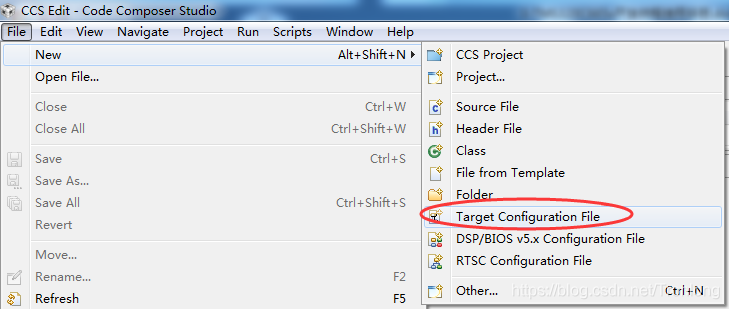
图 3
在弹出的界面中输入工程配置文件名字,然后点击Finish。如下图所示:
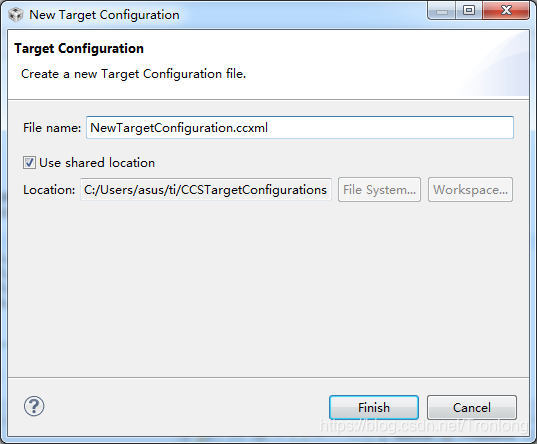
图 4
在弹出的对话框的Connection下拉框中选择对应的仿真器类型(如使用TL-XDS200仿真器请选择"Texas Instruments XDS2xx USB Emulator_0"),在"Board or Device"下拉框中选择对应的CPU型号,TMS320C6657、TMS320C6655或TM320C6654,然后点击右边的Save,保存设置。如下图所示:
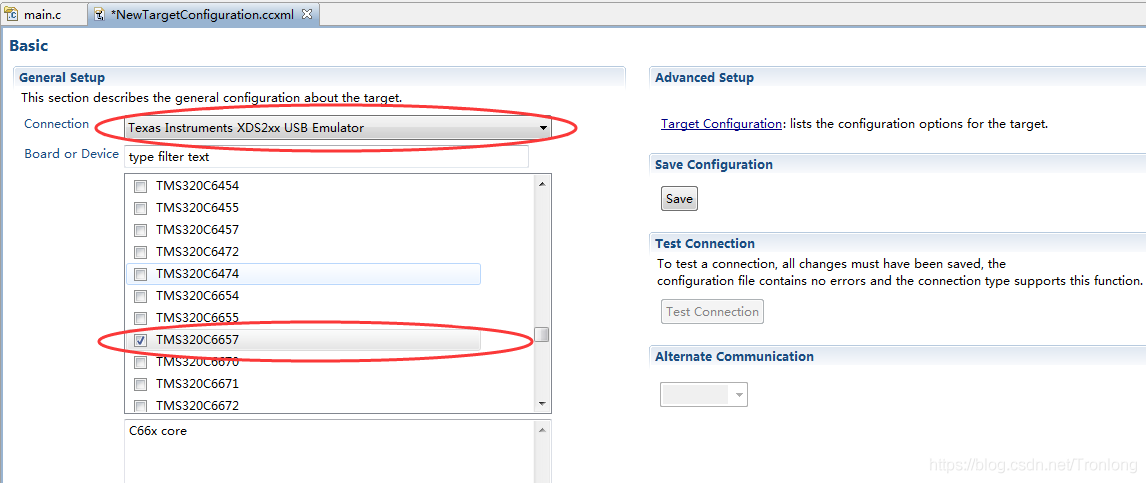
图 5
仿真器连接开发板,拨码开关拨到NO BOOT模式,这个档位是DEBUG调试模式。开发板上电后,点击"Test Connection",测试仿真器是否连接成功。如下图所示:

图 6
- 网络仿真配置
将网线一端连接路由器,另一端接入XDS220仿真器的网络接口。此外,USB接口线需要连接电脑及仿真器,确保仿真器驱动安装正常。
进入CCS安装目录,进入"ti\ccsv5\ccs_base\emulation\specdig"路径,具体以个人CCS安装路径为准,可以看到xds2xx文件夹,如图:
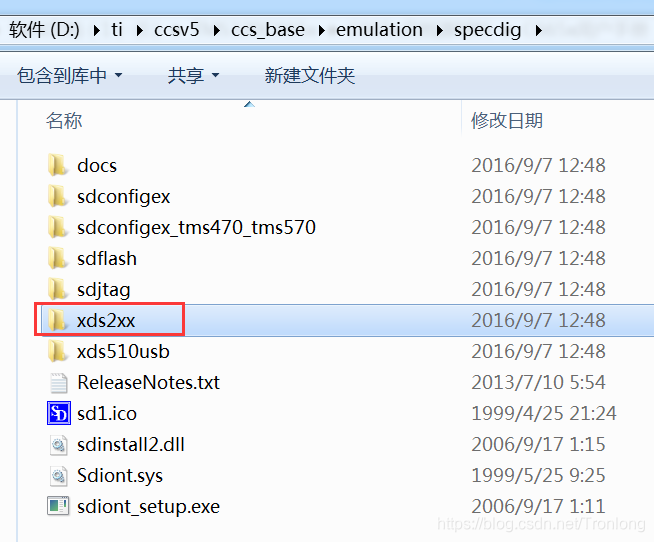
图 7
选中xds2xx文件夹,按住Shift键,单击右键,在弹出的窗口选中“在此处打开命令窗口”。
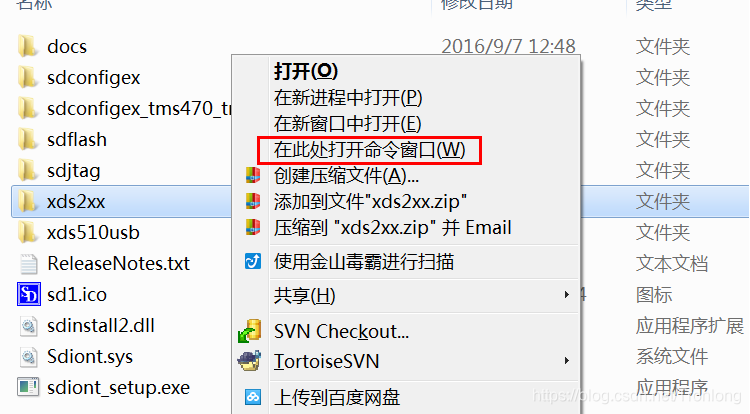
图 8
此时会弹出命令窗口,在命令窗口输入如下指令,然后按Enter键。
DOS# xds2xx_conf set xds2xxu 0 ipConfig=dhcp

图 9
通过命令行查看仿真器获得的IP,输入如下指令,按Enter键,可看到cmd窗口打印出仿真器获取到的动态IP:192.168.1.61。
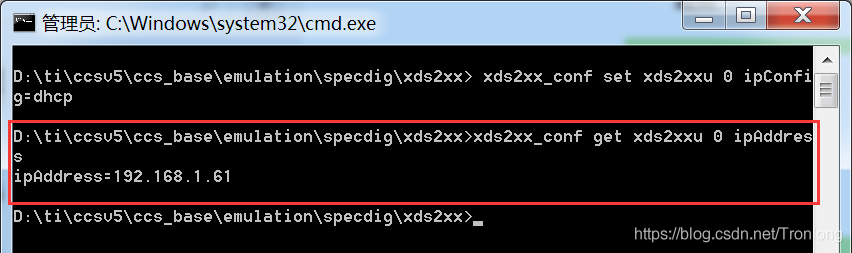
图 10
打开CCS,点击菜单"File->New->Target Configuration File",如下图所示:

图 11
在弹出的界面中输入工程配置文件名字,然后点击Finish。如下图所示:
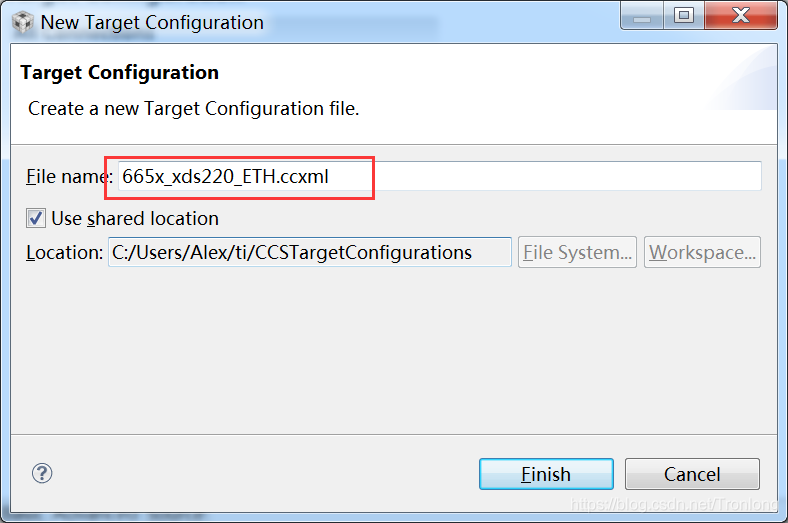
图 12
在弹出的对话框的"Connection"下拉框中选择对应的仿真器类型,在"Board or Device"下拉框中选择对应的CPU型号,TMS320C6657、TMS320C6655或TM320C6654。如下图所示:

图 13
选中C66xx_0,在右边的窗口,点击Browser按键,加载gel文件,如下两图。
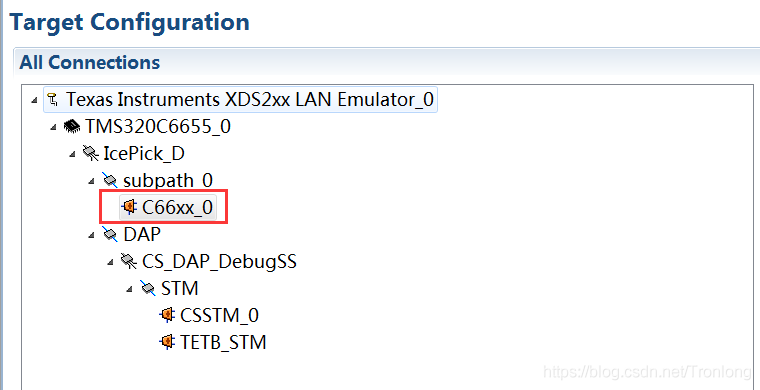
图 14
加载gel文件,gel文件在光盘的Image目录下,使用时需要复制到非中文路径下,如图。
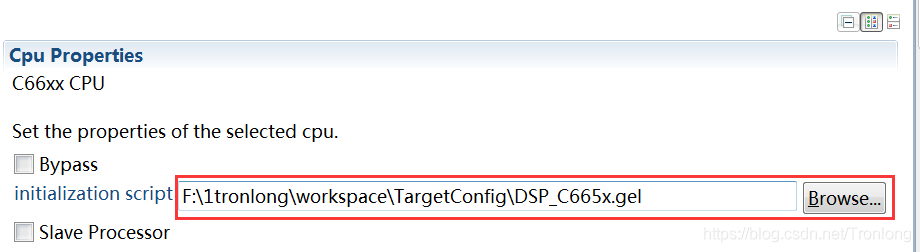
图 15
选中仿真器配置,在IP栏输入仿真器分配到的IP地址:192.168.1.61(具体IP以自己服务器分配为准)
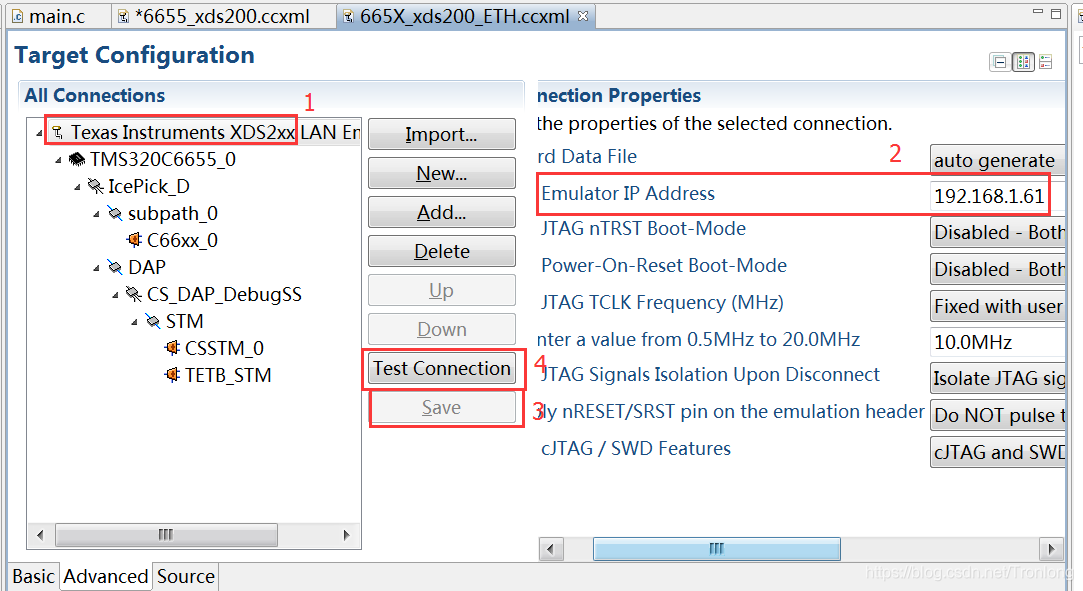
图 16
点击Test Connection,看到弹出窗口,测试成功,说明配置成功。
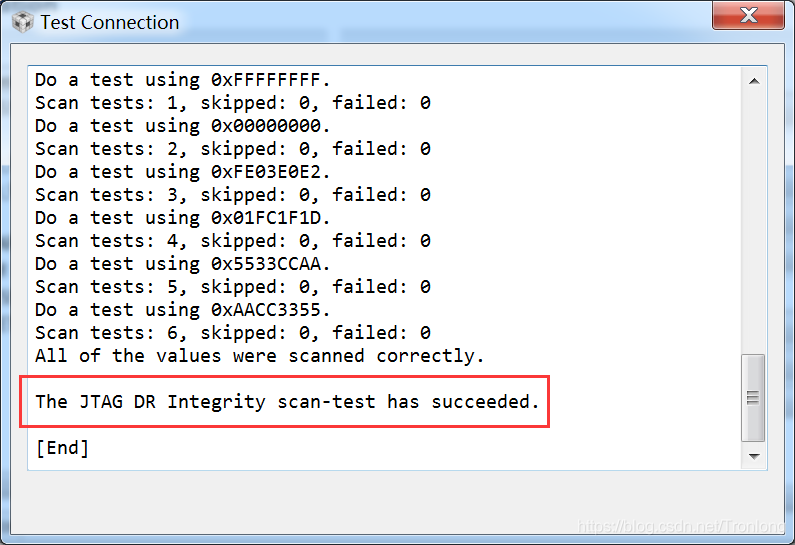
图 17
- 多个仿真器配置
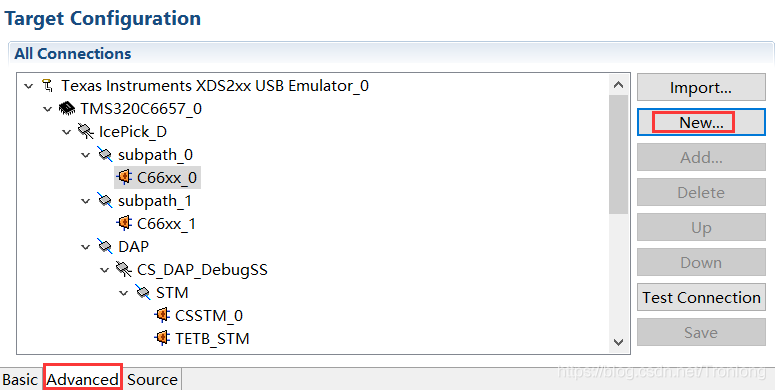
图 18
选择对应的仿真器连接,如图所示:
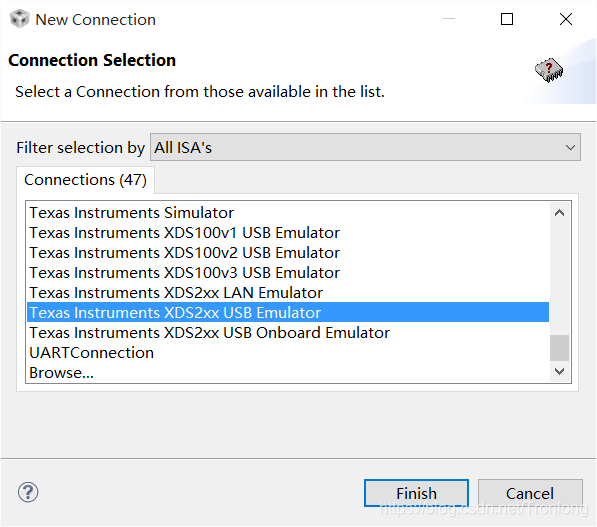
图 19
点击新建的仿真器连接,然后点击"Add…",如图所示:
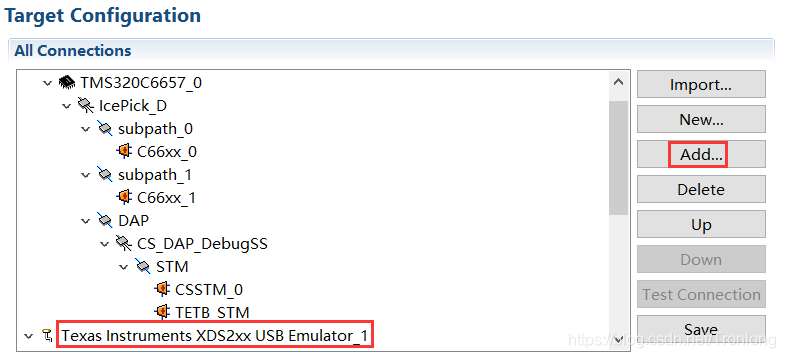
图 20
点击Devices窗口,选择相应的芯片,点击Finish,如图所示:
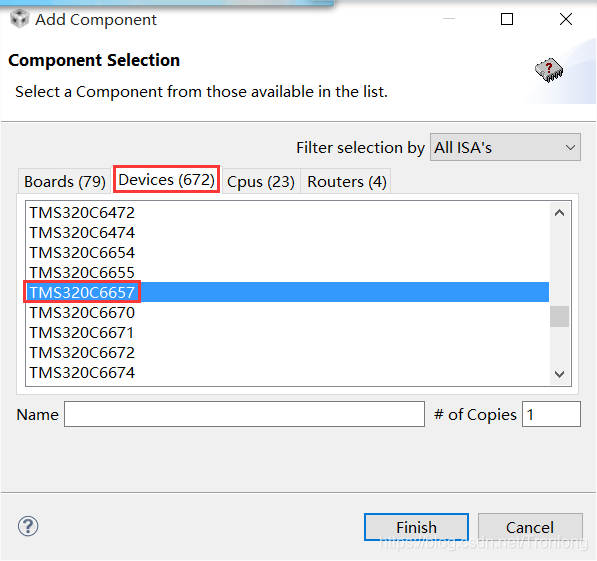
图 21
点击新建的仿真器连接,修改相应的端口值,并保存,如图所示:
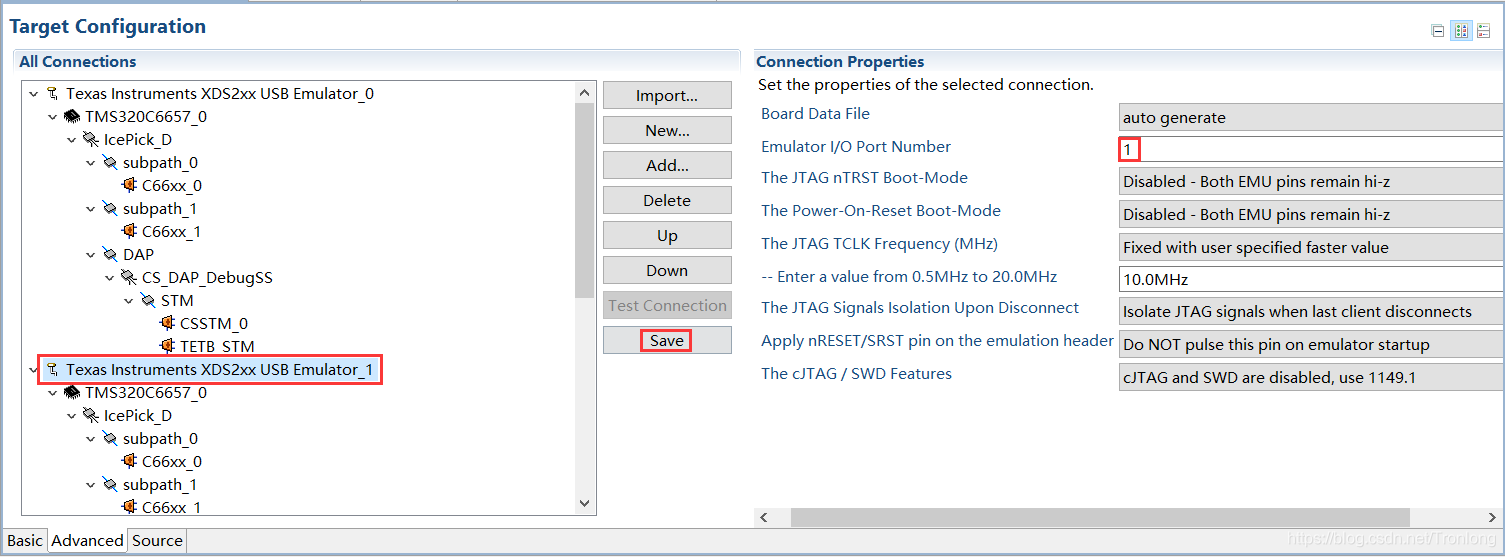
图 22
可按上述操作继续添加多个仿真器配置。
加载GEL文件
GEL文件主要用于在仿真调试的过程中对CPU进行初始化,如PLL、DDR等,还可以执行一些调试操作。例程中使用"Tronlong_C665x.gel"文件进行初始化,配置如下CPU为1.0GHz,DDR3等效频率及对CPU风扇进行控制。
点击CCS菜单"Run->Debug",弹出以下类似界面,可以看到C66xx_0核,如果使用的是TMS320C6657,还将看到C66xx_1核。C66xx_0和C66xx_1核都是可以单独加载GEL文件和程序镜像的。
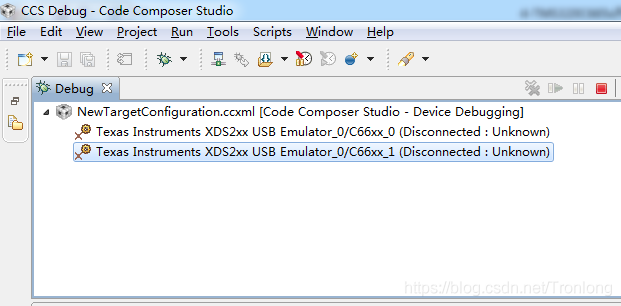
图 23
右击对应的DSP核,在弹出的界面中选择"Open GEL Files View"选项,右下角会弹出"GEL Files(TMS320C66xx)"对话框。
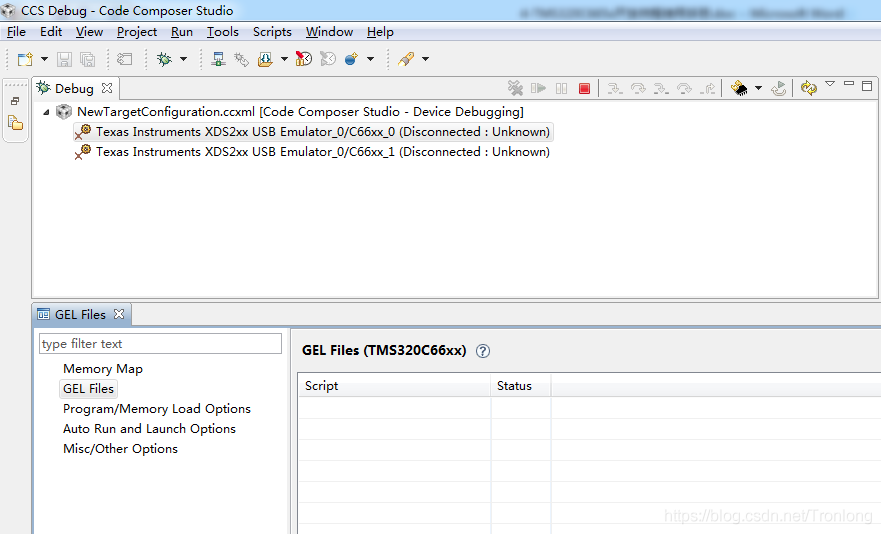
图 24
在对话框内点击右键,在弹出的界面中选择"Load GEL"。选择光盘资料Images目录下的GEL文件"Tronlong_C665x.gel",再点击“打开”,接着右下角的"GEL Files(TMS320C66xx)"对话框会出现Success提示语句,如下图:
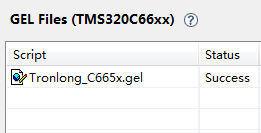
图 25
CCS连接开发板CPU
右击对应的DSP核,选择"Connect Target"选项,会显示Suspended状态。这说明CCS已经和开发板CPU正常连接起来了,如下图所示:
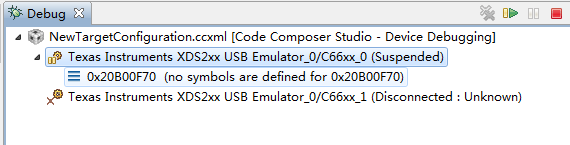
图 26
备注:如果此处提示"No source****"的信息,不是错误信息,可以将其忽视。
连接后将自动初始化开发板,如下图所示:
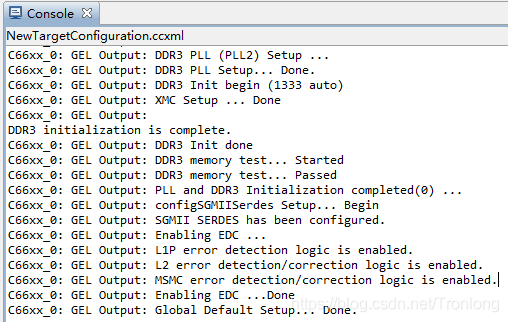
图 27
可在Scripts菜单下对风扇进行开关控制,如图所示。
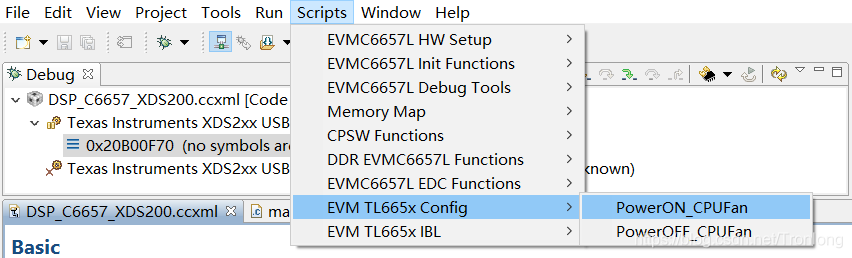
图 28
加载程序镜像文件点击"Run->Load->Load Program",选择程序镜像文件(光盘资料Images目录下有用于演示的"MyC665x.out"文件,现象为底板LED灯被点亮),并点击OK。接着点击绿色三角启动按键
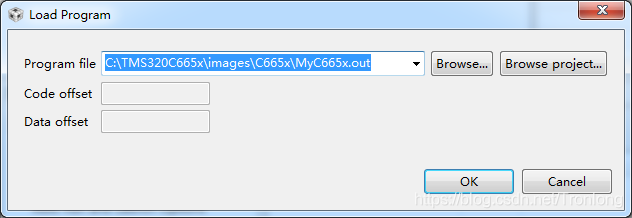
图 29

图 30
烧写程序到FLASH由于开发板的EEPROM烧写了IBL(Intermediate BootLoader),也就是二级引导程序,支持直接启动ELF格式的二进制.out文件,因此可将生成的.out文件烧写到NAND FLASH或NOR FLASH并脱机运行。依赖IBL的支持,可直接烧写CCS中编译出的.out文件,而不需要经过任何转换。需要注意的是,.out文件中包含有很多调试信息,所以文件较大,具体烧写步骤如下。
- 加载烧写工具程序
如需烧写NOR FLASH,将光盘"Demo\Flash Writer"目录下的NorFlashWriter.out、nor_writer_input.txt文件和需要烧写的.out程序拷贝到同一个非中文路径下,并修改需要烧写的.out程序文件名为app.bin。
打开CCS集成开发环境,加载GEL文件并连接CPU,然后加载烧写工具程序文件NandFlashWriter.out或NorFlashWriter.out,点击OK,如下图所示:
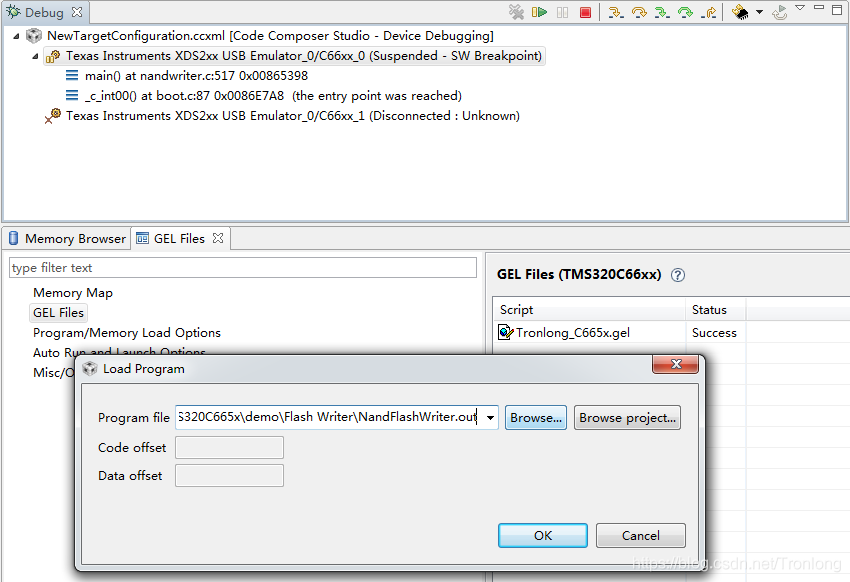
图 31
- 加载程序镜像文件

图 32
选择程序文件,文件类型选择"Raw Data Format(.bin)",如下图所示:
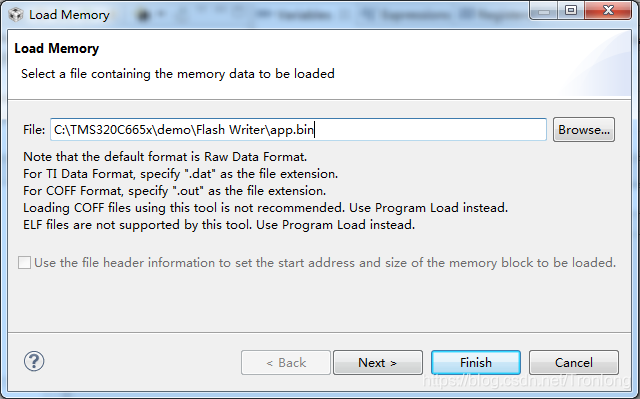
图 33
点击Next,在弹出的界面中输入起始地址:0x80000000,数据类型选择:32bits,然后点击Finish,等待加载完成,如下图所示:
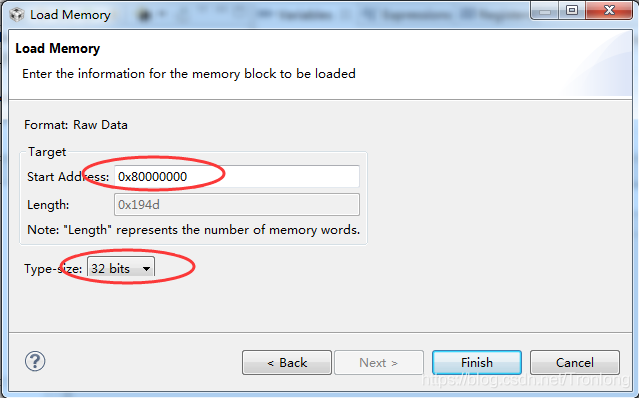
图 34
点击运行按钮
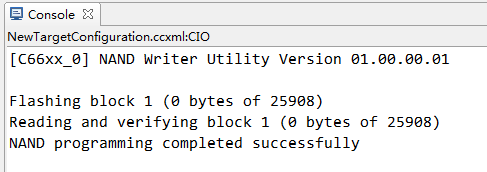
图 35
拔掉仿真器,开发板打到对应的启动档位,程序即会正常运行。
烧写多核多镜像文件这里的GEL文件使用DSP_C665x.gel文件在"Demo\TargetConfig"文件夹下。请提前安装好python 2.x以上版本,安装程序在文件夹"Demo\HostApp"下。
以下步骤实现将多核多镜像文件烧写到NAND FLASH,具体烧写步骤如下(部分类似烧写步骤参考上述小节,此处描述关键步骤)。
- 生成单个可烧写文件
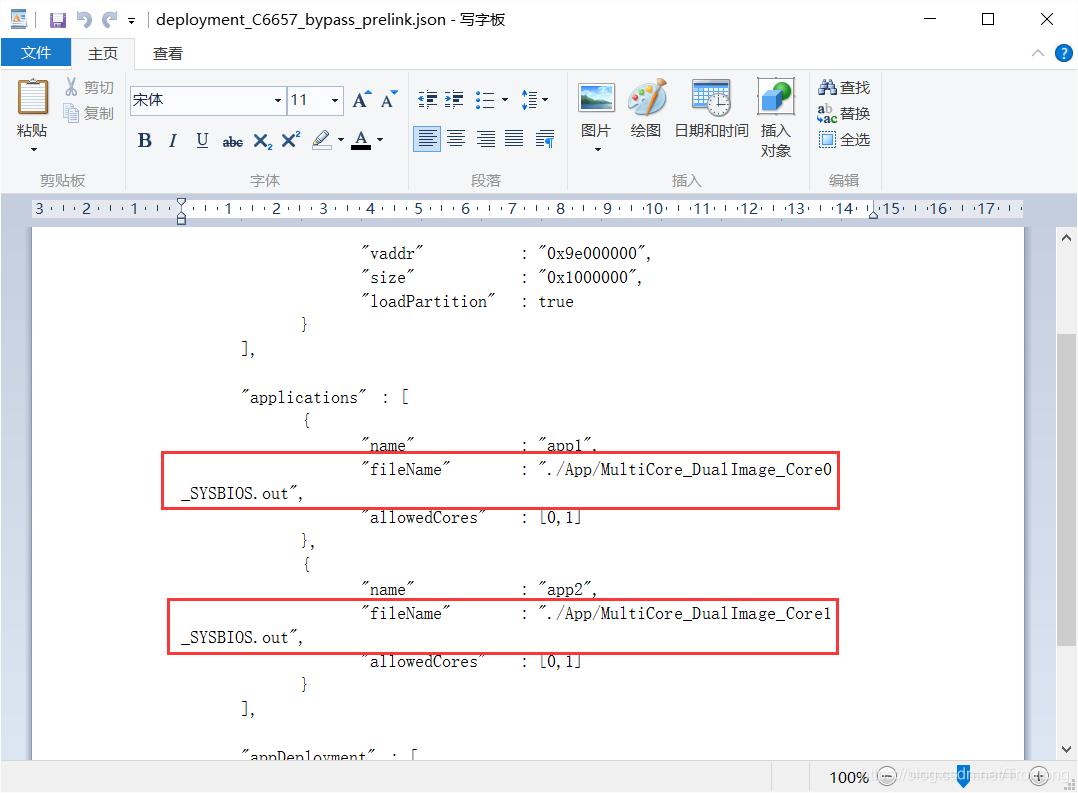
图 36
返回上一级目录,以编辑方式打开Build.bat文件,修改C6000编译工具的路径和python的安装路径,保存关闭。再双击Build.bat文件,即可生成单个可烧写文件C6657-le.bin,保存在同级新生成的images文件夹下。
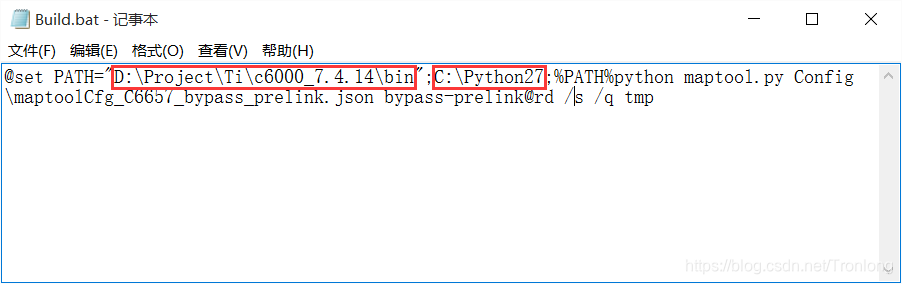
图 37
- 修改GEL文件

图 38
连接开发板CPU,加载i2cparam_0x50_c6657_le_0x500.out文件,保存在文件夹"Demo\HostApp\MultiCoreBoot\IBL Config"下。
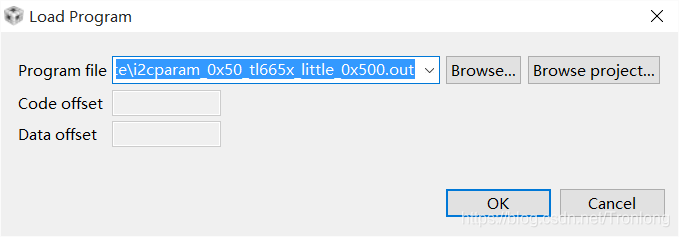
图 39
先点击运行,然后点击"Scripts->EVM TL665x IBL->SetConfig_TL665x_main"。
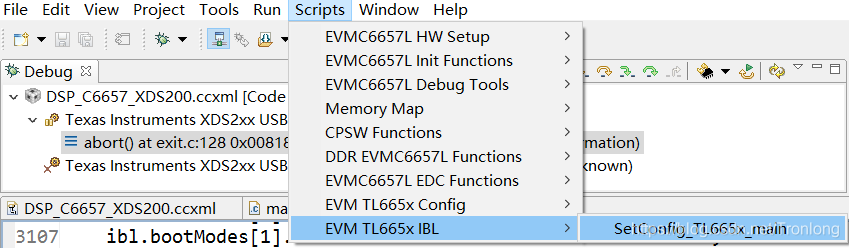
图 40
再在Console窗口下,按入回车键,显示修改成功,如下图所示:
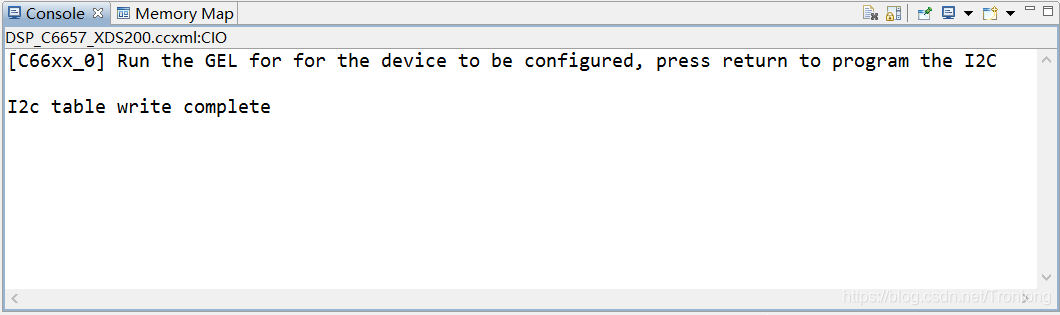
图 41
还可以通过IBL配置控制启动模式跟CPU风扇动作。修改DSP_C665x.gel文件中ibl.EvmConfig.Fan的值,TRUE为开启,FALSE为关闭。
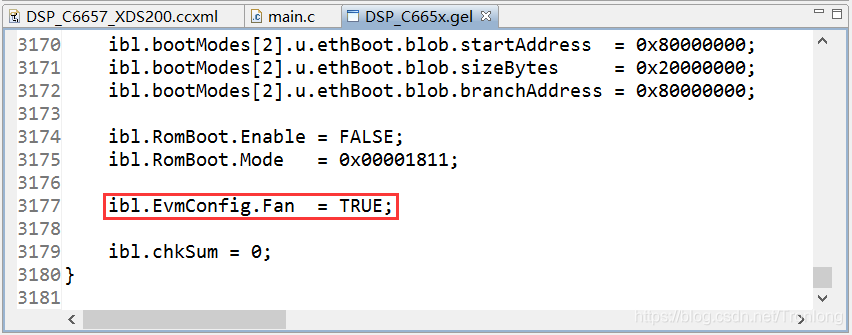
图 42
通过IBL配置从而支持全部的Rom启动模式,光盘里参考文档中有《DSP C665x启动模式汇总》。当ibl.RomBoot.Enable=TRUE;IBL会根据ibl.RomBoot.Mode设置的值修改启动配置寄存器然后跳转到Rom Bootloader执行剩余启动流程(注意,此时不会再执行IBL启动,所以需要IBL启动的话该配置项目应当设置为FALSE)。如图中设置ibl.RomBoot.Mode=0x00001811(仅低16位有效):
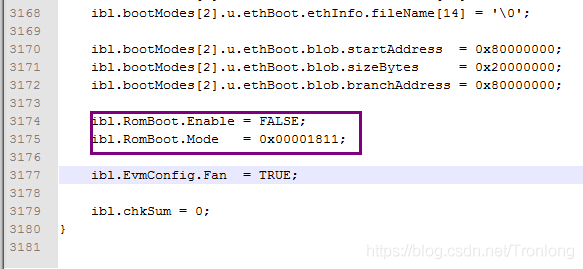
图 43
低16位0x1811=0001100000010001b,此时启动开发板从用户的角度相当于从RBL UART0启动,这时可以看到串口0打印出"cccc.....",在此期间通过串口0向开发板传输启动表(Boot Table)格式可执行程序即可完成启动。

图 44
- 加载多核镜像文件
点击运行按钮
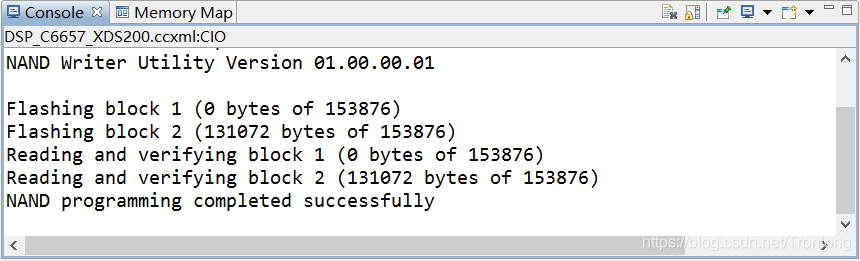
图 45
拔掉仿真器,开发板打到对应的启动档位,程序即会正常运行。
软件仿真使用CCS进行程序模拟运行,用户不需要连接硬件以及仿真器就可以对程序进行验证,适合于偏重算法的程序。
- 设置工程配置文件信息
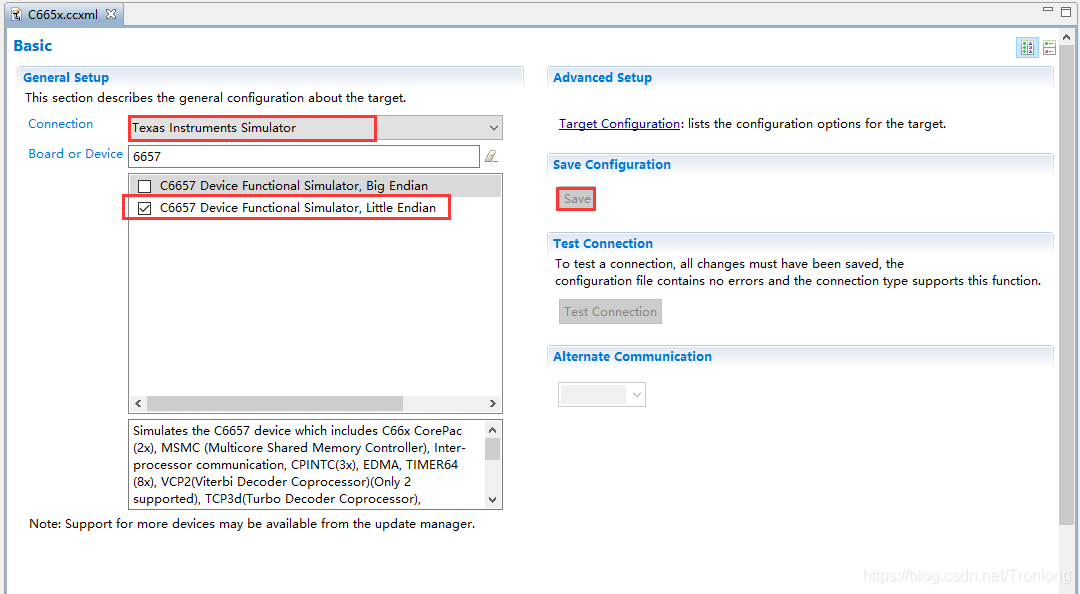
图 46
- 软件仿真


 /5
/5 


